Hi, I'm Mike from 1A Auto. We've been selling auto parts for over 30 years.
What's up, guys? I'm Andy from 1A Auto. In this video, I'm going to be doing some rear brakes on this 2004 Subaru WRX. If you need these parts or other parts for your vehicle, click the link in the description and head over to 1aauto.com
I'm going to remove this wheel. Normally these lug nuts would be—a 19mm socket you would use. This has aftermarket lug nuts, so we're just going to use the tool to remove it, and a breaker bar. I'm just going to crack these free before we raise the vehicle.
Now we're going to raise and support the vehicle. We're using a two post lift. If you're doing this at your house, you can use a jack and jack stands.
I'm going to remove the lug nuts. Now I'm going to remove the wheel. Alright. I'm going to use a 14mm socket and remove the caliper bolts. This one, and also this one, up here—loosen those up and you can take them out by hand. Now, I'm going to grab the caliper. Just rock it back and forth a little bit, and I can use this caliper hanger—we actually sell these at 1aauto.com. Slide it through the caliper and then secure it on the spring. Just make sure there's no tension on the brake hose. I'm going to remove the brake pads. Slide the front ones out; the back ones off. These are stuck in there a little bit. Just take a screwdriver. These are really in there.
Now we're going to take the two caliper bracket bolts off. I'm going to use a 14mm socket and a ratchet. Then I'll loosen this one up as well, before I take the other one off. Take that one out; take that bottom bolt out, and I can grab the bracket. Just slide it off.
Now I'm going to grab the rotor. At this point, you want to make sure your parking brake is down. You want it not engaged. Otherwise, you won't be able to get this off, because the parking brake assembly is underneath this hat. Slide it off. If you had trouble with this rusted on, you can take a hammer and hammer in these areas. This one comes off nice and smooth.
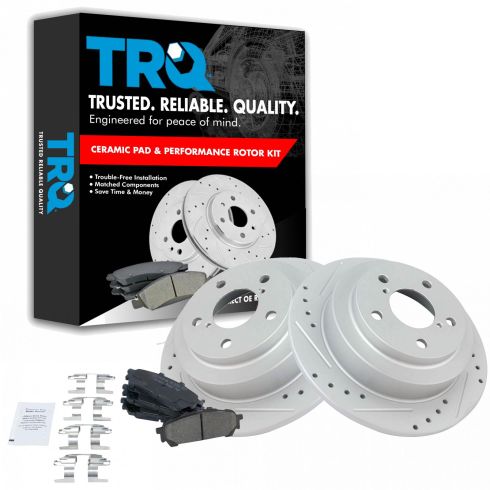
Here're the old brakes. Here're the new brakes from 1aauto.com. If you look at the pads, the pads are the same shape; they have the same ears, same backing. On the front, pad material is the same shapes. If you look at the rotors, the rotors are the same height; they're machined the same way, and the same inside drum for the parking brake. It's the same side—same surface. Get yours at 1aauto.com. You'll be ready to rock and roll.
I'm going to take and clean up the brake caliper bracket. Just take a straight blade screwdriver, and you’re going to take these pad clips off; slide those off. I'm going to clean this surface, right here. Just use a wire brush. Just go back and forth; clean some of the rust up. The back side of the pad clip—if you were using it, just clean this up a little bit. Reinstall this. Once you get that back on, you can take the brush and clean the top side. We're going to do the same with the other side. That looks pretty good.
I'm going to remove these slide pins, and we're going to use a little brake parts cleaner. Wipe these off; clean that up. Same in the hole. Spray a little bit in there; take the rag and just clean this up a little bit. I'll do the same with the other side. I'm going to take a little brake caliper grease and grease up these slide pins and reinstall them. Make sure the rubber grommet goes all the way around. We'll do the same with this one.
If your parking brake shoes are in good shape, you can reuse them. These are really thin, so we're going to actually replace them. Otherwise, you could reuse them. Just make sure the adjustment is right when you go to put the new rotors on.
Alright. Before I take this all apart, I'm just going to use some brake parts cleaner. Make sure you stay back a little bit, because there's going to be some dust—or you can wear a mask. Just clean this off a little bit. We'll let that dry a little bit.
Alright. Now I'm going to take these two springs off. Keep in mind which spring comes off first. This back spring on this side is the one that comes off first. Just use some locking needle nose pliers. Just force it off this way and then slide it out—just like that. If you're going to reuse the hardware, set it aside the same way you took it off. I'll take this one off. Slide that out—just like that. You don't want to lose this little stopper. This just stops the shoes from coming forward. So, we'll take that off.
Next, we're going to take this retainer off. You're going to need a special tool—like this—that fits over the retainer. There's really not any easier way to do it. You could try using a socket, but in my experience, you need this tool. What you're going to do is—there's a little nail, they call it—that goes through the center of it. You push down on the retainer and you twist it. And on the back side, I'm just holding the nail with my fingers, and then I can pull that off. That comes off and the spring comes off. The spring's actually rusted a little bit. Before I take this one off, I can actually take this shoe; bend it foreword, and there's an adjuster down below. You're going to want to keep in mind which way the adjuster comes off. The screw side was towards the back of the vehicle, on this side. On the other side, it might be different. So, just keep in mind which way that came off. Then there's a spring, right here. Just remove the shoe from the spring—just like that, and remove the spring.
Now, this hardware is very rusty and it's actually a gap, right there, which isn't good. At this time, this hardware should be replaced. I'll take this retainer off with the same tool. Just push down and then you twist it. Take that off. This shoe is what's connected to the parking brake assembly. This cable goes all the way up into the car and attaches to the handle, and when you pull the handle, it moves this lever and pushes out on these shoes. You need to remove this clip that holds these shoes on.
Alright. There's not really any easy way to take these clips off. Just take a small screwdriver; try to get it in between here. Sometimes you can pry back here; just try to spread it apart. It's like a little horseshoe. Try not to stab yourself while you're doing this. There we go. Just pry that off, and there was a little spacer washer that went on there. Set that aside. I'm going to take these. They call them nails. Just slide these out—just like that. Take this side out as well. Reach behind and grab it.
All these contact areas—I'm just going to take a wire brush and just clean them up a little bit. This is pretty rusty. Take a little brake parts cleaner and clean that area up.
Alright. Before I put this together, I'm going to take a little brake caliper grease and put it on the contact points. I have new hardware for this. I'm just going to install the new brake nails—there and there. We have two shoes that are going to go on here. This one is going to go on the back. This one connects to this lever that connects to the parking brake cables. That one is going to go there, and this one is going to go on the front. Slide this into position, here. I'll just flip it over so it's easier to work on. I have this spacer washer that's going to go there. This new horseshoe clip is going to slide over here. Sometimes these are hard to get on. You can twist it back and forth to try to get it on. Try to use some needle nose pliers. Sometimes you can tap it with a little hammer. Try to pry it on with a screwdriver. Get close to the edge of the brake shoe. There we go. Get that on. That's the hard part.
Take some locking pliers. We're just going to crush the front part to lock it in place; lock it in a little better. Oops. That looks pretty good. Alright. Now we're going to take this shoe; get this in position. Take that nail; slide that through. It's going to go through this hole, here. I'm going to take a new spring and a new retainer, and going to get the tool set up. The spring goes on here. Slide that over the nail and twist it. Make sure it's locked in place—just like that. Alright. Before I go any further, I want to reinstall this part. I'll take the old spring off and put a new spring here. I'll just slide this on here—remember the way it came off. Just leave that there for now.
Alright. We have a new adjuster. Compare it to the old adjuster. This can go on multiple ways. You'll screw this one on this way, and the screw part is going to be towards the back of the car. I'll just screw it all the way down—not too tight. I'll take the brake caliper grease; put it on this side of the adjuster—this little pin. And then I'll hold the adjuster in and it'll lubricate it.
Now I'll set that aside but not too far, because I'm going to need that in a minute. I'm going to take this shoe and I'm going to take this spring. We have a new spring. We need to hook it on the back side of the back shoe and then, with the front shoe, you need to slide that spring into position, there. Then we're going to take the adjuster and slide that into position. This is why you want to set the adjuster up before you put this shoe on. Just take a screwdriver. You don't want to get your fingers stuck in here. As I pull on the front shoe—pull that out. This is a little bit tricky. Get the adjuster lined up. There we go. With that lined up, we can line the nail up—just like that.
I'll take that new spring and retainer and the tool. Holding it from the back side, I'll get this lined up; twist and lock it in place. Alright. Now I'm going to spread these a little bit, because this little bar that goes across needs to get into position, which, once these shoes are in there—it's very hard to get it in there. Oops. The spring fell off. Reposition the spring. Alright.
There's a little groove right there; it's going to go in between there—just like that. That's how that's going to go. We're going to take this piece and it's going to go back on there. Take one of these springs. This spring is the one that's going to go on first. It helps to have one of these special tools that's made for brakes—for drum brakes. Slide that through the spring. Get that in position and then you just slide it down. Make sure you're wearing safety glasses when you do this, because sometimes the springs go flying. Get that back in there. Just slide that down—like that; pull the tool out. Make sure this lines up.
Alright. Now we'll get the other spring on. Now, sometimes it's not that easy to use the spring tool for the second one. So, I'm just going to use the locking pliers.
So you could use locking pliers if you don't have it?
Yeah. You can use this for both of them if you don't have the spring tool. Just slide that in position. Go in the pin. Take a screwdriver to help you out a bit. It's almost there. Give it a little tap. That's not all the way down, so I'll just move this, and now it's locked in. Make sure those springs are both locked in. Make sure this bar that goes across here is locked in place, which—it looks good. Everything looks good. Down below, everything looks good here as well.
Now we're going to use our brake parts cleaner on the shoes, because we got them a little greasy. Try as hard not to get them greasy, but if you get a little grease on there, just wipe it off.
If you need to adjust these shoes, you can just use a screwdriver—just to loosen them or tighten. That's tightening them up and then loosening. You're going to go the other direction. If you need to adjust these after you have this all together, there is a plug that you can remove from the back side backing plate. You just pull the plug out and then you can get in there with a screwdriver and go through and adjust it accordingly.
Alright. Now we're going to clean the hub. If yours was really rusty, then you take a wire brush and go along here, and clean all this area. This hub is actually in pretty good shape. So, we don't have to do that, and you can add some kind of an anti-seize, or something, around here. You can see a little bit of gray on here—that'll prevent the rotor from sticking to the hub if you ever have to do a brake job again.
Now we're just going to throw the rotor on backwards. Take a little brake parts cleaner. Clean the back side of the rotor. There is an anti-corrosive film on the rotor that we want to wash off. Alright. We'll also spray it on the inside of the drum for the parking brake shoes. Just use a little rag and wipe that off. Flip it over. Make sure you have a little bit of slack from the brake shoes. You want them rubbing just a little bit—but not too much. Nice and easy. We'll clean this side.
Now I'm going to slide the caliper bracket on. Take the bolts; reinstall the bolts. I'll get that one started. I'll use a 14mm socket and a ratchet to just snug these up and then we're going to torque them. Now I'm going to use that same 14mm socket and the torque wrench, and I'm going to torque these to 38 foot-pounds. If I can find the other bolt—there it is.
Now I'll take the break pad. I'll just take a little bit of brake caliper grease; put it on the ears of the pad. Put a little bit on the back and install the brake pads. I'll do the same for the inside. There we go.
Before I compress this piston, I'm just going to use a little brake parts cleaner. Spray some of the dirt away from the piston. Clean it up. Just wipe it with a rag. Now I'm going to take the piston; remove the caliper holder and I flip the caliper over—little bit of brake cleaner in there. Flip this over. I'm going to use this tool—we actually sell it at 1A Auto. This is going to compress the caliper. Just slide this in position and I'm going to slowly compress the caliper—just squeeze it. What this is doing—it's pushing the piston back into the caliper. It's going to push brake fluid through the hoses, through the lines, back up into the master cylinder and into the reservoir.
It's a good idea, after you've done the brake job, to check your reservoir and adjust it accordingly. Go nice and slow. Once it's all the way down, we can release it, right here. Make sure that dust boot is all the way down, which is good. Reinstall the caliper. Take the two caliper bolts; get that started and get the lower one started. You may have to twist the pin; it is a key way to keep the pin from spinning.
Now I'm going to use a torque wrench with the same 14mm socket and torque these to 27 foot-pounds. Now we're going to reinstall the wheel. Put the lug nuts on.
Now I'm going to torque these with a torque wrench. You would normally have a 19mm socket, and we're going to torque them in a star pattern to 65 foot-pounds. The reason why you torque them in a start pattern is to snug the wheel down evenly. Just go around again; make sure everything's tight.
At this time, we're going to want to pump the brake pedal, because there's going to be a little bit of an air gap in between the brake caliper piston and the brake pads. So, you want to eliminate that air gap. Otherwise, when you go to drive away, you're going to have to pump it real quick. Just do that.
Alright. At the master cylinder, you'll check the brake reservoir. Just make sure the level is where it needs to be. We're right under maximum. So, we're good. We don't have to add or subtract any fluid, but you're going to want to adjust accordingly. Now we're just going to check the parking brake. Make sure it works properly. It feels like it's working pretty good.
Thanks for watching. Visit us at 1aauto.com for quality auto parts, fast and free shipping and the best customer service in the industry.