Hi, I’m Mike from 1A Auto. We’ve been selling auto parts for over 30 years!
We disconnect the negative terminal of the battery using a 10 millimeter wrench to loosen it. Just have to get it loose enough for it to come off the terminal. Put the negative terminal aside. Lift up the protective cover on the positive terminal. Take a 10 millimeter wrench to loosen it. When you're loosening this with the wrench, be sure to not touch anything else metal while you're touching the positive terminal. It'll cause a short and a spark, so be very careful. Just kind of protect the wrench from touching anything as you're turning it.
I'm using my hand to get this loose. Put that aside. Now remove the bracket holding the battery in. These look rusty. I'm going to spray some rust penetrant on them. I don't need to undo these the whole way. We'll get them loose enough, and they will unhook from underneath. If you've got a deep socket long enough, you could use it, a 10 millimeter, however that's not deep enough. All we need is a ratcheting wrench. You could also use a closed box wrench. Either way you need to loosen these, so I'm just going to hold on to it.
If you're using a longer wrench, you don't want to swing this wrench around and touch this positive terminal, because it will arch and cause a spark because you're shorting it to ground. So, just be aware that that terminal does have positive energy in it. We'll get this loose. It's almost there. I'm going to loosening it a little bit. Once it's loose enough, there's a little hook on the bottom, so I was able to push down and unhook it, just like that. Once one side's loose, typically you can push down the other one, and work it out of there. You don't have to loosen them all the way up and out, but just enough to get the hooks undone at the bottom. We'll lift the battery out of the car and just put it aside. Take the plastic tray out.
Let's spray some rust penetrant on the backside of these two screws/bolts. They do have a Phillips head in there. Use this 10 millimeter socket, extension and ratchet. It's a little rusty, but fit it on there. Get that one free, and then we'll work on getting this one free. Put those bolts aside. This should lift up off a little stud, kind of a rubber stud, and lift it up beyond the fuel filter. Because this is a sedan, it doesn't have a rear wiper, so there's only one wiper motor. A wagon would be the same except you'd have a motor here.
To unplug it, just push in on the connector and pull it out just like that. Now, the hoses here, so I'm going to kind of tilt it to get the fluid away from it. It also helps that this is not very full, so it did come off of this little plastic stud here on the bottom. I'm going to carefully pull the rubber hose off and put that right there, then take the whole bottle out. I try to hold it in this direction because it's not very full. If I tip this way, it'll start to leak washer fluid out of here. If you want to reuse this washer fluid, just pour this into a bucket and then you can pour it back in here when you replace this.
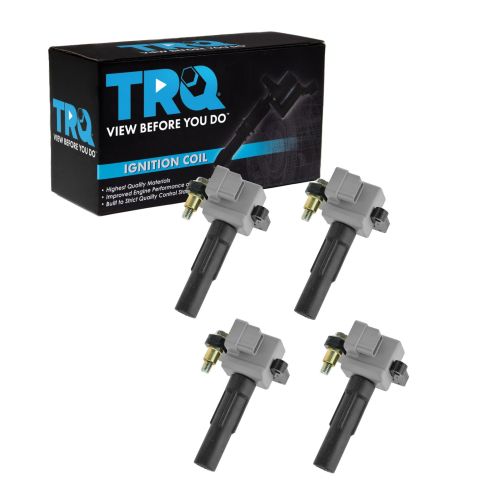
Coil packs are located on both the driver and passenger side because this is a flat engine, so it's two cylinders on each side. This would be the front driver's side, and the rear driver's side. You need to unclip them, both of them, and remove the bolt. And you can slide the coils out.
Something to pay attention to when you're doing these, you should do these one at a time so you don't mix them up. But if you do happen to mix up the coil pack connectors, the white one goes to the front of the engine. The black one will be on the rear coil. That applies to both sides. There's a wire harness up here with a little metal bendy bracket. I'm just going to bend it out of the way. I'm just going to gently bend it up out of the way. That'll give you some movement there.
I'm going to spray some penetrant in here. I'm also going to spray some on the connector. You may break this connector. Hopefully not, so be very, very careful. I'm just going to push it inward like that. This one's moving nice and easily. It did help that I sprayed some oil in there. Sometimes if you push them in a little bit, it helps break them free. Then, I'm going to push the lock open by pushing inward, and then just kind of pushing off like that. That one came off pretty easily. It didn't break. That's good. Just put that aside.
We're going to do one of these at a time. I'm going to use a 12 millimeter socket on the other ratchet to remove the 12 millimeter bolt that's holding the coil to the head, and break this free. It's broken free. I'm in here with my fingertips. Take it out. The bolt is captured with the coil. I can grab onto the coil, and wiggle it back and forth. Pull it straight out. It'll come right out of the head.
I'm going to use a five-eighths spark plug socket. It has a rubber grommet in here. I loosen the spark plug and pull it out. It takes the spark plug with it and it doesn't fall. You're going to have a little short extension.
It's electrical tapped together because the extension and the socket are kind of loose, and when I get them in there they like to pull apart. That's the only reason why we have that tapped. So, I go in here and feel for it. Get it setup on the spark plug. That's in place. Now I put my ratchet on here. All right. Add a little smaller extension.
You need to find the right combination of extension to get in here. Once it's loose, you can pull the ratchet off. Slide the ratchet out of there. Now it's loose. With my fingers, I can thread the spark plug out. Spark plugs have a lot of threads on them. Once it comes free, lift it right out, and there it is.
Install your spark plugs; they come pre-gapped. Push it right into the spark plug socket, this way it holds it in place. Carefully get it into the head of the engine. I want to make sure that I don't cross thread it. Sometimes if you spin it backwards a little bit, you can actually feel it grab the thread. Right there, and then you thread it in correctly. Just thread it all the way by hand. Make sure it goes in nice and easy. You'll torque it once it bottoms out.
That doesn't want to get any tighter, so now I'm going to torque it. Hopefully this fits in there. Torque on these is 15.2 foot-pounds, so I'm going to torque them to 15 foot-pounds. Kind of get this in here. Let's see. Torque is 15 foot-pounds. It's difficult to get a torque wrench in here because of the bigger head on them. If you can't get one in here, you're just going to have to do it by feel. It doesn't take much. 15 foot-pounds is not much. You basically just want to tighten them down. You're going to crush the sealing gasket. I can feel it getting tight. You don't want to over tighten them, of course. And right there feels good. Get it out of here. Pull this out.
Install our brand new coil. Slide that down into place. Make sure it goes over the spark plug. It should have some resistance as it pushes in. Get the bolt started in the head. I'm just going to tighten this down. It doesn't need much. You don't want to crack the head. Just tighten it down. Feels good just like that. Slide this out of here. The coil connector is a bit dirty. If you want, you can take some electrical cleaner, just spray it in here, and clean it out.
If yours is in good shape, don't worry about it. Now were going to slide it back onto the coil. It'll click when it's locked in place. You'll repeat this procedure for the one towards the rear, and you'll have the spark plugs changed on the driver's side. I'm going to spray the bolt that's holding the coil in with some rust penetrant. I'm going to spray the connector. The electrical connector with some rust penetrant. I'm going to carefully unlock it. Pull the wire off. Then I'll unbolt the coil. Pull the coil off, and we'll remove the spark plug and replace it.
I'll reinstall the coil just like this one here. It’s the same exact procedure. Remove the two 10 millimeter bolts that are holding in the air duct. Air duct will lift up, and just kind of pop it right off of the tube. We'll put that aside. Unplug the mass airflow meter. Push down on the lock. Gently pull the plug out. Move that wire out from there. These are coolant lines. You do not want to disconnect them from here because you'll spill coolant everywhere. Just going to pop them out of the clips here. Do the same for both. Those will just sit just like that.
If you have a throttle cable, some Subaru's do and some later ones don't. Just pop it out of here and put it aside. It's an eight millimeter hose clamp. Going to use an eight millimeter socket and a driver handle. Loosen it. Leave the clamp in place. Unlock the air box cover, pulling the two clips off. It's all loose. It should lift right off of the pins in the bottom. It'll come out of this hose. We have to guide it under these hoses. Pull it right out.
That's your cover and you can put that aside. Pull the air filter out of the way. Put that aside. There are two bolts holding in the air box on either side. That ones kind of hard to see. It's just like this one over here. I'll spray some rust penetrant on it. Spray some rust penetrant on this one. I'm using a very long extension and a 12 millimeter socket.
So you're reaching down here and unbolt this. We'll do the same for the other one. We'll pull the air box up off of this, and at the same time I'm loosening those bolts. Carefully grab it. It's a little tricky to get to. There's that other bolt. Now, this will lift out and over that. We'll lift the air box right out. Maneuvered it around the hoses and break lines. There's a harness on this side, but it will lift up and out of the engine compartment. I'm going to start with the front coil pack. Normally there's a plastic clip holding the harness into the valve cover. It's old. It's broken off.
Somebody has serviced these plugs before. It's not a big deal. It'll be loose but if you still have yours, you have to gently pull out the value cover so you get enough movement on these coil wires. Connector is just hidden underneath there. I'm going to spray some rust penetrant on the bolt and on the connector. I'm going to push it in a little bit. Push it open to unlock it, and slide the coil pack connector off. Just push it up out of the way. I've got a 12 millimeter socket and ratchet. Reach down here.
When you're doing this, just use whatever extensions, sockets, whatever works for you best. This one is not quite too tall. It didn't take much but once you loosen it, reach in there with your fingers, take it right out. All right. Get the core loose and pull it straight out. Then maneuver it up. Pull it out of the engine. Use the five-eighths spark plug socket. Has a grommet inside to hold the spark plug so it doesn't fall when I remove it. I have it tapped, the extension because it fits a little loosely on this extension. That's the only reason. You might have to fiddle with the right extension length to get it in here and still get a ratchet on it. When you feel you're over the spark plug, reach in with your ratchet and remove it. Let's get the connector out of the way. Usually you get it loose enough, and then you can spin it out by hand the rest of the way.
We'll install the new plug. Find one of the openings. Sometimes when you turn it backwards, it will find the thread and you can start to thread it in by hand. Should go in nice and easily. You don't want to cross thread these, aluminum head. Torque is 15 foot-pounds. If you can get a torque wrench in here, you can use one. If not, just kind of do it by feel. It's not super tight. You just want to crush the sealing gasket on the spark plug. Feels good there. Remove the ratchet. Move the extension socket.
Install a new coil. Reach down. Make sure it goes over the spark plug. Should line right up. Might have to hold it with one hand and let the other one get the bolt started that holds it into the head. I'm going to turn my ratchet and socket, tighten this up. It's 11 foot pounds. It's very, very light. Don't want to crack the valve cover, so just tighten it a little bit snug, and then you can stop. Right there. I'm just going to use some electrical cleaner. Clean the connector.
Reinstall the electrical connector. The white one will go in the front. The black connector will go in the back. You should do these one at a time so you won't mix them up. We'll get this one in place. The other one will be the exact same procedure. Push it down. It'll click when it locks in place.
For this one, the connector is actually broken and it's loose. Just slides right off. Have to change that connector. That can happen. They get old and brittle. Loosen this bolt here. Guide the spark plug out of the cylinder.
Install the new spark plug. Ratchet. Put the new coil back in. Find the right spot for it. Just past the frame. Make sure it goes over the spark plug. Tighten it up. Clean the connector and then reinstall it. If the connector was broken, you can replace it now.
To replace the connector for the coil pack, you need to remove this yellow lock and use a small flathead screwdriver, and just gently pry it up. At the same time, we don't want the lock to go flying out of the way. If the whole connector breaks, that's fine. They're very brittle. The only thing we want to reuse is this yellow lock, so I'm going to put that aside in a safe place so I can reuse it.
I want to keep these wires in order, and they pretty much go in order. It's red, black, and white. There is a small lock, a black lock right here on each one of them. I'm going to take a small pick and very carefully pry down on the lock, and you can almost break it off because this connector is so brittle it doesn't really matter. We're not reusing it. They just get brittle with age and heat cycles.
I'm going to carefully pull these out. That red one’s loose. I don't think these ones are loose yet. Get that out of there. I'm just breaking the locks right out. You do want to be careful of the metal connectors, because you want to reuse those. Once those locks are open, they'll come right out, and they kind of stay in order anyways.
Here's our new connector. It has a new lock. That was what was originally broken, and then we broke the rest of the locks taking this out. These are in order. Orientation was this way with the lock to the side, so I put them the same way. Just kind of line them all up, and push them into place. They'll all make kind of small little click as they lock into place. The locks are in there. They're not moving, but we need to put the yellow lock back in.
I'll take the yellow lock and slide it in place. That wider part goes towards the bottom, and that top part that sort of matches where the trunnels goes in the top. And then just push it in. You'll just feel it kind of slide in place and it'll lock nice. It's flush. That's perfect, so now this can go back on the coil. Slide right into place. It'll click when it locks in place, and now it won't come off.
If you've got broken coil pack connectors and they're loose, they could be vibrating back and forth. You could end up with a misfire, and you don't want that. I'm going to move the air box into place, kind of in and around the brake lines, around the harnesses, under this hose. At the sametime we're going to put this, it's going to go up under the side of the fender well, and this is going to go over the intake duct. Make sure you're right over it. Holes are lined up. We're going to install the bolts.
We'll reinstall the bolts. Get this one started. Reach down. I move my hand in here to get the other bolts. Take our super long extension here. Tighten this bolt up. You'll feel it get tight. Stop. Do the same for the other one. I'm going to put our air filter back in and install your air box cover.
We've bungee corded these lines out of the way. Kind of maneuver it into this duct, and then it also needs to go down. It needs to sit inside of these tabs here, just like that. Push the air box cover down. Pull the latches over. We'll unbungee cord these coolant lines. There were just gently pulled over there. Push them back into the clips.
The mass air harness got put on the wrong side here. It can slide down this way. Just be careful with it. Maneuver it down and around. Plugs into here. It'll click when it locks in place. Make sure this tube is fit together nicely. I'm going to pull the clamp up where I can get to it. Make sure it's pushed together and I'll tighten it. Eight millimeter socket and driver, push the throttle cable back into here. The intake duct goes back over this intact duct over here. Just pushes over. Fits down in place right over these holes. Reinstall the bolts. I don't have to go super tight with these. Just when you feel them get tight, and stop.
Before you install this in the car, don't forget to find your windshield washer hose. It'd be very annoying to get it all installed and then realize you forgot to plug this in. It sprays washer fluid out the bottom of the engine bay. Just pop that back up. It just slides right on. After you plug in the windshield washer hose, just make sure you plug the electrical connector back in. Got a find it here. Kind of fell over.
On this car it's not a wagon, so this plug was never used. You can tell. It's filled with dirt. It is the green plug that matches this one. Plug that back in, and then I'm going to carefully feed it down in here. Actually looking at this, the way it is, I think it should go underneath this one here. I'm going to slide this under this harness. Wrap around and plug this in. This little spot—this round mount on the bottom of the bottle is going to sit down in a round opening in the fender well. It's in there. I'm going to get this out of the cog. It's going to feed underneath the fuel filter and just sit right down in there. Can reinstall the bolts.
Reinstall the plastic tray. The arrow points to the front of the car. This round part matches up with the round part here. The battery will just sit on top of that and hold it down. Reinstall the battery. Put the battery tie down back in place. When we're installing this we need to get that hook. There's an opening there in the plastic. I'm going to reach down and you just kind of feel around for it. I didn't loosen that one that much, so it locked right into place. I'm going to get this front one. Okay. Tighten this one up a little bit. Battery's nice and tight.
Connect the positive terminal. Pull the cap up here so I can see what I'm doing. Push it down over. Use a 10 millimeter wrench, tighten it up. Again, be careful you do not ground this out while you're tightening it. It will cause a spark, short the battery out. Let's get it nice and tight. That's on there solid. Put the protective cap back on. I've got my key fob ready because as soon as I connect the negative terminal it's going to set off the alarm. It's very common when you disconnect the battery, reconnect it, the factory alarm might go off.
Thanks for watching. Visit us at 1AAuto.com for quality auto parts, fast and free shipping, and the best customer service in the industry.