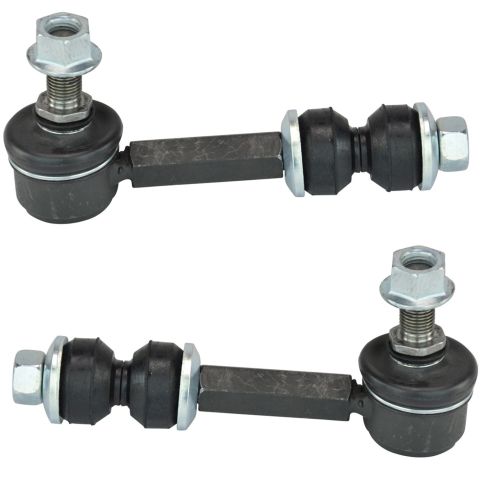
1ASFK02586-Toyota Lexus Rear Driver & Passenger Side 2 Piece Sway Bar Link Set TRQ PSA55851

Replaces
2019 Lexus NX300 Rear Driver & Passenger Side 2 Piece Sway Bar Link Set TRQ PSA55851

Product Reviews
Loading reviews
4.69/ 5.0
16
16 reviews
Value for money.
December 6, 2018
Easy to install and I like the beefier design of they sway bar links.
2010 RAV4 rear sway bar links
March 3, 2020
The products I order from 1A Auto are good quality and reasonably priced with free delivery. The items are packaged well and ship quickly. I will always use 1A Auto and recommend them to anyone asking about buying auto parts.
Rear end link RAV 4 2009
April 26, 2020
I received parts on time considering with Covid 19 issues. Parts seems look good. I installed on the following day. I can recommend 1A auto for good service and on time delivery. I hope they can supply American products in the near future.
Sway bar link set review
October 10, 2020
These are a pain in the butt to install on a Rav-4 right side as the exhaust system tail pipe passes directly in back of the link, thus hampering access with tools to the link. However, they are easy to install once you get the 18mm socket on the upper nut. Really wrench them tight! if you don't, they'll thump on the suspension system pretty loudly! They are, however, much better than stock Toyota parts.
Fantastic aftermarket parts for Rav 4
March 27, 2021
The sway bar links I bought from 1A Auto were perfect fit and came with additional features that made it super easy to install. A bigger area to grip onto with my wrench and pliers. Definitely be repeat customer.
Barely lasted 2 years
May 1, 2021
Installed these on my 07 Rav4 in July 2019. Recently had to change my rear springs and noticed these things were already worn down and the bushings were dried out and cracked. They were a cheap fix at the time but for them to be in this condition after 11k miles says a lot about the quality.
Perfect replacement
May 4, 2021
This Sway Bar Link is an excellent replacement for the original parts. They are definitely a better quality part than the original, using a wrench instead of an Allen wrench. I would highly recommend this part to replace the original parts.
Perfect!
April 6, 2022
Parts were affordable, on time, and a perfect fit. I bought these parts because 1A Auto had a good video for installation.
Great parts had zero issues installing
April 21, 2023
Fit great!
October 16, 2023
Worked great
Good quality
December 12, 2023
Parts is as i expected
Better than OEM
December 18, 2023
Great fit, having the hex shafts to hold with a wrench makes install super easy. Followed the video, worked great!
Much better than OEM
January 10, 2024
These sway bar links are built much better than the OEMs. They are thicker and heavy duty, while also being easier to put on. They allow you to use a wrench to hold the link in place instead of a hex key, which often strips out.
Love the prices and I will be buying more parts for other vehicles, thanks a1 auto
January 30, 2024
I watched the video install by a1 auto and figured the were the better parts and it was a very easy installation.
Sway bar link review
February 9, 2024
I recieved the part as ordered in a timely manor. The price was reasonable.
Unfortunately the parts ate not of the same quality as the original. It looks like someone weld a bunch of pieces together to make one part. Don't know how long they will they will hold up?
Great
March 5, 2024
Worked great! Love 1Aauto. Video was very helpful
Customer Q&A
Do I need bushings to go with this?
February 17, 2018
10
No, the bushings come with. Be aware, I had a 2006 Toyota Rav4 Limited, these were slightly longer than the OEM sway bars. They still worked,.
February 18, 2018
D R
10
No, I just installed them yesterday. Every thing you need is included.
February 19, 2018
A G
How tight do they need to be on the lower part of the link? Do the lower links on each side of the car need to be adjusted exactly the same?
February 26, 2019
10
We do not have the exact torque spec for the install of these parts, but usually these types of parts are good to just be tightened with regular tools. Try searching some online forums for further info!
February 26, 2019
Andra M
10
They need to be tight on the lower link. They should be adjusted fairly close but it's not critical to be exactly the same.
February 27, 2019
M J
Lexus is a registered trademark of Toyota Motor Corporation. 1A Auto is not affiliated with or sponsored by Lexus or Toyota Motor Corporation.
See all trademarks.


