What's up guys? I'm Andy from 1A Auto. In this video, I'm going to show you how to replace the rear shocks on this 2010 Toyota RAV4. If you need this part or other parts for your vehicle, click the link in the description, head over to 1aauto.com. I'm going to remove the wheel. I'm using a 21 millimeter socket and an air gun. If you don't have an air gun, you can remove it on the ground with a breaker bar before you raise the vehicle up.
The wheel wasn't too difficult to get off. If you do have trouble getting it off, you can just put a lug nut on there and hit the back of the tire with a hammer. Generally that gets them off. All right, so I'm going to use a screw jack underneath this lower control arm. I want to support the arm so that when I take this shock off, the coil spring is going to be okay. It's not going to spring down or anything, so that's just going to take the tension off the shock. Now I can take these two bolts up. Now the shark is attached to this bracket and you would think you would be able to take this bolt out, but because of the lower control arm being in the way, this bolt actually won't come out. So we have to take this bracket off and then once the brackets off and out of the way, we can take that bolt out.
All right, so the top part of the bracket attaches to the knuckle. So I'm just going to spray where the bolts go through just with some rust penetrant. Let that soak for a little bit and that'll make the bolts coming out a little easier. So while I'm spraying that down with rust penetrant, I'm just going to spray the top part down. The the top part of the shock bolt and the nut right on this side, so we'll let that soak for a little bit, make it a little easier removing it. All right, so I'm going to take a 17 millimeter socket extension and a breaker bar. We'll loosen these bolts up. All right, got those a little bit loose. I'll just use an air gun to remove them the rest of the way.
All right, pull those bolts out. All right, so I'm going to loosen up this bolt right here. Just use a 17 millimeter wrench. I'm trying to get it to break free first. It's not coming off too easily. Trying to get the wrench on the nut. Might have to use a pipe on the wrench. All right, loosen this up. Yeah, that worked a little bit. Now I happen to have a ratchet wrench on the other side, so now it's loose enough. I can take this wrench off and try to get that nut off. Get the bolt out. It's just hard to get in here, there's not a lot of room. All right, there we go, got the nut off. So I'm going to support the shock as I pull this bolt out, and I'm able to get the bolt out and pull the shock, pull it right down.
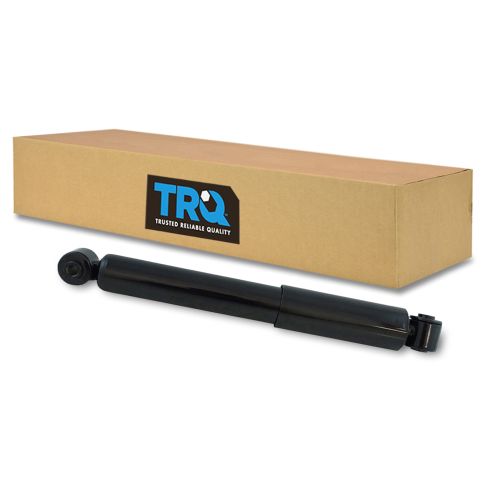
I'm going to use a 17 millimeter wrench on the backside of this bolt, because we want to take this bracket off and I'll use a 17 millimeter socket and a air gun to remove the nut. Pull that off, slide the bolt out. Now keep in mind the way that you take this apart, because you want to take the new shock and install it the same way. Here's the old part. Here's the new rear shock from 1aauto.com. The bushings are the same. It has a similar sleeve. Ours is metal. The shock is the same size. It just comes shipped like this. What we'll do is to remove this, just push down, slide that to the side, and the shock will extend. And then it'll be the same size as the old one. Get yours at 1aauto.com and you'd be ready to rock and roll.
All right, take the shock, install it the same way we just took the old one out. Remember the sleeve part is going to be at the top, and the bolts came from this side. Slide that in position. You want to position it the same way it was when it came out. Take that nut. Use a 17 millimeter wrench, 17 millimeter socket and the gun and I'm just going to snug this up for now. We can torque it when it's on the vehicle. All right. Now position the shock back how it came out. You may have to twist this a little bit. Slide that into position, just like that. And take the bolt, slide the bolt through. There we go. And take the nut, get the nut started. Before I tighten all those bolts and nuts down, I want to get this bracket lined up. So you could actually loosen up this bolt, if you're not getting it to line up too well. Then just take a socket, 17 millimeter socket, take those bolts and extension. Just give these started.
Just muscle those into position. Now I'm just going to use an air gun, snug these up. Now, I'll take a 17 millimeter wrench, try to get on this nut. Actually, I'm going to use the open side of the wrench, because I don't want it to get stuck on there. And then use a ratchet wrench on the inside and tighten this up. This is going to take a while. All right, it's tightened down. I just got to do my best to tight this. I'm not going to be able to fit a torque wrench in there. If I was, you'd want to torque it to 59 foot-pounds. So just do the best you can.
Then we're going to tighten this lower shock bolt. I'm going to use a 17 millimeter wrench here, and then 17 millimeter socket and torque wrench. Torque this two 59 foot-pounds. Good. We can remove the screw jack and put the wheel back on. We're good to go. Now I'm going to reinstall the tire. Take the lug nuts, install the lug nuts. I'm going to use a 21 millimeter socket and a torque wrench. I'm torquing these lug nuts to 76 foot-pounds and I'm going to do it in a star pattern. That way that the wheel gets tightened down evenly. I'll just go around again, just to make sure. Good to go.
Thanks for watching. Visit 1aauto.com for quality auto parts shipped to your door. The place for DIY auto repair. And if you enjoyed this video, please click the subscribe button.