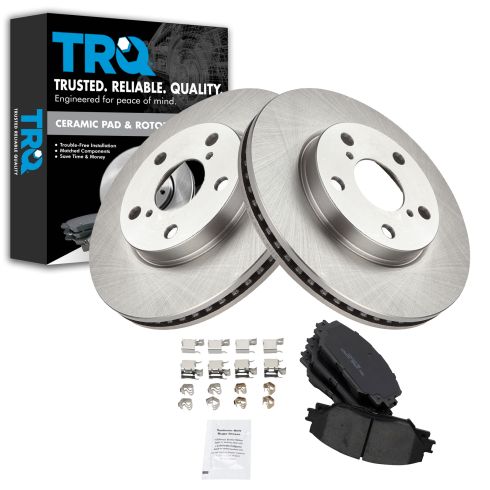
1ABFS01312-Toyota Lexus Scion Front Ceramic Brake Pad & Rotor Kit TRQ BKA11119

Replaces
2014 Toyota Prius V Front Ceramic Brake Pad & Rotor Kit TRQ BKA11119

Product Reviews
Loading reviews
4.77/ 5.0
22
22 reviews
Brakes 2009 RAV4
February 18, 2017
The new rotors were Identical to the factory. The ceramic pads installed with little effort. After a month, the front brakes are working great.
Buy This
February 22, 2017
I use these on all my customers cars when they dont want to spend alot of money. They work great ive never had a problem.
New brakes for my xB
December 8, 2017
Parts were well packaged and delivered promptly. Due to personal schedules, I waited 60 days to install. Rotors were identical to original, well cross-surfaced for rapid pad break-in. Pads were also identical to original. The entire job took only 2 hours, including bleeding brake lines. Great brakes !
Scion brakes
August 16, 2018
Delivery as usual was fast and product quality excellent
The parts fit
September 10, 2019
The parts fit the vehicle, which was the question. Quite satisfied.
Brakes
February 12, 2020
Great price good delivery will use and recomend
Better than OEM
March 10, 2021
Not sure why, but the fit an feel of the equipment I purchased from 1A auto seemed like the fit and finish was dare I say, better than the OEM equipment I used in the past.
Perfect fit
May 11, 2021
There is absolutely nothing like a smooth stop.
Great fit for 2015Rav4
October 31, 2021
Fit and works perfectly for my 2015 Rav4. Direct fit. No modifications needed
Great product
January 29, 2022
Good quality at a very good price
Front rotors
August 16, 2022
Great deal
2018 rav 4 rear brake rotors and pads. Excellent
September 11, 2022
2018 Toyota Rav 4 rear brake rotors and pads. Excellent. Great product, price, and service. 2nd time Ive used TRQ brake products and havent been disappointed.
Perfect fit and function
November 14, 2022
No more speaking brakes!!!!
I had been putting off changing brake pads on wife's Toyota.
Then I drove it to Chicago and back and realized that they really needed to be replaced sooner than later
So I ordered these parts while on the road and they arrived much sooner than I expected.
So I got right on it and replaced pads and rotors in one evening.
She needed it.
She is so happy and not embarrassed now because the brake are no more squeaky causing that feeling of fingernails on caulkboard feeling any longer.
Fits perfectly
December 8, 2022
Fits perfectly great prices.
Brake
December 8, 2022
Very good quality
December 22, 2022
Perfect.
Great
February 8, 2023
Great
Not completely happy but will buy parts again.
July 12, 2023
Appreciate the quick delivery but most importantly video on how to do it. I did have challenge with clipping pads and Lee them flat and close to the rotor. I had to use clamp to secure it unit I could install calipers.
November 22, 2023
I ordered for my Toyota Rav4 not Lexus Scion. My mechanic said the rotor and pads look different and suggested that is why I am constantly hearing a grinding sound. Did you send me the wrong item? Anyone buying for their vehicle, need to double check that 1aAuto sends the right product. Very disappointed with 1aAuto.
would recomend.
December 17, 2023
worked good.
April 20, 2024
Everything fit great. No problems what so ever. Thanks.
Good price for good parts.
May 24, 2024
Everything fit and quality is good. A good way for someone to save some money if they know how to DIY.
Customer Q&A
Does this fit a 2014 Toyota RAV4 limited all wheel drive?
October 19, 2022
10
This is not the correct part for your vehicle, but we do carry the one you need. The correct part number is: BKA11138.
October 20, 2022
Emma F
Toyota is a registered trademark of Toyota Motor Corporation. 1A Auto is not affiliated with or sponsored by Toyota or Toyota Motor Corporation.
See all trademarks.


