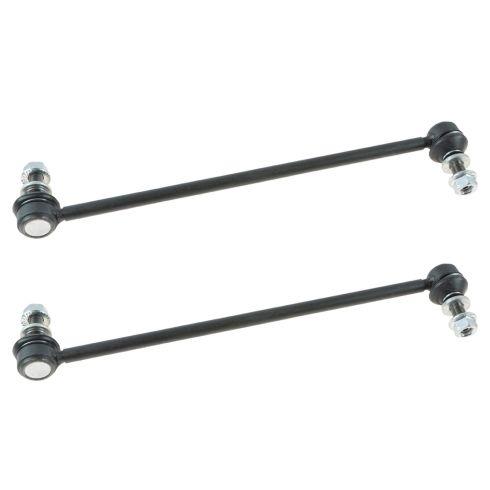
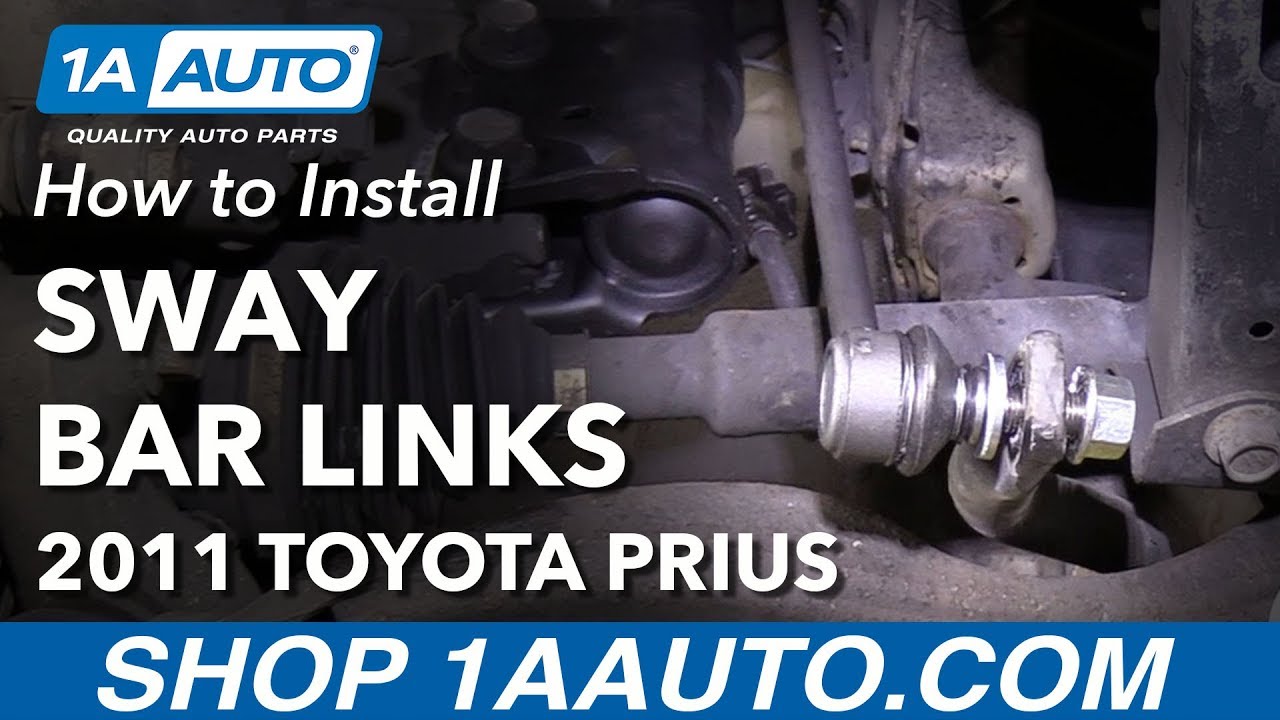
Kit Includes: (1) Front Passenger Side Sway Bar Link (1) Front Driver Side Sway Bar Link
Quantity: 2 Piece
Specification
Side Location
Driver & Passenger Side
Location
Front
Our steering and suspension components are pre-greased and sealed for long life and do not require the extra maintenance typically required by greaseable versions.
Item Condition:New
Attention California Customers:
WARNING: This product can expose you to chemicals including Lead and Lead Compounds, which are known to the State of California to cause cancer, and birth defects or other reproductive harm. For more information, go to www.P65Warnings.ca.gov.
Lifetime Warranty
This item is backed by our limited lifetime warranty. In the event that this item should fail due to manufacturing defects during intended use, we will replace the part free of charge. This warranty covers the cost of the part only.
FREE Shipping is standard on Orders shipped to the lower 48 States (Contiguous United States). Standard shipping charges apply to Hawaii, Alaska and US Territories. Shipping is not available to Canada.
Expedited is available on checkout to the United States, excluding Alaska, Hawaii and US Territories as well as P.O. Boxes and APO/FPO/DPO addresses. Final shipping costs are available at checkout.
How to Replace Front Sway Bar Links 2010-15 Toyota Prius
How to Replace Front Sway Bar Link 2006-17 Toyota RAV4
Created on:
Tools used
21mm wrench
6mm Allen Wrench
Flat Blade Screwdriver
Torque Wrench
17mm Wrench
17mm Socket
Jack Stands
Ratchet
Floor Jack
1/2 Inch Breaker Bar
1. Removing the Wheel
Pry off the wheel cover with a flat blade screwdriver
Loosen the 21mm lug nuts with the vehicle on the ground
Raise the vehicle with a floor jack
Secure the vehicle on jack stands
Remove the lug nuts
Pull off the wheel
2. Removing the Front Sway Bar Links
Loosen the upper sway bar link bolt with a 6mm allen key bit and breaker bar and a 14mm wrench, or vise grip pliers and a 17mm wrench
Remove the upper portion of the sway bar link
Insert the upper portion and gently tighten the nut
Loosen the lower sway bar link bolt with a 6mm allen key bit and breaker bar and a 14mm wrench, or vise grip pliers and a 17mm wrench
3. Installing the Front Sway Bar Links
Insert the upper portion of the sway bar link in place
Insert the lower portion of the sway bar link in place
Counter hold the upper portion with an 18mm wrench
Tighten the upper nut with an 18mm socket and ratchet
Repeat for the lower portion
Tighten the nuts 55 foot-pounds of torque
4. Reattaching the Wheel
Slide the wheel into place
Start the lug nuts by hand
Tighten the lug nuts preliminarily
Lower the vehicle to the ground
Tighten the lug nuts to 76 foot-pounds in a crossing or star pattern
Hi, I’m Mike from 1A Auto. We’ve been selling auto parts for over 30 years!
You can use a small pry bar, or you can use a large flat-bladed screwdriver. We're going to pop the wheel cover off. Going to use a 21 millimeter socket, a large breaker bar. Loosen the lug nuts with the vehicle on the ground, so the wheel doesn't turn. Raise this sporty vehicle with a jack and jack stands, or we're going to use our two post lift. The vehicle in the air, the lug nuts are loose, I'm going to use the socket to finish taking the wheel and tire off.
Remove the sway bar link. Spray some rust penetrant on the top nut. It's a 17 millimeter nut. Try to break it free first. It might want to spin on the ball joint part. There is a way to counterhold it. Typically, before I try to counterhold it, I like to try to break it free a little bit. It started to move, and then, now it's spinning on the ball joint part, but I did free it up a bit.
We're going to take a 6 millimeter hex drive on the breaker bar. Put it in here to counterhold it. Now, loosen the nut. It's possible that these could be so rusted together that you may have to cut the sway bar links off. If you're replacing the strut, you should have a new sway bar link on hand, in case you destroy it while you're removing it. This one came off really nicely. Pull it right out.
Spray some rust penetrant on the lower sway bar link nut. Wipe it so it doesn't drip all over the floor. Using the 17 millimeter wrench, break it free first. There you go. This one, I actually got lucky, I didn't have to counterhold it like the top one, and it spun right off.
Here's the original sway bar link we pulled from the vehicle, and the brand new one from 1AAuto.com. Comes with new hardware. Similar in design, this will work great and fit great in your vehicle. This can be installed in either direction. They're reversible. I'm going to start with the bottom one. Put it through. Use the new nut that was included. It is a locking nut, so it's going to get to a point and then stop. Take the one off here, and we'll install it here. Bend it a little bit. Nut installed here.
Now, we'll work on tightening the bottom one first. Nuts that come on this new one were 18 millimeter. Hold the bolt in place and tighten them up. It's starting to turn the ball joint. The stud's turning with it, so now I'm going to have to counterhold this. Use our 6 millimeter hex drive with our breaker bar. I can counterhold it and tighten it up. Get it tightened down, come back and torque it. Torque the sway bar link upper nut and lower nut to 55 foot-pounds. Once it clicks, you're all set. Do the same for both.
Reinstall the wheel. Start the lug nuts by hand. These lug nuts do have a shoulder on them. The opening in the wheel is a little bit bigger, so you might have to line it up, and just fiddle with the wheel a little bit while you're tightening these down. Just going to use the socket to snug these down. When I'm done, we'll lower the vehicle to the ground and torque them to spec. Torque the lug nuts in a cross pattern to 76 foot-pounds. To reinstall the wheel cover, line up the hole for the valve stem, and then snap it in place.
Thanks for watching. Visit us at 1AAuto.com for quality auto parts, fast and free shipping, and the best customer service in the industry.
Tools used
21mm Socket
Hammer
Socket Extensions
5.5mm Hex Wrench
Torque Wrench
Locking Pliers
Rust Penetrant
18mm Wrench
6mm Hex Socket
17mm Socket
18mm Socket
Ratchet
What's up guys? I'm Andy from 1 A Auto. In this video I'm going to show you how to replace the front sway bar links on this 2010 Toyota Rav4. If you need this part or other parts for your vehicle, click the link in the description and head over to 1Aauto.com.
All right, I raised and supported the vehicle. I'm going to remove the wheel and I'm using a 21 millimeter socket and an air gun. If you don't have an air gun, you can use a breaker bar. Just crack the lug nuts free while the vehicle is still on the ground. All right, now I want to take the tire off. This one's stuck on there pretty good. So I'm going to put one lug nut on and just hit it on the backside of the tire with a hammer. Break it free, reason you leave the lug nut is so the tire doesn't go flying.
Now take the lug nut off, pull the tire off. I'm just going to take a little rust penetrant. Spray this sway bar link nut. It's a little bit rusty, so let that soak for a little bit. So there's a couple ways you can take this nut off. One, you could take a 7/32 hex key or a 5.5, it's pretty close as well. And then a 17 millimeter wrench and try to loosen it up that way. But I find it takes forever if you do that. So what I'm going to do is take some walking pliers, get behind here on the back side. This is going to prevent the stud from spinning. Just lock those in place. Take a 17 millimeter socket and an air gun and just take it off. Generally if you just bump it a couple of times like that, it'll loosen up. But I got to readjust the locking pliers. Make them a little tighter. Let's give this a try.
There we go. Got it off. Now we can slide this out and then you can see how this was on here. Now if you weren't replacing the sway bar link, then you probably don't want to do it this way. You probably want to do it with taking the wrench and the hex key. It just takes a lot longer.
Take the locking pliers off. I'm just going to use a little rough penetrant on this nut. Let that soak a little bit. Before I take this nut off, I don't want the stud to spin while I'm taking that off, so I'm going to use some locking pliers right here. Should be able to lock this stud or we could do similar to what I said up top, you could use a hex socket in the center there and then use a 17 millimeter wrench. It just takes a lot longer. 17 millimeter socket and an air gun and there we go. Nice and easy. Here's the old part. Here's the new sway bar link from 1Aauto.com. As you can see, the length of the parts are the same, they're machined the same way, the ball and socket ends are the same. They come with new nuts. Get yours at 1Aauto.com and you'll be ready to rock and roll.
Take the sway bar link, slide the stud through the sway bar and then put the nut on. Now as far as tightening it down, I don't have the ability to use locking pliers right here because I don't want to mess the boot up. So what I'm going to do is just use a ratchet wrench and a hex key. This nut is a different size, so I'm going to use an 18 millimeter ratchet wrench and the center for the stud to hold that, I'm going to use a hex bit with a six millimeter hex socket.
Tighten this up. I got that snugged. Now I'm going to use an 18 millimeter socket and a torque wrench and I'm going to torque this to 55 foot pounds. Just makes sure the stud isn't spinning when you do that. It's good. Now, align the link up into the bracket on the strip. Put the nut on.
I need an 18 millimeter ratchet wrench and a six millimeter hex key on a ratchet. So then I'm going to just tighten this up. And then the same as the bottom. I'm going to use an 18 millimeter ratchet wrench and a six millimeter hex key in a ratchet. Tighten this up. All right, I'm going to snug that up real tight. Then I'm going to use an 18 millimeter socket and a torque wrench and torque this to 55 foot pounds. Now install the tire. Take the lug nuts, install the lug nuts. Now I load the vehicle down to the ground so that the tire's just touching the ground and I'm going to torque these with a 21 millimeter socket and a torque wrench to 76 foot pounds, and I'm going to do this in a star pattern. The reason you do it in a star pattern is so that the wheel gets tightened down evenly. And then I always like to go around again just to double check and you're good to go.
Thanks for watching. If you want the parts to do it yourself, check out 1Aauto.com. The place for DIY auto repair.
PSA55895
In Stock
Product Reviews
Loading reviews
4.74/ 5.039
39 reviews
5 Stars
4 Stars
3 Stars
2 Stars
1 Star
31
6
2
0
0
Rav4 Sway Bars Pair
F
October 27, 2018
The price was really good and the delivery was in reasonable time. However I had too much difficulty tightening the nuts. I had to use the nuts from the Old Sway bars. I dont think I would recommend these to anyone.
Works great
Bill
November 16, 2018
These were installed on a 2009 rav4 the same time the quick struts were installed and they perform like stock
They fit, but that's about all.
Frank
May 7, 2019
Purchased for a 2010 Prius. They fit the vehicle fine, but the build quality was definitely inferior. I don't expect them to last as long as the original parts.
Fits nicely
Raymond
June 14, 2019
Easy enough to Install especially if you follow the video provided by 1A Auto. Good pricing. Performance and reliability yet-to-be-determined.
Screw size not correct
????
June 18, 2019
The four screw size not fit .
Easy as expected, fit perfectly.
D
August 23, 2019
Original equipment fit.
Front sway bar link pair.
Dmitriy
August 25, 2019
Thanks. Good product.
Toyota 2006 RAV4 2.4l
Robert
December 20, 2019
Fit and installation without any problem.
Half the price, 100% functionality
B
March 5, 2020
I was coming home from a successful snack run at the local grocer, taking the backroads through my neighboor hood, enjoying the drive.
This past winter we were expecting snow in Seattle, barely got any that stuck, but the city decided to run chains on its army of busses anyways and tore up the roads in the process. As I drove over the freshly opened potholes I began to hear some very faint knocking, was it really there? Maybe my head was playing tricks on me, I lowered the volume on the radio and listed intently as all other mechanically inclined and anal owners do. I went over a few bumps and there they were, those annoying faint clunks reared their ugly heads after every bump. After a few days the clunks grew louder and were eventually followed by creaking
Eventually I got my near decade old Prius on a lift and began inspecting every rubber clad bushing and bolt on my suspension. Ball joints? No, clean as a baby bottom and plump as a ripe berry, control arm bushings? Also good, ho
Excellent service
Peter
December 29, 2020
It came quickly and with great packaging.highly recommend
A
April 8, 2021
Good quality and good online service
Greg
July 19, 2021
The parts are just like OEM. Very great parts. They fit just perfect. Never any modification. 1aauto have your back. Videos on site make installation easy showing step by step. Whats really nice you can call them if you need more help.
Good replacement part
hugh
September 1, 2021
Only thing I would make sure you torque it to 55 psi
Fits like factory and solved the mysterious clunk in the front end. Thanks 1A Auto for good price and shipping.
Good
Vernon
December 16, 2021
Original made of aluminum this is steel. Not a problem. This came with a washer unlike the original. At first was quite sure where the washer should be placed.
good deal
Richard
January 4, 2022
I a Auto immediately sent a replacement when requested
good company
end links are a value
Worth getting
Gervey
January 21, 2022
They work just fine
OSHANE
March 27, 2022
Good
Awesome
Jose
June 14, 2022
Excelent 100% recomended and fast shipping
Good service.
Stephen
June 16, 2022
Great price. Quick delivery.
Christopher
July 9, 2022
Great price, quality part, fast shipping
Marouane
July 15, 2022
Good quality
Great Quality, Fast Shipping with Great price
David
September 23, 2022
Good quality, exact fit and great price, cant ask for more. for long durability the time will tell. so far so good and I am very happy. Fast shipping with good packaging. Highly recommended
Good fit
CLAIRE
September 27, 2022
The bars fit well and installation was easy since I was replacing the struts too
Kang
February 9, 2023
great value and does fixed my problem
Perfect Fit
Mark
March 26, 2023
Super easy and good quality replacement
just work goos
PEDRO
April 6, 2023
easy to use and strong material.
donovan
June 8, 2023
the parts are very good and was installed easily and works well.
Works great
Steve
July 20, 2023
Shipping took longer than stated. Equipment works well. Both front tires need to be off the ground to install easily.
Jean
October 1, 2023
Great parts
Great purchase!
Terry
October 25, 2023
Great parts and made a huge difference on my 2014 Toyota Prius steering/curves. Received the parts alot faster then stated.. Glad I ordered from 1A Auto, Toyota pricing was outrages! These parts are built tough and a very economical choice for my car that I treat extremely well.....
I would recommend.
Tiffany
November 14, 2023
I've had them i for about 2.5 yrs. They are pretty worn but nothing that warrants replacing yet.
Thomas
January 20, 2024
fit and worked very nicely. was easier than trying to reuse the old ones.
Great investment
Alex
February 22, 2024
My car doesn't move everywhere on speed bumps!!
Ronnie
March 13, 2024
Quality parts, should always replace when doing struts.
Xavier
April 11, 2024
Just what I needed, quality parts for less!
Neil
April 15, 2024
easy to install, quality product
Sway bar links
John
September 6, 2024
The drive is very tight
Customer Q&A
what is the length of this part center to center?January 28, 2019
Mark W
10
Actual Measurements are not listed or available. Our parts are exact replacements for your vehicle's OEM parts.
As long as your year, make, and model match up with our listing, these parts will directly fit and function like the originals.
January 28, 2019
Peter L
Customer service
877-844-3393
Monday - Friday 8:00am - 9:30pm ET Saturday - Sunday 8:00am - 4:30pm ET
Scion is a registered trademark of Toyota Motor Corporation. 1A Auto is not affiliated with or sponsored by Scion or Toyota Motor Corporation.See all trademarks.
Enter Vehicle Year Make Model
Specify your vehicle's year, make and model to guarantee fit.
Year
Make
Model
Options
Drivetrain
This part doesn’t fit a . Select from parts that fit.