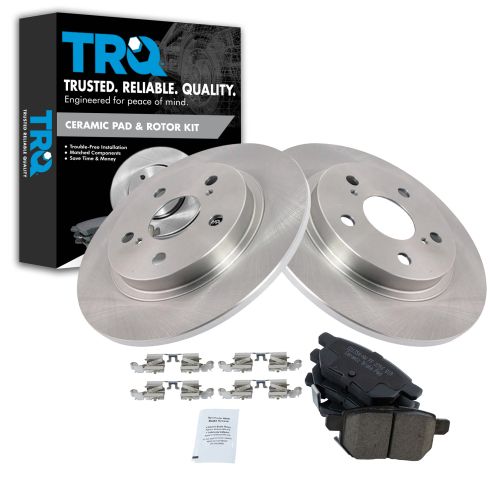
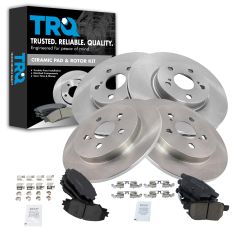
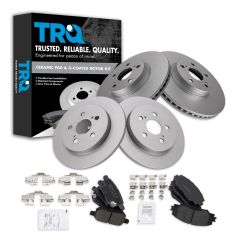
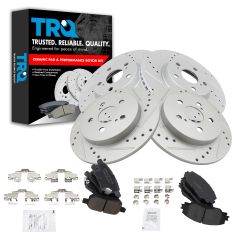
Kit Includes: (2) Rear Brake Rotors (1) Rear Ceramic Brake Pad Set with Contact Point Grease & Hardware
Brake Pad Bonding Type: Premium Posi
Wheel Lug Count: 5 Lug
Rear Brake Rotor Venting Type: Solid
Brake Pad Friction Material: Ceramic
Rear Brake Rotor Diameter: 10.98 in. (279mm)
Specification
Trim
Base Model
Drivetrain
Front Wheel Drive
Engine Displacement (Metric)
L4 2.4L
Location
Rear
TRQ brake kits are designed to restore your brake system to like-new performance. TRQ brake pads are positive molded, thermal scorched, chamfered, and utilize a multi-layer shim for enhanced performance and service life. TRQ rotors have a non-directional finish that reduces the break-in period for new rotors as well as reducing vibrations throughout the rotor’s lifecycle. All products are fit and road-tested in our Massachusetts R&D facility to ensure we deliver on our promise of Trusted Reliable Quality.
Product Features
Positive Molded - Less dust resulting in clean wheels
G3000 Casting Alloy - Reduced noise and improved wear resistance
Application Specific Design - Extended service life, no modifications
WARNING: This product can expose you to chemicals including Lead and Lead Compounds, which are known to the State of California to cause cancer, and birth defects or other reproductive harm. For more information, go to www.P65Warnings.ca.gov.
Lifetime Warranty
This item is backed by our limited lifetime warranty. In the event that this item should fail due to manufacturing defects during intended use, we will replace the part free of charge. This warranty covers the cost of the part only.
FREE Shipping is standard on orders shipped to the lower 48 States (Contiguous United States). Standard shipping charges apply to Hawaii and Alaska.
Shipping is not available to a P.O. Box, APO/FPO/DPO addresses, US Territories, or Canada for this item.
Expedited is available on checkout to the United States, excluding Alaska, Hawaii.
Final shipping costs are available at checkout.
How to Replace Rear Brakes 2009-10 Pontiac Vibe
Created on:
Tools used
14mm Wrench
Torque Wrench
14mm Socket
Pry Bar
Jack Stands
Brake Parts Cleaner
21mm Socket
Rubber Mallet
Dead Blow Hammer
Paper Towels
Bungee Cord
Ratchet
Wire Brush
Floor Jack
Needle nose pliers
1/2 Inch Breaker Bar
1. Removing the Wheel
Loosen the lug nut covers with a 22mm socket
Pry off the center cap with a flat blade screwdriver
Loosen the lug nuts with the vehicle on the ground
Raise the vehicle with a floor jack
Secure the vehicle on jack stands
Remove the lug nuts
Pull off the wheel
2. Removing the Brake Pads
Loosen the 14mm caliper bolts
Hang the caliper from a bungee cord
Pry the brake pads off with a flat blade screwdriver
3. Removing the Brake Rotor
Remove 14mm bolts from the brake caliper bracket
Pull off the brake caliper bracket
Pull the rotor off
If the rotor will not come off, thread the lug nuts and strike the hub area of the rotor with the ball end of a ball peen hammer
4. Preparing the New Brake Pads and Rotors
Carefully turn the adjustor on the caliper clockwise with needle nose pliers
Clean the brake pad slides with a wire brush
Apply grease to the caliper slides
Clean the rotor with brake parts cleaner
5. Installing the New Brake Rotor
Slide the rotor on
Thread on one lug nut to hold the rotor in place
Put the bracket back into place
Tighten bolts with a 14mm wrench
6. Installing the New Brake Pads
Apply grease to the brake pad tabs
Install the new brake pads into the bracket
Put the caliper on
Tighten bolts with a 14mm wrench
Remove the lug nut from the rotor
7. Reattaching the Wheel
Slide the wheel into place
Start the lug nuts by hand
Tighten the lug nuts preliminarily
Lower the vehicle to the ground
Tighten the lug nuts to the spec foot-pounds in a crossing or star pattern
Reattach the center cap
Tighten the lug nut covers with a 22mm socket
Hi, I’m Mike from 1A Auto. We’ve been selling auto parts for over 30 years!
To remove the hubcap, these things that look like lug nuts are actually little plastic caps, and they screw onto the real lug nuts. That's what holds the hubcap on. We're going to take our 21 millimeter socket and just loosen them by hand. They shouldn't be on there too tight. If you have to, you could use a small ratchet, but these ones are coming free with my hand. So loosen these up. You should be able to pull the hubcap right off. With the vehicle still on the ground, take our 21 millimeter socket and a breaker bar and loosen all the lug nuts. With the lug nuts loosened, we can raise and support the vehicle with a jack and jack stands. We're going to use our two post lift. With the vehicle in the air remove the rest of the lug nuts. They should be pretty loose. I can use my hand and remove the tire and wheel. I'll hold on to the wheel as I take the last lug nut off so it doesn't come falling off on me. Put these lug nuts aside. Take our wheel off.
Rear caliper has the parking brake integrated into it, so I won't really be able to grab this. Kind of compress the piston, because it basically threads out and it's part of your parking brake. These are 14 millimeter caliper bolts. We need to remove those and take the caliper off. Using a 14 millimeter box wrench, get the bottom one broken free and break the top one free. Lift the caliper up and off.
I will hang this with a bungee cord from the spring to so it doesn't dangle on the e-brake cable or the brake hose. Use a small pry bar or a large flat bladed screwdriver and pop the pads out. There are two bolts holding the caliper bracket on: one here and one here at 14 millimeter. We need to use a 14 millimeter socket and a breaker bar to loosen those. Probably in there pretty tight. Since that's so tight, I'm going to use a dead blow mallet to hit this. With those freed up, I'm going to switch to a ratchet to make removal a little quicker. I'm going to hold on to the bracket as I remove the top one so the bracket doesn't fall. Pull the bracket out and the rotor is so loose it's ready to come right off. If this rotor is frozen in place you could spray some rust penetrant here on the hub and you could thread some eight millimeter bolts in here evenly and push this off. Luckily for us it came right off.
In our car here unfortunately the dust shield has rusted away, so I just kind of took the bits that were left and pushed them out of the way so they don't touch the rotor. On this particular style of caliper, because the e-brake cable and parking brake is integrated into it, the piston is part of the adjuster, so it actually threads and locks so it can't go back all the way in. So when you pull the e-brake inside the car or the parking brake, it pushes the piston out and locks the pads. There is a special tool for this. You can get them and it will help you spin this in. Or you can use some needle nose pliers and very carefully I'm going to turn this clockwise. It's going to spin down and retract. It's probably going to take you longer using pliers but it'll work.
If this doesn't want to spin in easily in a particular direction, sometimes the opposite side may be counterclockwise and vice-versa. Just make sure that you're not forcing it. I'm just going to move the bungee cord out of the way. There should be a direction that this turns easily and one direction it will not turn. So if it doesn't turn one way, try the other way. Clean our caliper hardware and the stainless steel brackets. Just clean them with a little brake parts cleaner and a wire brush. Repeat that for both sides.
Install our new brake rotor. I'm going to put it on backwards first so I can clean the outside of it with brake parts cleaner. And I'll flip it over. I'll actually take one of our lug nuts, hold it in place, and just spray down with some brake parts cleaner.
Reinstall the caliper bracket. Capture the top one first, and then the bottom one. Tighten up the bracket bolts. Make sure those are nice and tight. Pads that we took out are in good shape. We just want to show you how to remove them, so we're just going to clean and reuse them. This would be the same with our brand new pads. Just want to make sure that this surface is nice and clean with brake parts cleaner. We'll put a little bit of caliper grease on here and pop them in place. Push those clips over. Pop those in place.
There's these little locating tabs on the brake pads. Just like this on the outside one there's one on the inside here. It needs to line up into one of these openings here. So I'm just going to have to turn this just a little more, get it to line up to basically vertical like that. Now when this sits down it should sit right in place. Yeah, that lines up nice.
Reinstall the bolts. I'm just going to tighten these up. Tighten the bottom one. Remove the lug nut.
Reinstall the wheel. Do the same for the other side. Tighten the lug nuts and torque them when the vehicle's on the ground and then we're going to pump our brake pedal. The vehicle on the ground tighten your lug nuts to spec. Go the cross pattern. Go line up the valve stem opening with the valve stem in the wheel. Should fit right in place. Take the 21 millimeter socket and just thread these on. Just do them hand tight because they're just plastic. You don't want to break them. To push the calipers back out since we compressed them I'm going to gently press on the brake pedal. Don't mash it to the floor. Just kind of gently press it, build up the pressure, and you'll feel it get harder as the brake caliper piston move out to meet the pads. That feels good.
Thanks for watching. Visit us at 1AAuto.com for quality auto parts, fast and free shipping, and the best customer service in the industry
BKA11143
In Stock
Product Reviews
Loading reviews
5.00/ 5.012
12 reviews
5 Stars
4 Stars
3 Stars
2 Stars
1 Star
12
0
0
0
0
Perfect fit
Michael
February 25, 2017
Not sure what I can say about brakes. They were the right parts and I had no problem installing them.
Brake set rotors and pads.
D
March 22, 2019
Excellent product with very affordable price.What else do you want.Thank you
Great Brake Parts Set, Easy to install - WORK GREAT!
Bryan
September 7, 2019
Sometimes I worry about not replacing with OEM parts, especially on brakes. But, I can honestly say these are great parts! They work SMOOTHLY and QUIETLY!
I tried them out by buying the front set first. Once I knew I was happy with those...I bought the rear set. I am very happy. And, saving HUNDREDS over letting a shop do the work is the icing on top!
2012 Scion XB brakes
R
January 9, 2020
Excellent. Much cheaper than auto parts stores.
2011 Scion XB Rears
Dan
August 3, 2020
These work great! You can't beat the price and quality of these brakes. I installed a couple of weeks ago and they're very quiet and smooth. Will be doing my fronts soon. Thanks
Fit my 2010 Toyota matrix
Jason
August 24, 2020
Garage quoted just over $400 for brake pads and rotors. This set was ~$60. Stopped the squeaking and saved me $350.
ANATOLIY
August 23, 2021
Just what I needed
Jose
August 3, 2022
The parts are excellent
Raul
November 22, 2022
Perfect fit.
Suggested tool works perfect
William
June 19, 2024
Everything fit fine, no problems.
Exactly what I needed
Victor
July 22, 2024
The product arrived quickly in great condition.
The fit was perfect.
Independent YouTube walkthrough made the job easy.
Brake overhaul
Oliver
October 5, 2024
Great product, price and fast delivery
Customer Q&A
No questions have been asked about this item.
Customer service
877-844-3393
Monday - Friday 8:00am - 9:30pm ET Saturday - Sunday 8:00am - 4:30pm ET
Pontiac is a registered trademark of General Motors Company. 1A Auto is not affiliated with or sponsored by Pontiac or General Motors Company.See all trademarks.
Enter Vehicle Year Make Model
Specify your vehicle's year, make and model to guarantee fit.
Year
Make
Model
Options
Drivetrain
This part doesn’t fit a . Select from parts that fit.