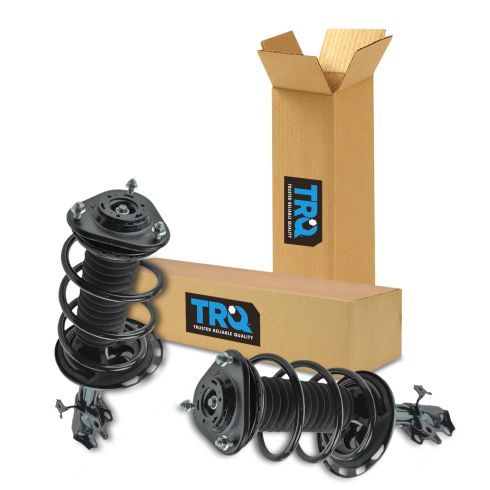
1ASSP01081-Toyota Rav4 Front Driver & Passenger Side 2 Piece Strut & Spring Assembly Set TRQ SCA57189

Replaces
2007 Toyota Rav4 Sport L4 2.4L Front Driver & Passenger Side 2 Piece Strut & Spring Assembly Set TRQ SCA57189

Product Reviews
Loading reviews
4.57/ 5.0
21
21 reviews
Strut
February 25, 2018
Shipping was fast and Struts were a perfect fit for my Rav4. Would recommend
Just like new!
March 20, 2018
The strut and spring assemblies were perfect. As a complete unit, they were very easy to change out. The ride and handling ability is like new again. Thanks 1aauto!!
Struct Assembly pair
June 21, 2018
I have just replaced the front strut assembly pair on my 09 RAV4.
The part feel solid and fit very well. Hope it will last forever...
strut and spring assembly
September 27, 2018
having the spring included in the assembly made replacing my front strut go alot quicker and was easier, since i didnt have to take the spring off the old strut.
Struts assembly
November 21, 2018
I bought the struts assemblies for my wife's 2010 Toyota RAV4 . They were easy to install except the right side straight the bottom holes didn't lineup had to grind it a little to make the boat fit through. Everything else fit just like the original. I'd buy another set of 1 a auto .
Perfect fit.
December 18, 2020
Exact replacement for my 07 RAV4. Old came out harder than the new ones went in, but was not hard at all. Got rid of the CLUNK.
Fit like factory
March 28, 2021
No problems getting these in. My original strut mounts were making noise over bumps. No more noise after installing these. Cant beat the price.
1Aauto quick struts
May 3, 2021
These are very good quality strut assemblies, this is my 3rd time getting this brand and always have satisfied my customers needs!its always the right fit and quality!!
Same as OEM, without the cost
June 2, 2021
New struts for 199$ cant beat it
Passenger side Struts Assembly fits to a TEE!!
September 2, 2021
The Strut and Spring Assembly - Passenger Side fits to a Tee. For a DIY'er that almost short of tools to use, took me about 3 - 4 hours uninstalling all the parts needed to and installing the strut assembly. For the driver's side strut assembly, that's is going to be for another day, 'cause the passenger side was the one making the squeeky noise. As for the performance, time will tell.
Customer service is awesome
November 4, 2021
With the help of Sara she made sure they where the right struts for my Suv
August 14, 2022
Fit perfectly. Install videos were easy to follow. Overall great experience.
Not recommended
September 17, 2022
Got this set and had them installed. After about 1,500 miles the passenger side is making a loud clunking kind of noise that sounds like a marble in the cup holder. The mechanic said the strut is bad. Have a replacement on the way but have to pay to have it installed after already paying since I didnt buy the struts from the mechanic. Hopefully, the drivers side stays ok as it almost sounds like its starting to clank, but hard to tell from the loud passenger side.
Great quality! Was able to change both sides in two hours. The package arrived quickly as well!
October 12, 2022
Perfect fit!! Lined up perfectly!
November 20, 2022
Your video made install easy, but the left was missing 2 bolts (I used the old ones,also no cover over bearing nuts. I used metal tape to keep dirt out, but rides wonderful. thank you
November 29, 2022
Fit was perfect on the install n product is A1. Great ride n definitely a match on oem equipment. N price was unbeatable
November 29, 2022
Fit was perfect on the install n product is A1. Great ride n definitely a match on oem equipment. N price was unbeatable
Perfect struts
December 8, 2022
Perfect replacement struts
The right fit
January 26, 2023
Works great. Exactly as described, OEM similar.
Failed after 3000 miles 2 months.
July 11, 2023
Purchased a set of these for my 06 RAV4. They are a direct replacement with no fitment issues whatsoever. Ride quality is much improved over the old worn ones. Unfortunately after about a month i starting hearing loud rattling going over bumps, checked everything and determined it had to be the shock. Went through a warranty replacement through 1A which was amazing BTW! and had a new shock delivered in 2 days. Had it replaced and resolved the rattling issue. 1 week later started hearing the same type of ratting, clucking sounds from the other side. Seems as if these are defective and or cheaply built as another customer reported the exact same problem in their review. One good note is 1a was prompt in resolving. Hopefully i just received a bad set and the replacements hold up!
December 12, 2023
very good quality
Customer Q&A
Will this fit the 2010 Rav4 sport?
July 24, 2018
10
Yes as long as you have the 2.5L engine.
July 24, 2018
T I
Will this fit 06 rav4 base model 2.4?
December 11, 2021
10
This is not the correct part for your vehicle, but we do carry the one you need. The correct part number is: 1ASSP01079
December 11, 2021
Cristina P
Where are these made?
October 29, 2022
10
We do not have that information. These are manufactured by TRQ. TRQ is a high quality, high-end name brand that we offer and back with our 1A Auto Limited Lifetime Warranty.
October 29, 2022
Kelly S
10
Heck if I know, but the worked very well
October 29, 2022
Anonymous S
Will this fit the 2009 Rav4?
September 8, 2023
10
These parts are specifically listed to fit the 2009 Toyota Rav4 L4 2.5L.
September 9, 2023
Kemal S
Funciona para mi rav4 2008 BASE?
August 13, 2024
10
This kit is listed to fit s 2008 Toyota Rav4 Sport models with a L4 2.4L engine only.
August 13, 2024
Jessica D
Toyota is a registered trademark of Toyota Motor Corporation. 1A Auto is not affiliated with or sponsored by Toyota or Toyota Motor Corporation.
See all trademarks.


