WARNING: Cancer and Reproductive Harm - www.P65Warnings.ca.gov.
Lifetime Warranty
This item is backed by our limited lifetime warranty. In the event that this item should fail due to manufacturing defects during intended use, we will replace the part free of charge. This warranty covers the cost of the part only.
FREE Shipping is standard on Orders shipped to the lower 48 States (Contiguous United States). Standard shipping charges apply to Hawaii, Alaska and US Territories. Shipping is not available to Canada.
Expedited is available on checkout to the United States, excluding Alaska, Hawaii and US Territories as well as P.O. Boxes and APO/FPO/DPO addresses. Final shipping costs are available at checkout.
How to Replace Cabin Air Filter 2002-09 Toyota 4Runner
How to Replace Cabin Air Filter 2003-09 Toyota 4Runner
Created on:
Tools used
No Tools Needed
1. Removing the Cabin Air Filter
Open the glove box
Push the side tabs to remove the glove box
Pry the glove box damper from the mounting post
Push the tabs on the cabin air filter tray to slide it out
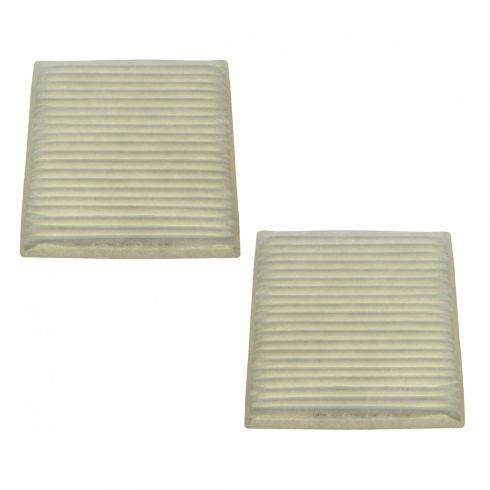
Remove the cabin air filter from the filter tray
2. Installing the Cabin Air Filter
Insert the filter into the filter tray, making sure the edges of the filter fit under the retaining tabs
Insert the tray into the cabin air filter slot, and push the locking tabs into place
Install the glove box damper onto the mounting post
Close the glove box to reset the side locking tabs
Hey, friends. It's Len here from 1A Auto. Today we're gonna be working on our 2006 Toyota 4Runner, and I want to show you how to remove and install your cabin air filter. Let's get right into it. We're gonna go right behind the glovebox here. Hopefully, nothing too crazy falls out of here. This looks clean. So that's nice. Squeeze like this, and you're gonna see a little tab right here. That needs to pull out. Same thing over here.
And then, I just grab along this piston right and slide it off of this piece right there. At this point, you can look inside. You can see this rectangle coming across. Just gonna grab this end. Give a little tug, this end. Oh, yeah, I'd say it's about time. Let's bring this over to the trash receptacle, clean it out, and then we'll install our new one. Okay, so to install our new filter we're just gonna go in just like this. Slide it in.
All right, so now it looks like it's in but it's not. Right along here you're gonna notice little triangles with a cut out at the bottom and that's to hold the filter in. So, you just need to make sure you that you squish the filter down enough, so it gets under that lip. Should slide right in. Around here do the same on this side. That one looks good. Come right here. Here we go, awesome. Now when we install this you want to make sure these fins are facing up.
So that way the air... As the air is getting drawn into the vehicle it's coming down here, and it's gonna accumulate inside all these ridges. This is gonna help protect you from breathing in all that crud that you saw on the old one. I'll come down here. Line it up with the hole, and just slide it in. We're gonna listen for a click noise, awesome. Give it a nice little tug. Try to wiggle it around. It's definitely latched in, perfect.
At this point, I'm gonna lift this up. We're gonna pay attention to our piston now. You've got your little piton right there, okay? Right where my finger is, and on the piston there's a little hole. It's kinda like this one up here, except it's right down here, all right? So just lift up your box. So you get so the two are lined up. The hole with the piton. Slide it in. Here we go. Lift this up. This is gonna go up and over that just like that. Bonk, bonk, boom. Perfect, that looks great. Down the road you go.
Thanks for watching. Visit 1aauto.com. Your place for DIY auto repairs, for great parts, great service, and more content.
Tools used
No Tools Needed
CFA18011
In Stock
Product Reviews
Loading reviews
5.00/ 5.02
2 reviews
5 Stars
4 Stars
3 Stars
2 Stars
1 Star
2
0
0
0
0
Easy to install after watching 1A Auto YouTube video
[{"url": "https://wac.edgecastcdn.net/001A39/prod/media/pNISJll75W64CYGsite/9ed8b25ef742d26ba44f33f50dd07302_1630174461620_0.jpeg", "caption": "2008 Subaru Outback cabin filter. Great install video from 1A Auto. saved over $200 in dealer costs!"}, {"url": "https://wac.edgecastcdn.net/001A39/prod/media/pNISJll75W64CYGsite/d2ac35ca9c35940bf3f180a5c0c4e7ca_1630174461620_1.jpeg", "caption": "2008 Subaru Outback cabin filter. Great install video from 1A Auto. saved over $200 in dealer costs!"}]
Donald
August 28, 2021
Easy replacement and saved a ton of dealer charges!
Good cabin air filters
Theodore
March 2, 2022
Fit perfectly and works perfectly.
Customer Q&A
No questions have been asked about this item.
Customer service
877-844-3393
Monday - Friday 8:00am - 9:30pm ET Saturday - Sunday 8:00am - 4:30pm ET
Toyota is a registered trademark of Toyota Motor Corporation. 1A Auto is not affiliated with or sponsored by Toyota or Toyota Motor Corporation.See all trademarks.
Enter Vehicle Year Make Model
Specify your vehicle's year, make and model to guarantee fit.
Year
Make
Model
Options
Drivetrain
This part doesn’t fit a . Select from parts that fit.