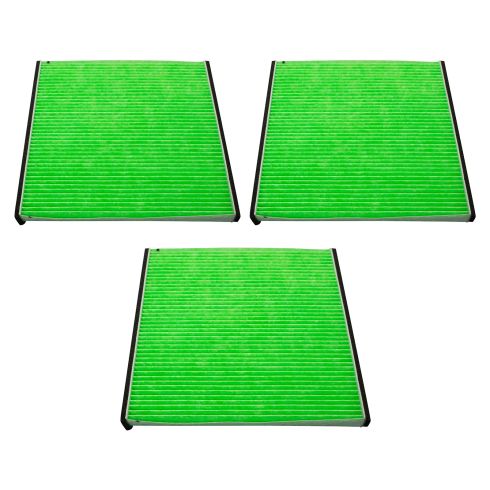
This item is backed by a 60-day warranty against defects in materials and workmanship under its intended use. The warranty does not cover normal wear and tear. This warranty covers the cost of the part only.
FREE Shipping is standard on Orders shipped to the lower 48 States (Contiguous United States). Standard shipping charges apply to Hawaii, Alaska and US Territories. Shipping is not available to Canada.
Expedited is available on checkout to the United States, excluding Alaska, Hawaii and US Territories as well as P.O. Boxes and APO/FPO/DPO addresses. Final shipping costs are available at checkout.
How To Replace Cabin Air Filter 2004-09 Subaru Outback
Created on:
Tools used
Phillips Head Screwdriver
1. Removing the Glove Box
Open the glove box
Pop the side cover off
Lift the glove box and remove the damper spring
Pull the sides in to unhook
Loosen the Phillips head clip
Remove the Phillips head clip from the side
Press the tab on the right side
Remove the glove box
2. Removing the Cabin Air Filter
Remove the plastic access panel
Remove the five Phillips head clips from the access panel
Press the tabs up on the cabin air filter
Remove the cabin air filter
3. Installing the Cabin Air Filter
Remove the old filter
Insert the new filter
Insert the new filter into place in the vehicle
Put the access panel into place
Tighten the five Phillips clips to the panel
Replace the plastic access panel
4. Installing the Glove Box
Insert the glove box into place and press the tabs in on each side
Tighten the Phillips head clip to the glove box
Connect the damper spring to the glove box
Pop the side cover on
Close the glove box
Hi, I’m Mike from 1A Auto. We’ve been selling auto parts for over 30 years!
Open the glove box. Pop the side cover off. Put that aside. Lift this up. Take this little damper string off. Push the glove box side in. Pop it off. Do the same for the other side. Just pull it in. The glove box will lower down.
To remove this screw and clip, use a Phillips head screwdriver. Loosen it. Pull its clip out. Put that aside. Push in on the tab on this side and then the glove box will come right out. Take out this upper compartment. This just lets you see down inside what you're doing, so just kind of lift it up, pull it straight out, and put that down aside.
The cabin air filter is back behind here, but just to let you look down inside because we need to remove this access panel here, so there's one, two, three, four screw clips. Use a Phillips head screwdriver to loosen these. There's a fifth one over here. Reach in here. Pull out. Push it back. Pull it out. I can see the bottom. There's two tabs. Push these up and on the top there's two tabs.
You're going to take your two hands with your thumb and index finger and reach up in here and squeeze them together and then pull that out. I'm going to carefully pull this out because this one is really dirty and filled with junk. Might never have been changed. Oops, my finger's stuck in there. I'm going to try to slide it out without dumping it into my blower motor. Wow, that is nearly clogged. This might not even been This probably smelled really bad and probably had very poor air flow through the heater and A/C. That is one of the worst I've seen.
Here's the cabin filter we pulled from our vehicle. It is completely clogged and filled with dirt. There's no way that any air is getting through this. It probably smells awful. This potentially could be original to the car. These should be changed every year or 12,000 miles. As you can see, this is a brand new one from 1aauto.com. It's the same exact style and size and design. This will fit in the tray. I'm going to pull this old one out over the trash brown, throw it away, and then we'll slide the new one in place. It'll fit great and work way better than this old one.
I'm just going to take a rag I've dampened with some glass cleaner. You could use water, anything, just to clean up some of the dust that's in here. There is a direction of flow marked on the air filter. The arrow is pointing down so the air comes in and goes into the blower motor, so we want that arrow pointing down. This will just slide into place, again, pretty flexible and gently push it down and in. Goes under these little tabs here and under this tab on this side. Should be one in the middle there. That's our brand new cabin air filter ready to be reinstalled.
Slide this tray back into place and then just push it right in. It does have an arrow pointing up. Now it's locked in place. Reinstall this cover. One of these clips was broken off, but there's three clips, so push up into place. Reinstall the threaded clips. Put this one over here. They'll just kind of push into place. Line them up. Push them as far as they'll go and then you can screw them back in. Just repeat this for all of them. Push it in. Put the glove box back in place. There's an opening here and a pin here. It's going to sit on that pin and slide this one up into place and then we'll push it up on the pins.
Before you forget, install the upper little cargo pocket. So it does say up. Now we go towards the top part. It just slides in place and clips in. Reinstall the clip on this side. You might have to move this around or adjust the clip out. Just thread it out. Just catch the top thread so it can squeeze together. Get it in place. I'll get that pushed in. Then put the center in, just like that. Hook up the little damper rope. Reinstall the side cover. Push it just beyond that trim there, get that clipped in. The cabin filter is replaced.
Thanks for watching. Visit us at 1AAuto.com for quality auto parts, fast and free shipping, and the best customer service in the industry.
1AEEK01092
In Stock
Product Reviews
Loading reviews
There are no reviews for this item.
Customer Q&A
No questions have been asked about this item.
Customer service
877-844-3393
Monday - Friday 8:00am - 9:30pm ET Saturday - Sunday 8:00am - 4:30pm ET
Mitsubishi is a registered trademark of Mitsubishi Motors Corporation. 1A Auto is not affiliated with or sponsored by Mitsubishi or Mitsubishi Motors Corporation.See all trademarks.
Enter Vehicle Year Make Model
Specify your vehicle's year, make and model to guarantee fit.
Year
Make
Model
Options
Drivetrain
This part doesn’t fit a . Select from parts that fit.