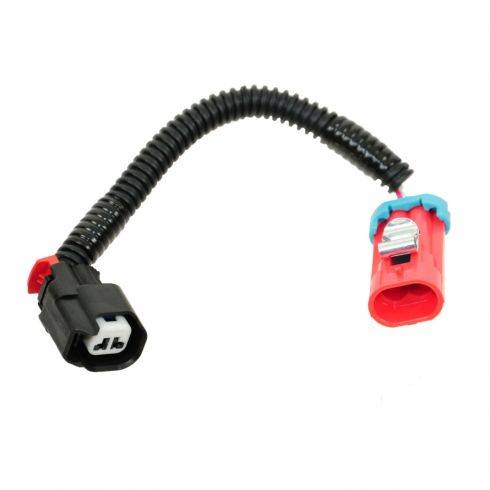
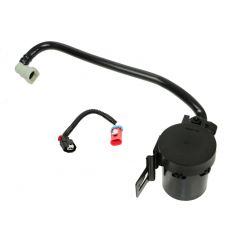
This item is backed by our 1-year warranty. In the event this item should fail during intended use, we will replace the part free of charge. This warranty covers the cost of the part only.
FREE Shipping is standard on Orders shipped to the lower 48 States (Contiguous United States). Standard shipping charges apply to Hawaii, Alaska and US Territories. Shipping is not available to Canada.
Expedited is available on checkout to the United States, excluding Alaska, Hawaii and US Territories as well as P.O. Boxes and APO/FPO/DPO addresses. Final shipping costs are available at checkout.
How to Replace EVAP Purge Canister 2000-06 Chevy Impala
Created on:
Tools used
Slip-Joint Pliers
1. Removing the Evaporative Purge Canister
Disconnect the evaporative purge canister wiring harness
Pull the canister backwards and off
Loosen the canister hose clamp with a pair of pliers
Pull the hose off the canister
2. Installing the New Evaporative Purge Canister
Push the hose onto the new canister
Put the hose clamp on with the pliers
Slide the canister onto its bracket
Connect the canister wiring harness
Brought to you by 1AAuto.com, your source for quality replacement parts and the best service on the Internet.
Hi, I'm Mike from 1A Auto. I hope this how-to video helps you out, and next time you need parts for your vehicle, think of 1AAuto.com. Thanks.
In this video, we're going to show you how to replace the evap purge canister on a 2006 Chevy Impala. The tools that you'll need are a pair of pliers. You'll also need a replacement purge canister from 1AAuto.com.
You're going to locate the evap purge canister behind the left rear wheel, kind of right by your gas tank on the inside of that fender. Go ahead and take off the connector that goes to it, and you're going to lift up on the tab and just slide it right out. You can see it right here up close to the tab that you pull up on. To get the canister down, you're going to want to pull backwards. Give it a little jiggle and pull it backwards. It's just being held on. It slides on to a clip. I'll show you, right here. The clip just slides in, right through there. You just pull it back and down. Using a pair of pliers, here, to squeeze that clamp, slide it down the end of the hose. Then, I'm going to go ahead and twist the rubber evap hose and the canister to get it off.
Here's a side-by-side of the old part and the exact new replacement part from 1A Auto. Going back in, I'm going to put the rubber flexible hose back on and use my pliers to secure the clip, so that there are no leaks. Once I've done that, I'm going to slide it back up into the fender well, the wheel well, and slide it back on to its bracket. It can be a little tough. You've got to just wiggle it and push it back on. Once you've got that in place, you can go ahead and reinstall your connector.
We hope this video helps you out. Brought to you by www.1AAuto.com, your source for quality replacement parts and the best service on the Internet. Please feel free to call us toll-free, 888-844-3393. We're the company that's here for you on the Internet and in person.
19257603
In Stock
Product Reviews
Loading reviews
There are no reviews for this item.
Customer Q&A
No questions have been asked about this item.
Customer service
877-844-3393
Monday - Friday 8:00am - 9:30pm ET Saturday - Sunday 8:00am - 4:30pm ET
GMC is a registered trademark of General Motors Company. 1A Auto is not affiliated with or sponsored by GMC or General Motors Company.See all trademarks.
Enter Vehicle Year Make Model
Specify your vehicle's year, make and model to guarantee fit.
Year
Make
Model
Options
Drivetrain
This part doesn’t fit a . Select from parts that fit.