Hey friends. It's Len here at 1A Auto. Today we're working on our 2004 Volvo XC90. This is the all wheel drive version and I'm going to be showing you how to replace a rear wheel bearing. It's going to be super easy. I can do it. You can do it too. If you need this or any other part, you can always check us out at 1aauto.com. Thanks.
Okay, friends so if you don't have an air gun to do your lug bolts here. I just use a long handle ratchet, 19 millimeter socket thin wall because I have to be able to get in here and we're just going to essentially have the majority of the weight of the vehicle off of the wheels, but the wheels still touching the ground and then you're just going to break them free. We're not going to loosen them up too much.
We don't want the wheel to be able to wobble. We just want to be able to have them broken free while the wheel is still on the ground because once it's up in the air and you try to do this, the wheel is just going to spin. If you have an air gun, don't worry about any of this. Let's move along. So now we'll just take off these lug studs or lug bolts. Generally speaking, you'd say lug nuts, but these are actually bolts to hold the wheel on. So something to think about when you take all these out is the fact that once you get the last one out, there's literally going to be nothing holding your wheel to the bearing. So usually what I'll do with the fourth one here, I'll take it so it comes all the way out, just like that. And then I'll just give it a couple threads in. Here we are. And that's just going to make it so the wheel can't fall down while I finish removing the last lug bolt.
Cool. Now we can hold the wheel, pull this out the last couple of threads, grab my wheel and get it down out of the way. Okay, so on the caliper here, we've got this clip. You're going to want to make sure you're wearing some safety glasses and just grab it with some cutters. Give it a little tug. This is what it looks like. We'll set this aside. You've got your caliper here. This is where your slider is going to be hiding, inside here. There's a little boot on top of here though. Let's see if I can grab something. Just try to get in between here. This right here should just pop right out of there. Just a little plastic cap and that blocks moisture from getting into where your slider is. There's another one down on the bottom.
There it is. Both those caps. We'll set those aside. We have our ABS wire connected to our brake hose. You can disconnect either side for the clips. They just pop right off and that's just going to give us slack for when we take the caliper off, we can hang it. We don't have to worry about putting a tug on our ABS wire. This is super delicate material right here, so get that out of the way. Let's move along. Okay, so we'll just grab this ABS wire. There's one more bracket that we're just going to try to lift it up and out of. Usually works easier if you roll at the same time as you left. There we are. Now we've got a clear view of these bolts. There are 14 millimeter. I'm going to get this one almost all the way out, but I'm going to leave it in a few threads and then I'll go ahead and remove the lower one, which is a little harder to get to. Not much, it's not like a issue or anything.
Down here. That's what our bolt looks like. Just set that aside. I'm going to grab the second one here. At this point the caliper and bracket is going to be ready to fall, so be careful. I'm going to grab a tool that I can use to hang it and of course my pry bar here, that's just going to help get it off of there. We've got our other bolt. We'll set that aside with the other one. Small pry bar pulls that away. Here's our caliper with the bracket, which is this right here, and then of course the pads in there.
So now we're going to use our 10 millimeter and we're going to remove this bolt. This bolt right here holds the rotor onto the wheel bearing behind it. When you remove this, the rotor is going to be able to flop around. If you want to, you could use one of those lug bolts to hold the rotor from being able to fall off. I'm not super worried about it. I'll hold the rotor. I just want to let you know about that. We'll just use our 10, break this bolt free. Once it's broken free, that's what it looks like. Grab our rotor, we'll pull it right off of there.
So we're going to remove this center bolt right here. It's a 14 millimeter. I'm just going to use my half inch air gun. That's what our bolt looks like. It's got a nice washer on it. The washer won't come off so you don't have to worry about losing it. We'll set this aside. So now I'm going to use my 13 millimeter wrench. I'm going to remove this bolt right here, which just holds this ABS wire bracket. Get it going the right way here.
There's our bolt there's our bracket. I'm just going to put the bolt through the way that it came out so I remember. Not that you'd be able to mess it up if you put this in backwards. It's really not going to want to mount in. So set that aside. What we're going to do next, so we're going to remove the mounting bolts that go through the knuckle and hold in the bearing. So right there, let me use my 17 millimeter wrench. I'm just going to get it onto the bolt here and I'm going to use my rubber mallet. I've got hand protection and eye protection on. And I'm just going to go ahead and give this a couple of bonks so it will break free. There we are. I'm going to do the next one. Make sure it's on there. Get my wrench. All right, cool.
See about doing the same to the other side. This side might be a little bit harder to even see, and by maybe I mean it is. One bolt is behind here, up in there. The other bolt is right here next to this arm. So I'm just going to finish taking out the other two real quick. Once those are out I'll bring it up and I'll get a better view of what's going on behind there. So there's one of our bearing bolts. I'm sure that all four of them look the same. So we'll just set this aside someplace where we can put all four of them next to each other and we'll continue on. Bolt number two, same as the first. Okay, so to get to the upper bolt, I'm going to use my 17 millimeter swivel socket, long extension, and I'm going to use my air gun. But you can use whatever you've got. More than likely you are going to use a 17 millimeter swivel socket and extension, probably a ratchet or an air gun.
There we are. Bolt number three, exact same as the other two. Let's move along. Okay, so now to get to this last bolt right here, what we need to do, is we need to obviously take it out. To take it out it's going to hit up against this arm. So we would need to take this bolt out so we can try to bring this down a little bit. If it doesn't go down, we'll of course have to take out this bolt as well. Anyway, so to go back to this one though, bringing this out, it's going to have to come out. Bonk, bonk, bonk. Up against this arm. So now we have to get this arm out of the way to be able to start trying to get this arm out of the way to get to that. So we're going to do a little digging. I've got my 18 millimeter, I'm going to put it on the nut side. There's a nut on the back there. On the bolt side use a 17 millimeter.
See if I can get that out of there. Here's our nut. Here's our bolt. Just put both those together and we'll set them aside. All right, let's get this arm up and out of the way here. Just be careful in case it wants to come slapping back down. I don't want anybody to get hurt. This gives us quite a bit of room to get in here, so I'm going to see if I can wrench this out. See how far we can get it before it stops. It might come out far enough where it's not going through the bearing anymore, in which case, you know we don't really have to take this bolt all the way out of the whole knuckle. We just need to come out of the bearing so we can bonk get that bearing out of there. Okay, let's grab our tool and see if we can get that out a little bit.
17. I'm not going to get very big turns this way but if it saves us a little bit of hassle down the line. Got that turning really well by hand now and it feels like it came loose enough that it's not into the bearing. So I'm all right with that just hanging out here. Now we'll bring it down and we'll continue. We're going to give our bearing a couple of bonks and see if we can get it out of there. Okay. So now at this point we have all four of our mounting bolts out. We have the bolt that holds the axle in out. I've got my little hammer. I'm going to give this bearing a couple bonks and try to get it to break free from the backing plate/knuckle area. I'm a righty. So normally I would be coming to try to hit it from this side. There isn't very much room without hitting up against this, so you'd have to just be super careful.
I'm going to try and give it a couple of whacks from the left. Maybe I'll come from the right again and we'll just see if we can get it to come free. When it comes off, there's no telling where it might go. So you know, don't have your head underneath here and give it a couple bonks and this thing comes down, smashes you. All right? You also don't want it to hit you in the foot or the shin or the ... I don't know anything. You don't want it to hurt you. Safety first, be careful. Here we go.
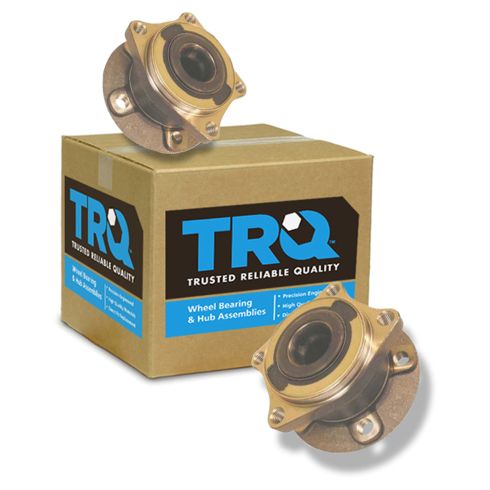
So that came out much easier than expected. And I got to tell you, I'm kind of loving it. So here we are friends, a quick product comparison for you. Over here we have our rear wheel bearing out of our 2004 Volvo XC90. We just removed it. It was super easy. And over here we have our brand new quality 1A Auto part. Both these parts are created equal, which is super important. They've got the same base right along here, which is where the rotor goes up against. This is the hub area. Along the back ... We'll just set this down. You've got four mounting holes on the new one, four mounting holes. You've got the area where the axle goes through, it's nice and splined. Right along here is a magnet area. That's where your ABS sensor is taking a reading, letting you know how fast this wheel is spinning. This one right here is the original. As you could tell, it's just absolutely disgusting and filled with gunk.
All in all, I would say this is a quality part to install into the vehicle and I don't see any reason why I wouldn't want to go ahead and do it. With that said, if you need this or any other part, you can always check us out at 1aauto.com. Thanks.
Okay, so now that we've got our bearing off, we're going to clean up the area. You can you something as simple as one of these brushes available at 1aauto.com. We're just going to clean up the area. Try to get off as much of this debris as possible. This right here is your e-brake actuator. Essentially when you pull on the e-brake, it moves this right here. So this is a pivot point right up along this area. And this will separate your e-brake shoes, which are these two pieces. And they'll hit up against the inside of that braking surface of the rotor. When that happens it creates friction, stops the vehicle, or holds the vehicle in a stop position depending on what you're doing. So I'm just going to clean it down and then we'll just put a little spritz of fluid there. Make sure that function's okay before we go ahead any further. So safety glasses on. Hand protection. Here we go. Oh, of course, got a collection bucket down there. Make sure we don't contaminate anything.
Okay, so now that we just spent a little bit of time using our brush and I went ahead and I grabbed a little pocket screwdriver, these are super handy to have. You'll see the area where the bearing's going to sit up against. So you want to make sure that that plate area is nice and clean. If you have a lot of build up, just take your screwdriver or whatever you might happen to have. Just chisel it off and then just brush it again. Make sure it looks clean. You need to have a nice flat based surface there. No big chunks of anything because that's going to hold the bearing up and away and it won't be able to sit flush up against there. With that said, let's move along.
So we're going to take a couple of things here. I'm going to use a little bit of penetrant. Just want to go right in here. You don't need to use too much of this and you definitely don't want it to get on the braking surface of the shoes. So I used the little bit of penetrant there and now I'm just going to use a little bit of never seize.
I like to go just like that. It'll dry up and look better in the long run, but that's essentially just going to help make it so we know that this thing can move. It's not going to freeze up on you next time you try to use your emergency brake. Then you'll have to get all the way back in here, take it all back apart so you can get in here and free it all up. If you want to, you can go ahead and take the e-brake shoes off of here and make sure that this functions properly. If it's frozen and it's not moving, that is what you would have to do. It's very simple. You just take these, push them, twist them, pop them out. Same thing over here. You got a little spring. Comes out easy peasy. I'm not going to worry about that right now.
We'll move along. So I'm just going to use some more of this copper never seize and I'm going to go along where the base is that I was telling you about earlier, that you want to make sure it's clean. And I'm going to try to get inside here and a little bit on the splines of the axle. So I'll just go like that. That's just going to help the bearing come off again in the event that you have to take it off again for some reason. Maybe you have to do the axle down the line or something. Anyway, so we've got never seize on here. Like I said, that's going to help the bearing come off. Almost clean off the sensor there. This is your ABS sensor. Your ride's really close to that magnet that I showed you on the brand new bearing. Now we'll grab our bearing bolts right here. I've got three. Here's number four. Let's push her through. Here we are.
You could use a little bit of thread locker if you'd like. We'll say it's your prerogative. I like to use a little bit. So I'm going to go ahead and do it. If you, you do. If you don't, you don't. It is what it is. I'm not going to get mad at you. So we've got all four bolts with a little bit of thread locker. Now we'll grab our brand new quality 1A Auto part and we'll go ahead and start installing it. So we've got our bearing. This is the way that it's going to press in. Essentially like this. You've got a rounded area and then a flat area. And if you don't know what I mean, you can look just directly at the vehicle and get the flat area facing towards the front of the vehicle. And then the rounded portion of the base that faces towards the rear of the vehicle.
So we'll get this lined up, slide it over the splines of the axle. Start bringing it in. This bottom bolt right here is going to be the biggest problem for us. So let's just get that one started now. All right, it's going. Very cool. So we're just going to bottom out all these bolts right here as close as we can and then we'll snug them all up once they're all bottomed out. I'll see if I can get under here to see. Come on Len. It's just not very much room for me to get my work done in this area. What this is doing right now is just kind of drawing in the wheel bearing. It looks like it's going in nice and straight so I'm not too worried about it at this point. Okay, it's getting snug. Here we are. I'll get this one. Them we'll come up.
This is my last one that we're going to be trying to snug up, so once I get it so it's bottomed up. I'm just going to go ahead and tighten it right down. Here we are. That one's tight. Let's move along and do the other three. We'll snug them all up. Here we are. Last ones nice and tight. Let's move along to the next step. Okay, so let's grab our arm, move back down. Just bring it up here. We've got our bolt with our nut. Comes from the back to the front. Let's hold and get our nut on here. Here we are. 18 for the wrench on the nut side. Let's do it this way. 17 on the bolt side. Tight. Move along. So we've got our little ABS bracket here. I'm just going to put it back into its hole right up here. Be careful for the wire, of course. That's the whole point of taking this off of here so we don't damage anything. Last thing we need to do is do it now.
Okay, snuck it up with our 13 millimeter. It's nice and snug. We're just going to take our ABS wire, we'll put it over the little hooky do there. And when you try to push this down, it's easier if you roll it. Just kind of slide it down on one side instead of trying to force the whole thing down and it should just pull right in there. Next we have this, that's just going to go right on the brake hose. We'll connect that on in a minute though. So now what we're going to do, we're going to use a little bit of copper never seize on our bearing mating plate. This is the hub area. Also where the rotor is going to press up onto or sit onto. So if we put a little bit of any seize on there, it's just going to make it come off nice and easy down the line. Okay, so we've got our rotor here. Let's get it up on there. You can see our hole for our bolt.
Put it in here, we're going to snug that up. Got so bombed out. Just give a little extra. The rotor can't go anywhere. Seems pretty decent. That noise you hear there is just the sound of the shoes hitting up against the inner surface in here. I'm not worried about that. I just want to make sure that the backing plate didn't get bent and we don't have any backing plate grind here before I go too far. I think that that sounds pretty great. So let's move ahead to the next step. Okay, so we're going to take our bolt, put it right into the axle there. We're going to put it in until it bottoms out and then we'll go ahead and torque it down. I'm just going to zap it in with my 14 millimeter. Just like that.
Now we're going to bring the vehicle down and I'll show you a neat little trick for torquing down your axle bolt. Okay friends so what I did here to torque down this axle bolt. When you start turning it, this is going to want to spin, right? How are you going to make it stop spinning? Just go with something as basic as this. I put two lug bolts in here. I gave them a few good threads so I know they're not just grabbing on by a couple threads at the end there. I'm going to take my long pry bar. I'm just going to go right in the center here like this. Bring this up, just like that. And what that's going to do is while I try to turn this, my bar is going to be wedged in here, up against the ground, and it's going to prevent the rotor from turning. We're going to go 26 foot pounds just like that. I'm going to hit it one more time, just because I like to make sure they're nice and snug.
Now that we know this is tight, I can get this out of here. We'll take off our lug bolts and we'll continue to take our whole caliper with both pads. We have the friction material facing towards the rotor. That's super important. It's easy to make the mistake, you know I probably don't have to even say that that's the way it needs to go, but I will anyways. All right, so we've got the bracket up in there now. Now we're ready to get our mounting bolts. Right here. Remember there's two of them. If you want to use a little thread locker, you can go ahead and do that. I'm going to grab some real quick. Okay, so we're going to take our caliper bracket bolts and we're going to start them in. I'm going to start with the top one because it's easier for me to see and get to.
I'm just going to wiggle the bracket around till I feel it want to slide in. Get this one started. I'm not going to tighten it up or even bottom it out until after I get the lower one started as well. This one's much harder to get down to. It can be done. It's not very hard. It's just harder. There we are. Both of these are started, now we can go ahead and snug them up. All right, we're going to use our 14 millimeter and bottom that out. As soon as it bottoms out, just give it a little extra. Give it a nice little bonk. There we are. Okay, we're going to go ahead and torque down these bracket bolts to 26 foot pounds. That's one.
See if I can get that lower one. I'm just going to hit it one more time. There we are. This one. Both those bracket bolts are torqued down. We can move ahead to the next step. Okay, so now it's time to get our ABS wire back so it's mounted securely. Just going to get this on here. We've got the big flat bracket area and then the smaller area. The flat bracket goes over the caliper and then this area right here, it goes over this area of the hose. So let's get that on there. Just like that. Easy peasy. We've got another one, slide that on there. If either of these broke, it's really not that big of a deal. The one big deal would be to make sure that you do actually secure them though. Okay. That is super important. You don't want ... Let's see if I can get this back off of here.
You don't want your hose or your ABS wire, just kind of flopping around, getting stuck inside where your shock moves and goes up and down. It could get pinched, it could get torn, it could just overall go bad by moving around too much. So let's just keep it secured. That's the way Volvo wanted it and it only makes sense. So there's that. Onto the next step. We've got our little slider covers. Those go right on here and then of course the lower one. Same thing. Presses right on there. Now we've got our little bracket clip. This is just going to slide into this hole right here. You can give it a little bonk if you want. It's going to press up against the bracket. That's going to go into this hole right there. And then this here right here is going to press up against the bracket. So just try to press it just like that. Give it a loving bonk.
Give them a little wiggle. Nothing's falling out on its own. They're definitely in there. If they're sticking out quite a bit, they're not in far enough. If they really don't want to go in, you could just put a little penetrant in there, but they need to go in. So what this does basically is it holds the caliper from being able to flop around like this, but yet still gives it maneuverability to move around a little bit. All right. Okay, so now we're just going to get our wheel up onto here. Volvo made it fun for you essentially to get your wheel on there because normally you'd put your wheel up, you'd have some studs coming out like this. You could just put your wheel over the studs and the wheel's not going to go anywhere.
Volvo said, "Hey, good luck." So we're just going to have stuff ready. We've got our lug bolt ready. We've got our thin wall 19 millimeter socket ready. We're going to grab the wheel, roll it up to our leg, and then use our AB muscles to lift it up. We'll put it up near where it needs to go. Try to line up the holes and get this one lug bolt through. After we do that, we'll continue on at least get another one in real quick.
Let's get this up here. Line up our holes. I'm holding it up with my leg muscle right now, so that's nice. It's not going anywhere. We'll just get all five of these started in. We'll bottom it out and then we'll torque them down. Okay, so now we're going to torque down our lug bolts. We're going to use our 19 millimeter. We're going to go 103 foot pounds and we're going to do it in a star pattern. Essentially from here to here, here, here, here. Make a star. Don't go around in a circle. For good measure just go around one more time. We're here anyway. Doesn't cost us anything. Small price to pay for safety. So there we are. It's all torqued, and of course to do the other side of the vehicle, you would just repeat all the same procedure. Easy peasy.
Thanks for watching. Visit 1aauto.com your place for DIY auto repairs, for great parts, great service and more content.