WARNING: This product can expose you to chemicals including Lead and Lead Compounds, which are known to the State of California to cause cancer, and birth defects or other reproductive harm. For more information, go to www.P65Warnings.ca.gov.
Lifetime Warranty
This item is backed by our limited lifetime warranty. In the event that this item should fail due to manufacturing defects during intended use, we will replace the part free of charge. This warranty covers the cost of the part only.
FREE Shipping is standard on Orders shipped to the lower 48 States (Contiguous United States). Standard shipping charges apply to Hawaii, Alaska and US Territories. Shipping is not available to Canada.
Expedited is available on checkout to the United States, excluding Alaska, Hawaii and US Territories as well as P.O. Boxes and APO/FPO/DPO addresses. Final shipping costs are available at checkout.
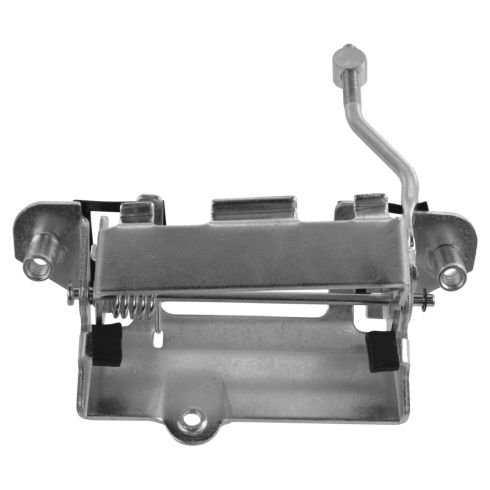
How To Replace Rear Hatch Handle 1998-2003 Toyota Sienna
Created on:
Tools used
Flat Blade Screwdriver
10mm Socket
Ratchet
1. Remove the tailgate hatch handle
Use a screwdriver to remove the grommet located above the pull.
Remove the three 10 mm bolts.
Pull off the panel.
Unclip the latch handle.
Remove the three 10 mm nuts securing the back panel.
Unscrew the two screws anchoring the handle to the back panel.
2. Install the new handle
Screw the handle into the back panel.
Bolt the three 10 mm bolts back in to anchor the back panel to the door.
Clip the latch handle mechanism back into place.
Clip the tailgate panel back on.
Bolt in the three 10 mm bolts and put the grommets back over the bolt cavities.
Brought to you by 1AAuto.com, your source for quality replacement parts and the best service on the internet.
Hi, I'm Mike Green. I'm one of the owners of 1A Auto. I want to help you save time and money repairing and maintaining your vehicle. I'm going to use my 20+ years experience restoring and repairing cars and trucks like this to show you the correct way to install parts from 1AAuto.com. The right parts installed correctly. That's going to save you time and money. Thank you and enjoy the video.
In this video we're going to replace the tailgate handle on this '99 Toyota Sienna, a common problem for all these Sienna's and Sequoias. The original handles were made with plastic. Our new handle is made with metal. The tools you'll need are a 10 millimeter socket and ratchet, a Phillips screwdriver and a regular screwdriver. The biggest design flaw on these Toyota Sienna's is that the tailgate handle is made of plastic. What can happen is it breaks and then your tailgate is stuck shut. You can open it from the inside, now I have it open here but that's just because it's a whole lot easier to film it this way. Basically, you crawl back inside and you'll want a screwdriver and a 10 millimeter wrench or a 10 millimeter socket and ratchet. There's a grommet around the pull here. You just get your fingers in it and it will pull up and off. If you want you can use a screwdriver. There's a little pin that holds it.
On this handle over here which will be way down near the bottom, you reach in with the screwdriver and pull these off. Then underneath those three spots there's three 10 millimeter bolts and remove those. Then once you remove those then you can reach under the middle here and grab it and give it a good pull. Then pull the whole thing right off. Then pull it down out of your way. Then what you want to do is here is your here let me get some light on here is your latch mechanism. It goes on to this cable here. You want to reach in and pull this up and that's what will unlatch your hatch.
Basically you can see here's the window, here's this opening here, reach your finger in there and you can feel it and pull it. Also, actually down here you could once you're down near the bottom, flip this up and that will release your door. Once your door is released you want to remove this nut here and this one right over here, they're both 10 millimeter. You also need to remove this 10 millimeter bolt over here. Then the back panel pops off. There's another clip that holds it there.
It looks like I forgot to video the part where you pull the plastic part above your license plate. Once you remove those bolts that plastic piece comes out and the handle is actually attached to that with two screws. I was able to remove one and then I had to drill the other one which you'll see later.
Here's my handle off and actually you can see I was unable to get the screw out so I actually drilled this one out, which some of you might have to do. I will still have this holding it plus the two bolts on the handle and our bolt here and our clip there. Even though one of the screws is missing it will go back together and function a whole lot better than this one did. You can see here the original handle made of plastic. Our new handle from 1A Auto; it's all die cast, it's all metal so it's a whole lot less, you can hear that, it's a whole lot less likely to break.
I notice you can see here a part of my handle so I'll have to grab that with a pair of pliers and try and get the bolts apart. Hopefully it will break off and get that out of there. You can see we got our broken piece of handle out.
I've got my new handle on here secured with one screw and can't secure it with the other one. Now ideal but we're going to have a working handle, which is a whole lot better than a not working handle. Now we can put the handle up in there. Get this in. Put our three 10 millimeter nuts back on.
Now we can reconnect the cable, which we put up in there. You can see right up here there's a slot. You have to get the cable in, feed it into that slot and then lock it into the bracket here. Before we put everything back together, very nice, before you put everything back together you want to take these side panels off, reach around here and pull them off. Put this up. We'll fast forward through putting those three screws back on and the trim plates back on.
We hope this helps you out; brought to you by www.1AAuto.com, your source for quality replacement parts and the best service on the internet. Please feel free to call us toll free 888-844-3393. We're the company that serves you on the internet and in person.
DHA49948
In Stock
Product Reviews
Loading reviews
5.00/ 5.01
1review
5 Stars
4 Stars
3 Stars
2 Stars
1 Star
1
0
0
0
0
james
December 27, 2021
Somewhat difficut to install because of limited space. It will need some adjusting of the arm screw but perfect fit
Customer Q&A
No questions have been asked about this item.
Customer service
877-844-3393
Monday - Friday 8:00am - 9:30pm ET Saturday - Sunday 8:00am - 4:30pm ET
Lexus is a registered trademark of Toyota Motor Corporation. 1A Auto is not affiliated with or sponsored by Lexus or Toyota Motor Corporation.See all trademarks.
Enter Vehicle Year Make Model
Specify your vehicle's year, make and model to guarantee fit.
Year
Make
Model
Options
Drivetrain
This part doesn’t fit a . Select from parts that fit.