Replaces

This part doesn’t fit a . Select from parts that fit.
Frequently bought together
Part Details
Product Features
Complete Repair in One Purchase - Stop searching for parts individually and complete your repair with a customized kit or set from DIY Solutions.
High-Quality Parts from Trusted Brands - DIY Solutions' kits and sets are selected from the best automotive brands and include hard-to-find and even obsolete parts you may need for your vehicle.
Guaranteed Fit - DIY Solutions ensures its selected parts are quality-tested to guarantee fit and function.
Assemblies may include halogen or incandescent test bulbs that should be replaced before installation.
Item Condition:
New
Attention California Customers:
 WARNING: This product can expose you to chemicals including Chromium (Hexavalent Compounds), which is known to the State of California to cause cancer, and birth defects or other reproductive harm. For more information, go to www.P65Warnings.ca.gov
Lifetime Warranty
This item is backed by our limited lifetime warranty. In the event that this item should fail due to manufacturing defects during intended use, we will replace the part free of charge. This warranty covers the cost of the part only.
FREE Shipping is standard on orders shipped to the lower 48 States (Contiguous United States). Standard shipping charges apply to Hawaii and Alaska.
Shipping is not available to a P.O. Box, APO/FPO/DPO addresses, US Territories, or Canada for this item.
Expedited is available on checkout to the United States, excluding Alaska, Hawaii.
Final shipping costs are available at checkout.


Created on:
Tools used
Tools used
Hi, I’m Mike from 1A Auto. We’ve been selling auto parts for over 30 years!
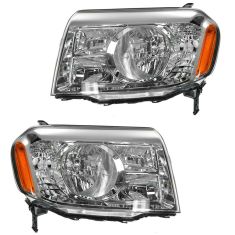
In this video we are replacing the headlight assemblies in a 2010 Honda Pilot. If you need these parts or other parts for your vehicle, click the link in the description and head over to 1AAuto.com.
All right, we're going to start by taking this cover off. I'm going to pull these little pins out. Get this out of the way. I'll take these two off first. Can move this out of our way. Take this one off and take this one off. Just get all those pins you can pull this off and set it aside.
Next we're going to use a 10 millimeter socket extension and ratchet. Take these two 10 millimeter bolts out. We raised and supported our vehicle. You don't have to. It's easier to gain access to everything if you raise it up. Now we're going to move the tire so we don't have to take it off. We'll just turn it to the left, and then there's a Phillips head screw that goes up here. Take that out. And there's a Phillips head screw right here. You're going to repeat these steps for the other side.
Next we're going to use our screwdriver and pull these push pins out. Release the centerpiece and pull down. There's one here, one here, one here, one there, one there, one there and one there. If when you're pulling these out if you break one cause they are pretty fragile, we do sell kits at 1AAuto.com. There's a 10 millimeter bolt right here take that out with a 10 millimeter socket. On ours the plastic is actually cracked but normally you would have to take that bolt all the way out.
Let's try this one, and this is the same, the plastic is cracked but you should take those bolts out. We're going to grab this side of the bumper right here. I'm going to pull out right like that, and then you want to stand in front of the bumper a little bit. I'm going to hit right here to unlock these clips over here just like that, and over here we're going to disconnect the electrical connection down here.
You push on that for the front bumper sensor and then right here there's a fog light bulb. We'll just disconnect the connector while you're still holding the bumper from falling. Then I'll grab a partner to hold it for me and then do the same for this other side. Pull it straight out and then holding it and just push. Pull that out like that. Don't drop it, and then grab these connectors right here. That's for the sensor, and this is for the fog light. The whole thing should come forward.
This is a 10 millimeter bolt right here. We're going to take that out with our 10 millimeter socket extension and a ratchet, and do it by hand once it's loose. Pull it out. Next we're going to take this 10 millimeter bolt out with our socket extension and ratchet. Take these two, there's two 10 millimeter bolts right here. Take those out. And last is a clip right here. Take this pushpin out.
Sometimes you can use some small needle nose pliers. Pull the center out. Pull the clip out. Make sure you want to hold the headlight while you take that last clip out so it doesn't fall. Want to pull this assembly out of the way, and we're going to pull this wiring harness right here up from the bracket right there.
For this one, there's a little clip right here we can push and grab a little screwdriver, loosen that. Pull that connector off. For this. For this side there's a little connector right here. You can push down right there on the lock and pull that out. Put that back in there. We'll just push down on this connector. Pull that out. We'll slide this wire out of that groove. Push down on this lock. Pull the connector out. Slide this out of this groove right here. And then push down on this connector. Shake it back and forth and wiggle it out. You can remove the headlight assembly.
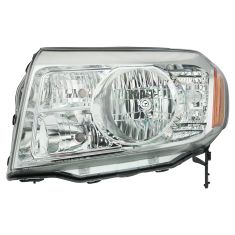
As you can see this is our old headlight assembly. This is our new headlight assembly from 1aauto.com. If you look at the configuration of the lights, everything's the same. The marker is on the side. The turn signal and the headlight is in the right location. The daytime running light and the high beams both match up. When replacing this, you will have to transfer this bracket over to the new one. We'll flip it over. As you can see, the backside is the same. Here's your adjuster right here. What you are going to do is you are going to transfer the bulbs over from your old headlight. Get yours at 1AAuto.com and you'll be ready to rock and roll.
We're going to transfer the bulbs over but first we're going to pull these covers off. You can use a screwdriver or a pick. Just peel this off, and we'll transfer the bulb over from here. This one's the high beam. Make sure you don't touch that. Push this down and lock it in. We'll move onto the next one. This is the DRL. Pull this from the old one. Install it in the new one. Lock it in.
Next, pull this headlight out. Pull the bulb out and transfer it over. Next the turn signal. Get that one in. Lock it in. And then pull this last one. This is the marker. Pull that out. Lock that in as well.
Next we're going to transfer over the bracket, but first we want to pull this foam piece off. We'll take a 10 millimeter socket extension and ratchet, take this bolt off. Pull that bolt out. You can slide this bracket off, move it over to our new one. You're going to line, there's a little pin right here and right there that lines up with that. You're going to line the hole up over here. There's a pin in there as well. Put our bolts back in. Snug that up. Remember it's plastic so not too tight. Just make sure it doesn't wiggle.
Now that our headlight's all set to go install in the vehicle. All right, now we're going to install our new headlight assembly. Going to start with the connectors. This blue one goes down here to the high beams. Line that up. Just click that in. Click this wiring harness retainer right here. Push down. And the daytime running light bulb connector right there. Can slide this harness retainer right here. And then the headlight bulb. And the turn signal bulb. Click that in. And then our marker bulb. And this harness is going to slide on right here. Push that down like that.
Now I can slide this up. You're going to want to make sure to get this bracket up top there. That's all lined up. Hold that and we'll put a bolt right here. Get these other bolts started before we tighten any down. Get this bolt lined up. Get that started. Before I tighten all those bolts up I'm going to push this pushpin in. Lock that down. Now I'll snug up all these bolts. Just snug. Remember it's plastic you don't want to tighten it too much. Repeat these steps for the passenger side. It's recommended to replace these in pairs so that you don't have one that looks brand new and one that looks foggy and old.
Okay, we'll reinstall the bumper. Get it lined up right there. Before we push it on, you'll reconnect the electrical connectors hook up the fog light and then hook up the front sensor connector. All right, I'm going to line up the center up here first and then line up the headlight area next over here on the side. You want that all lined up so just snap that in like that. Snap those in like that. This is going to go on the inside like that and same for the other side.
This piece right here is going to go in there like that. You may have to lift up on the bottom of the bumper a little bit. That's all lined up. All right, so we're going to put this screw back up in here get that started. Once you get it started, you want to line your bumper up so that it's flush up with your fender. Make sure it looks good over here. Might have to adjust it a little bit so it looks pretty good like that. Take this Phillips head screw and stick that one in here. Do the same for the opposite side.
So half of our undercarriage cover was in the right spot and the other half isn't, so we're going to just pull this forward like this. Just like that. You're going to reinstall these two 10 millimeter bolts that are on the end. Ours were broken so they're still there. Then we're going to install the push clips. Take these and push that in just like that. Install that last one. You're going to reinstall these bolts up here. Start with one right there. Go to this one. Once you get them both in, then we can snug them up. Make sure this is lined up with the headlight good right there. Now install this cover over here. Pull this out of your way. Then this goes over on top, and we can put all the push pins in.
When you replace your headlights you're going to want to adjust them. Take a number two Phillips screwdriver. You stick it in right here, and you can adjust them up and down.
This is a basic tutorial on how to aim the headlights on your vehicle. Find the axis of your headlights. This is usually indicated with a small dot or the headlight bulb size on the lens. If not, it's the actual center point of your headlight bulb. Transfer this mark to a vertical wall with a preferably dark color that'll allow you to back up 25 feet. Pull up and find the center line of your vehicle as well as the center line of your headlight axis. Mark the wall with the height of the headlights and a straight line going across at that axis height. Back your vehicle up 25 feet from the wall to the front edge of your vehicle's headlights.
Turn your headlights on and locate the adjusting screw usually on the back side of your headlights. You'll want to rotate this until the passenger hotspot or focus of the beam is approximately two inches below the line and the driver's side is four inches below the line. We change the heights on each side so you can still get a good beam to the offside of the road on the passenger side and have the driver's side low enough to not blind oncoming traffic.
Thanks for watching. Visit us at 1AAuto.com for quality auto parts, fast and free shipping, and the best customer service in the industry.
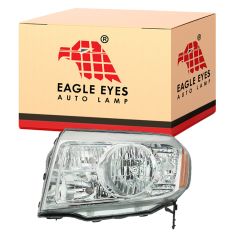
Replaces 2009-11 Honda Pilot Driver Side Headlight Assembly Eagle Eyes HD566-A001L
$127.95
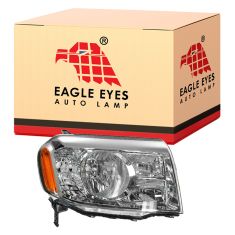
Replaces 2009-11 Honda Pilot Passenger Side Headlight Assembly Eagle Eyes HD566-A001R
$127.95
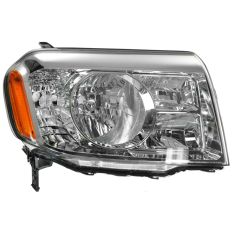
Replaces 2009-11 Honda Pilot Passenger Side Headlight Assembly DIY Solutions LHT02297
$127.95
Replaces 2009-11 Honda Pilot Driver Side Headlight Assembly DIY Solutions LHT02296
$124.95