Brought to you by 1AAuto.com, your source for quality replacement parts and the best service on the Internet.
Hi, I'm Mike from 1A Auto. I hope this how-to video helps you out, and next time you need parts for your vehicle, think of 1AAuto.com. Thanks.
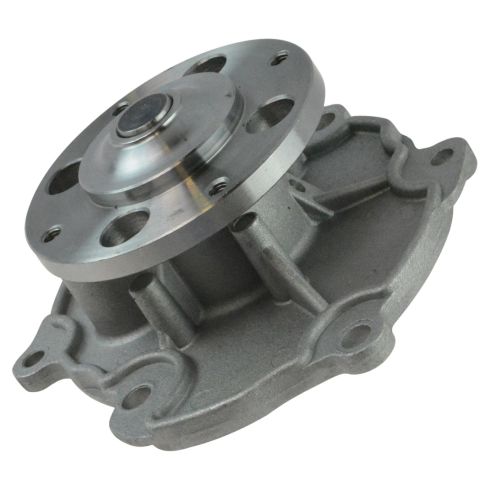
In this video, we show you how to replace the water pump on this 2005 Cadillac CTS with the 2.8L V6. You'll need a new water pump from 1AAuto.com, a pair of pliers, a flat blade screwdriver, a 10mm socket, a ratchet, a half inch ratchet, a drip pan, emery cloth, a funnel, coolant, a torque wrench, and jack and jack stands.
Start off by removing your coolant reservoir cap. Next, you want to raise your vehicle, and then you want to remove these eight clips that hold in this panel here. Now, we use wire cutters, but don't actually cut the clips. You just want to pull out the center, and then they pull out. We'll fast-forward as Don does the others. Next, you want to remove these six clips here. For these ones, you just want to use a flat blade screwdriver, pry out the center, and then you want to pull it out.
We use some pliers to help pull those out. We'll just fast-forward as Don removes the other five. Once those clips are out, just remove that panel. Put a drip pan underneath the lower radiator hose, push the teeth on the hose connector together with a pair of pliers, and let the coolant drain out. You can hold it like this until it drains, or you can slide the clamp back and pull the hose off and let it drain right into the drip pan. Once that's finished, remove your oil cap, and pull that engine cover off.
Now, disconnect this hose from your air intake box, and loosen up this hose clamp here, and this hose clamp down here. You can see I'm just using a flat blade screwdriver to loosen those up, and then the air intake box pulls up and off. Using a half inch ratchet, you just want to put it into that square there and push down. That will release the slack on the belt. Then, you want to pull that belt off the pulleys and slowly let up on that ratchet. Then you have to tuck the belt behind the tensioner to get it out.
Right here is your water pump. On the pulley you'll see these four bolts. These are 10mm. Just go ahead and remove them. A helpful tip: loosen those bolts before you take the serpentine belt off. The pulley will pull right off. Now, using the new water pump as a reference, you can see there are six bolts that hold the pump in. We can show you some of them on the old water pump. You see there's two right there. They go all the way up and around. These are 10mm. Just go ahead and remove each of those. When you pull your water pump out, there will be coolant trapped behind there, so make sure you have your drip pan in place. Then, remove the gasket from the water pump. Use an emery cloth to just clean up where the gasket went.
Old water pump on the right, new one from 1A Auto on the left. You can see they're identical, and will mount up exactly the same. Take your new water pump, put the gasket into place, and feed the water pump down into place. Just twist those bolts in by hand to get it held on there. Now we'll just fast-forward as he replaces the other five bolts and tightens all of those up.
Now, go around and tighten each of those six bolts to 11 foot-pounds, and then go around again tightening each of them to 22 foot-pounds. Now put your pulley back into place and replace those four bolts. We'll just fast-forward as Don does this. Here's a belt diagram for this car. You just want to use this as a reference when you got to put your belt back on.
It's hard to show what we're doing here, so just use this picture. You want to start off by just feeding it down and under that crank, and fitting it up behind the tensioner pulley, and then over the actual pulley. Then, using that half inch ratchet, you want to push down on the tensioner. That will allow you to put your belt back up over the water pump. Then, carefully let up and remove that ratchet. Now, torque the pulley bolts on your water pump to 11 foot-pounds.
Next, put that intake box back into place and reattach those hoses. Then just tighten up those hose clamps. To replace that hose into the intake now, you want to lineup these holes with these pins and the pin on your engine cover with the hole on the engine. Remove your oil cap, push this down into place, and release your oil.
Now, replace that panel and replace those six clips along the front. Just push them in with the center still popped up, and push the center in to lock them. Then replace those other eight clips. Now, fill your coolant reservoir bottle up to the max filling. Now, replace the cap and start the vehicle, and let the coolant run through the engine. On these Cadillacs it's known that it's a little tough to get the air out of the coolant, and so you don't want to run the engine a little bit. Make sure your heat starts working. If your heat doesn't start working, that's a sign that the coolant is not flowing. So, run your engine; check the coolant level often. It actually did take up to about an hour to an hour and a half to work the air out of the system in this vehicle.
We hope this video helps you out. Brought to you by www.1AAuto.com, your source for quality replacement parts and the best service on the Internet. Please feel free to call us toll-free, 888-844-3393. We're the company that's here for you on the Internet and in person.