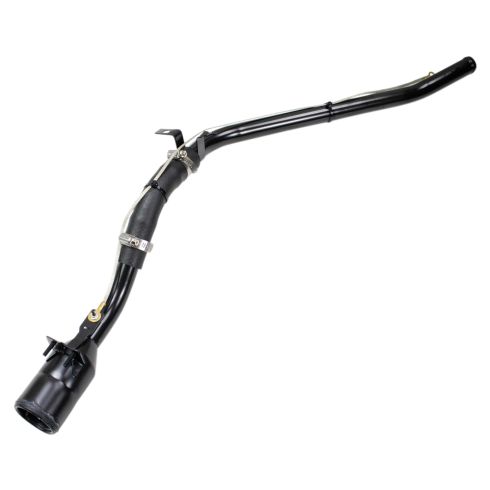
1AFMX00324-Chevrolet GMC Buick Olds Isuzu Fuel Tank Filler Neck TRQ FNA69735

Replaces
2004 Isuzu Ascender Fuel Tank Filler Neck TRQ FNA69735

Frequently bought together
Product Reviews
Loading reviews
3.80/ 5.0
5
5 reviews
Great item. Great service
April 23, 2021
Will be using 1A alot more in the future. They care more about customer service than any other auto part seller out there!
November 2, 2021
good quality
TRQ Envoy Filler Neck
December 1, 2022
The fuel filler takes a little tweaking to fit oem mounting tab under body. Be aware that you WILL HAVE PROBLEMS if you use old gas cap. Buy a new oem type gas cap so the cap can conform to the "threads" of the new filler tube.
January 9, 2023
I had trouble finding a gas cap that would push down in and turn to click. The actual filler pipe installation went okay though.
February 23, 2023
Checked gas cap before installing, didn't fit, had to file stops down inside neck for it to fit. Installed part, okay, at gas station nozzle wouldn't fit in lower opening in neck!! Now I need to remove from vehicle and try to open it up so it doesn't take me an hour to fill my tank. Very poorly manufactured part !!! I do not recommend unless you are capable of modifying it
Customer Q&A
Anyone have a problem using oem gas cap on this filler neck?
December 6, 2021
10
I just replaced the filler neck and my 04 Trailblazer gas cap does not fit.
Wonder which gas cap is compatible with this filler neck?
December 1, 2022
Jacob J
10
Hello, I am sorry to hear you are having trouble fitting the OEM gas cap. I have emailed you to assist further, you can also contact our Customer Service at 888-844-3393 for assistance.
December 1, 2022
Ricale A
Did they resolve the problem of the gas cap not fitting correctly?
November 1, 2023
10
Yes, the gas cap should be a direct fit.
November 2, 2023
Emma F
Isuzu is a registered trademark of Isuzu Motors Ltd. 1A Auto is not affiliated with or sponsored by Isuzu or Isuzu Motors Ltd.
See all trademarks.


