Brought to you by 1AAuto.com, your source for quality replacement parts and the best service on the Internet.
Hi, I'm Don from 1A Auto. I hope this how-to video helps you out, and the next time you need a part for your vehicle, think of 1AAuto.com. Thanks.
In this video, we're going to show you how to replace the alternator on this 2002 Chevy Suburban with a 5.3-liter V8 engine and 130 amp alternator. It's the same part and similar process on these Suburbans from 2000 to 2002. The items you'll need for this includes a new alternator from 1AAuto.com, a 10mm and 15mm socket, a ratchet, a flat blade screwdriver, pliers, a pry bar, an 8mm wrench, and a hammer.
To start off, you want to disconnect your negative battery cable. Use your 8mm wrench and just loosen that up. Then it just pulls free, and set it aside. Next, you want to loosen up this hose clamp here, and then loosen up the hose clamp right over here. Now, you can pull this intake hose forward and pry this part free, and lift it up. Now, using your pair of pliers, just push that clip and disconnect that lower hose, and set this intake-set aside. Now, using a 15mm socket and ratchet, put it on the tensioner and just pull the tensioner up, and pull that belt off your alternator, and then carefully release the tension on the ratchet. Pry up this tab, disconnect your alternator harness, pull back this rubber boot, and remove this 10mm nut. That wire just pulls free.
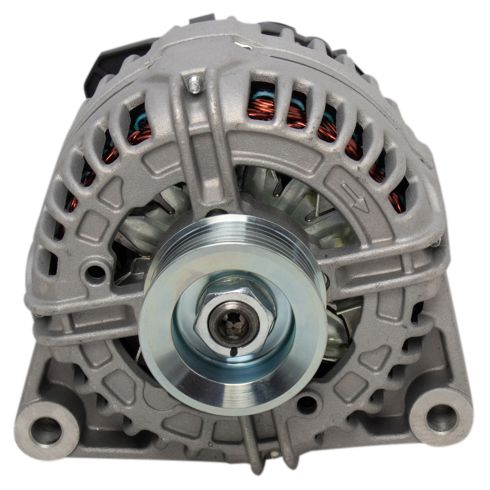
Now, remove these two 15mm bolts. We'll fast-forward as Don does that. Using your pry bar, just pry the alternator up and out. Once you do one side, just repeat the process on the other side of the alternator. On the left is the old alternator; on the right is the new one from 1A Auto. You can see they're identical, and they're going to fit exactly the same.
Put your new alternator down into place, and then pry it until you can line up those holes, and then push your first bolt in. The first one's going to be a little more difficult than the second one will be, because you're still trying to line everything up. Just use a hammer to help knock that bolt in. Once you get to about this point right here, you're all set. The second bolt is going to be a lot easier to put in. Now we'll just fast-forward as Don tightens those up with the 15mm socket and ratchet.
Reconnect the harness to your alternator. Put this wire back into place, replace that 10mm nut, and then put that boot back over it. Again, use your 15mm socket and ratchet on the tensioner, and then pull your belt back up and on to the alternator. Now, take this upper intake assembly and push it back down into place. Then push it back onto the engine. Re-clip that lower hose, and then reconnect this hose, and tighten up those two hose clamps. Now replace your negative battery cable and tighten it up with your 8mm wrench, and you're all set.
We hope this video helps you out. Brought to you by www.1AAuto.com, your source for quality replacement parts and the best service on the Internet. Please feel free to call us toll-free, 888-844-3393. We're the company that's here for you on the Internet and in person.