Replaces
This part doesn’t fit a . Select from parts that fit.
Frequently bought together
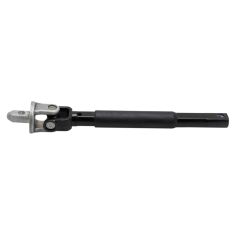
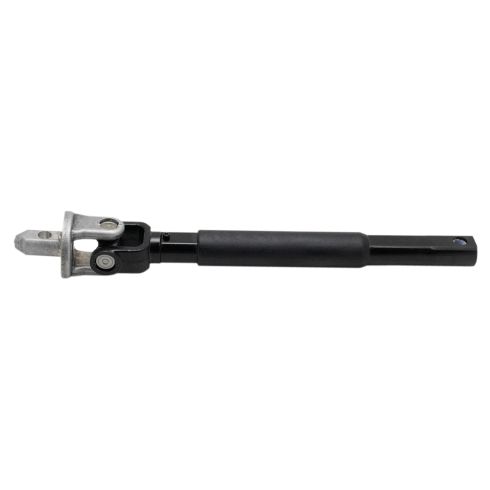
Updated Design: While this part may look different from the one originally installed on your vehicle, it is guaranteed to fit and operate as well or better.
Item Condition:
New
Attention California Customers:
 WARNING: This product can expose you to chemicals including Lead and Lead Compounds, which are known to the State of California to cause cancer, and birth defects or other reproductive harm. For more information, go to www.P65Warnings.ca.gov.
Lifetime Warranty
This item is backed by our limited lifetime warranty. In the event that this item should fail due to manufacturing defects during intended use, we will replace the part free of charge. This warranty covers the cost of the part only.
FREE Shipping is standard on Orders shipped to the lower 48 States (Contiguous United States). Standard shipping charges apply to Hawaii, Alaska and US Territories. Shipping is not available to Canada.
Expedited is available on checkout to the United States, excluding Alaska, Hawaii and US Territories as well as P.O. Boxes and APO/FPO/DPO addresses. Final shipping costs are available at checkout.


Created on:
Tools used
Brought to you by 1AAuto.com, your source for quality replacement parts and the best service on the Internet.
Hi, I'm Mike from 1A Auto. I hope this how-to video helps you out, and, please, next time you need parts for your vehicle, think of 1AAuto.com.
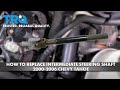
In this video, we're going to show you how to replace the upper steering shaft on this 2002 Chevy Suburban and it's the same part and similar process on these Suburbans from 2000 to 2006. The items you'll need for this are a new upper steering shaft from 1AAuto.com, 15 millimeter socket and ratchet, 15 millimeter wrench, torque wrench and grease.
Start off by removing this 15 millimeter bolt right here on the steering shaft. You can see, Mike uses a wrench to break it free, but then, what you want to do is put the wrench on one side and the socket and ratchet on the other and just remove that bolt the rest of the way. Now just above the gas pedal and brake pedal, you'll see the other end of the steering shaft and you want to just remove this 15 millimeter bolt right here. Now, we'll fast forward as Mike does this and you can see he's just using the wrench on this part. That's really the easiest way to do this. Now pull the bolt free. Then, pull the steering shaft free, and then pull this end free. Then, go back inside the vehicle and then just pull it out from that end. It should pull right out.
On the bottom, is the old steering shaft. Above it is the new one from 1AAuto. You can see they're identical and they'll fit exactly the same. You need to make sure that the new steering shaft will fit in to the lower shaft and sometimes, due to over tightening, the lower shaft could be pinched in a little bit. So, we just fit it in there from the top without putting it into the vehicle to make sure that it'll go through. Now, feed the steering shaft in from the inside of the vehicle. You do have to maneuver it around to get it to go through the boot. Then apply grease to this end of the steering shaft and then, push the upper steering shaft back into the lower steering shaft. To make the process a little easier, you can use needle nose pliers. You can just kind of pry the hole down while someone pushes from the inside and you don't have to have someone pushing from the inside but it does kind of speed up the process a bit. Using needle nose pliers, just keep the hole for the bolt lined up and then just push the bolt into place. Then we'll fast forward as Mike tightens that up. Then just torque this bolt to 37 foot-pounds and then pull up on the upper steering shaft and push it up into place. Then just push the bolt back into place and then put your key in the ignition and just turn your steering wheel so that the bottom of the bolt is facing down so it just makes it easier to get the nut on there and in place. Then just tighten that up, and just torque it to 35 foot-pounds, and then you're all set.
We hope this video helps you out. Brought to you by www.1AAuto.com, your source for quality replacement parts and the best service on the Internet. Please feel free to call us toll-free, 888-844-3393. We're the company that's here for you on the Internet and in person.
Tools used
You wanna start by locking the steering wheel, and make sure the wheels are straight. You can take the seatbelt and go through the steering wheel to prevent it from spinning, because you don't wanna mess up the SIR coil. And plug it in, and that'll be good enough. And find the steering shaft, the intermediate shaft, and there's a bolt that goes through it with a nut. Use a 15-millimeter wrench, loosen this up. And take that nut off like that, and then take the bolt off.
Then you're gonna slide the intermediate shaft towards the cab of the vehicle and separate it from the lower steering shaft. You can see that's separated right there. Now, under the dash, I need to remove the top part of the intermediate shaft. There's a nut right here with a bolt that goes through. Take the nut off, use a 15-millimeter wrench. Loosen this up. There we go. And take that bolt out. And you can slide the shaft down, off the steering column.
So slide the intermediate shaft down, and then, on the other side of the accelerator pedal, just grab the shaft and just try to slide it past there. And you might have to push it from the outside. All right. You can slide it down and beside the accelerator peddle. Now, I'm gonna take the intermediate shaft and go around the accelerator peddle this way. And just slide that through the firewall.
Come out here. And slide that through there. And get this lined up. You could always take the accelerator pedal out of the way, that would make it a little easier as well. And take this bolt, get this started. And get the nut started. And tighten that down. If you can get a torque wrench in there, which it's pretty tight, you're gonna torque that to 46 foot-pounds. If not, do the best you can. And get that lined up, and then just slide it down. And then you can get the bolt...get the bolt started. And then you take this nut with the bracket, get that in position. And tighten that down. And then torque that nut to 37-foot pounds. Then the job is all done. You can take the seatbelt off and you're good to go.
Tools used
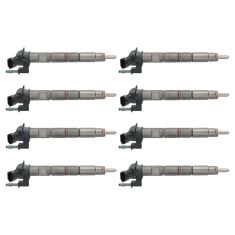
Replaces Chevrolet GMC 8 Piece Fuel Injector Set Bosch 1AEEK01602
$3,263.95

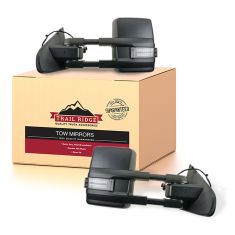
Replaces Chevrolet GMC Driver & Passenger Side 2 Piece Mirror Kit Trail Ridge TR00283
$654.95

Replaces Chevrolet GMC 6 Piece Mirror Kit with Chrome Mirror Caps with Textured Black Mirror Caps Trail Ridge TR00284
$654.95
Replaces 2015-16 Chevrolet GMC Driver & Passenger Side 2 Piece Mirror Set Trail Ridge TR38919
$639.95
Replaces Chevrolet GMC Driver & Passenger Side 2 Piece Mirror Kit Trail Ridge TR00285
$634.95
Replaces Chevrolet GMC Driver & Passenger Side 2 Piece Mirror Set Trail Ridge TR38916
$631.95
Replaces Chevrolet GMC Front & Rear Ceramic Performance Brake Pad & Rotor Kit TRQ Performance BKA19873
$619.95
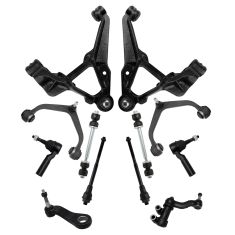
Replaces 2011-19 Chevrolet GMC Front 12 Piece Steering & Suspension Kit TRQ PSA72532
$619.95
Replaces Chevrolet GMC Driver & Passenger Side 5 Piece Mirror Kit with Chrome Mirror Caps with Textured Black Mirror Caps Trail Ridge TR10145
$609.95

Replaces Chevrolet GMC Driver & Passenger Side 5 Piece Mirror Kit with Chrome Mirror Caps with Textured Black Mirror Caps Trail Ridge TR10143
$609.95