Replaces
This part doesn’t fit a . Select from parts that fit.
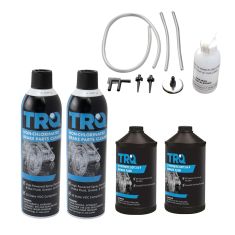
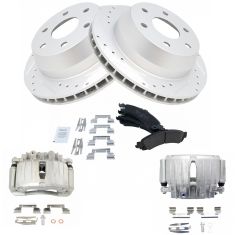
Frequently bought together
Part Details
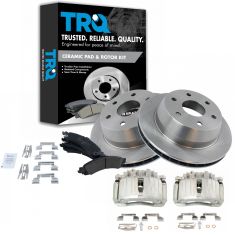
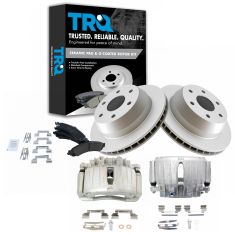
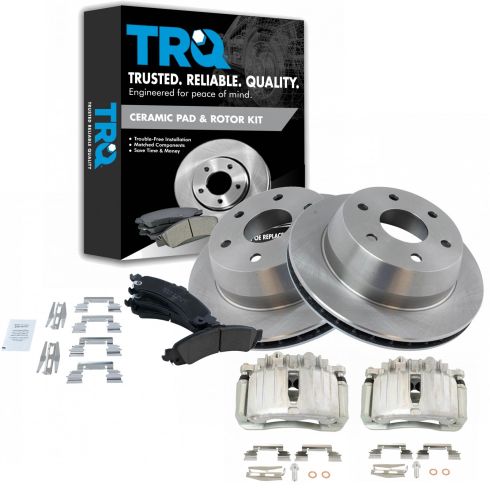
TRQ brake kits are designed to restore your brake system to like-new performance. TRQ brake pads are positive molded, thermal scorched, chamfered, and utilize a multi-layer shim for enhanced performance and service life. TRQ rotors have a non-directional finish that reduces the break-in period for new rotors as well as reducing vibrations throughout the rotor’s lifecycle. All products are fit and road-tested in our Massachusetts R&D facility to ensure we deliver on our promise of Trusted Reliable Quality.
Product Features
Premium Positive Molded Brake Pads Features and Benefits
Item Condition:
New
Attention California Customers:
 WARNING: This product can expose you to chemicals including Lead and Lead Compounds, which are known to the State of California to cause cancer, and birth defects or other reproductive harm. For more information, go to www.P65Warnings.ca.gov.
Lifetime Warranty
This item is backed by our limited lifetime warranty. In the event that this item should fail due to manufacturing defects during intended use, we will replace the part free of charge. This warranty covers the cost of the part only.
FREE Shipping is standard on orders shipped to the lower 48 States (Contiguous United States). Standard shipping charges apply to Hawaii and Alaska.
Shipping is not available to a P.O. Box, APO/FPO/DPO addresses, US Territories, or Canada for this item.
Expedited is available on checkout to the United States, excluding Alaska, Hawaii.
Final shipping costs are available at checkout.


Created on:
Tools used
I'm gonna take the center cap off. Use a straight blade screwdriver to get that off. Use a 22-millimeter socket, take off the lug nuts. Take the wheel off. Take these two caliper bolts out. I'm gonna use a 12-millimeter socket and then a 16-millimeter wrench just to hold the slide from spinning. Loosen these up. Now, just use a screwdriver, pry the caliper off. Pull it out. Then you can use a caliper hanger and just support it from the upper control arm right there. Just make sure there's no tension on the hose. Slide it over here. Take the brake pads off. Just use the same straight blade screwdriver. And take an 18-millimeter socket, take these 2 caliper bracket bolts up. Take these bolts out and slide the bracket right off. Now, take the rotor off. If it's stuck on there, just take a hammer, give it a tap in these areas. Just try not to hit the studs. Keep it loose. Try not to breathe any of that in and slide it off. I'm just gonna clean up this surface right here. You can use a wire brush or some type of grinding wheel. Just be careful, you don't wanna take too much material off. Just get some of the rust off. Take a little anti-seize, just put it on the hub area right here. Now, we're just gonna put the rotor on backwards first and we're gonna clean off the surface. Use a little brake parts cleaner. There is a protective coating on this, clean that up. You can clean up the inside of the drum area as well for the parking brake. Flip that around and clean off this area as well.
When you go to put the rotor on, you may have to adjust the parking brake. You can spin that wheel either forward or backward and...or you can either tighten it or loosen it. Just slide the rotor on just to make sure it spins good. And then double-check with your parking brake and adjust accordingly. Now, take these pad clips off or pad slides or sometimes they call them anti-rattle clips. Just use a straight blade screwdriver. Use a wire brush, clean up any rust built up, right here, and on the other side. With that cleaned up, and then just take a little brake caliper grease, give it a nice thin coat. It's gonna keep the moisture out, keep it from rusting as bad as it was. Then take these clips and slide it in position. Put more caliper grease, just a nice thin coat there and there, wherever the pads are gonna contact it. And then do the same on this side. I'm gonna take these caliper guide pins out. Use a little brake parts cleaner and a rag, clean these up. And I'll also spray a little brake parts cleaner down there. Clean those up with a rag as well. You can drain anything out. And take some brake caliper grease, coat the pin, put it back in. Make sure it seals, and do the same on this one. Slide the brake caliper bracket in place, put the bolts in. You can use a little thread locking compound on the bolts. Now, I'm gonna torque these bolts to 122 foot-pounds.
Now, I'm gonna install the brake pads. Make sure you have the brake pad warning indicator facing up on the outside and also on the inside. Now, take the brake caliper off, take the hanger off. Now, I have to compress the caliper, so use a brake caliper compressing tool. Just compress it really slow. This is gonna push the fluid through the hoses, back through the lines, back up to the master cylinder, and into the reservoir. Just go nice and slow. All right, if that's compressed, pull the compressing tool out. Now, we have a new little bracket right here. It comes with the brake kit. Just take a straight blade screwdriver, this little tab right here, just push in on that tab. Slide that off, take the new one, slide it in there, and then just push it, lock it in place. So, that's in there just like that. This is just gonna push down on the pads and just keep them from rattling around. Slide the caliper over the brake pads in the bracket. Take the two bolts, install the bolts. You can put some thread locking compound on those bolts, and then use my 16-millimeter wrench, 12-millimeter socket, torque these bolts to 31 foot-pounds. And reinstall the wheel, put the lug nuts on. Now, I'm gonna torque these lug nuts to 140 foot-pounds in a star pattern to tighten the wheel down evenly. Then just go around again, double-check. And then reinstall the center cap. Now, I'm gonna pump the brake pedal nice and slow. There's gonna be an air gap between the caliper piston and the brake pad, so we wanna eliminate that air gap. And once the pedal feels good, then you're all set. Check the brake fluid level in the master cylinder reservoir. There's the minimum line right there and the max line right there, adjust accordingly.
Tools used
Tools used
We're gonna start by taking the wheel off. I'm gonna use a 22-millimeter socket. Take off all the lug nuts. And take the wheel off. Now, we can take these caliper bolts out. I'm gonna use a 12-millimeter socket. Loosen those up. And if the caliper slide is spinning, you can use a 17-millimeter wrench to hold it while you take the bolt out. Now, you can grab the caliper. You might want to rock it back and forth a little bit. That'll compress the piston a little, make it easier to slide off.
And then, you can use a brake caliper hanger, and just hang it from the upper control arm, or you can hang it from the coil spring just like that. Just make sure there's not any tension on the brake hose itself. Now, take the brake pads off, just slide them out of the way. Now, we're gonna take the bracket off. You need to take these two bolts out, use an 18-millimeter socket. Loosen these up. And then, grab the bracket, and just slide it off. Now, you're gonna take the rotor off, just grab it and slide it.
If it's stuck on there, you can take a hammer and just hit in these locations. It's stuck on the parking brake a little bit. Just try to wiggle it. You can just take a prybar and try, and pry in here a little bit. It should get this off. All right. I'm just gonna take two screwdrivers, just try to wiggle this back and forth. There we go, slides right off. Before you put the new rotor on, just take a wire brush, and just clean up some of the rust right here. You could also use a die grinder, and just don't sand down too much. Just get some of the rust off.
Now, you're gonna install this rotor backwards first. Take a little brake parts cleaner, just clean off the backside, and flip it around, and slide it over the parking brake. If you have to adjust the parking brake, you can adjust it right there. And then, spray this side with brake parts cleaner, and wipe it down with a rag. Now, you're gonna take a wire brush, and just clean up this bracket. If you're gonna reuse these clips, just clean these up. If not, take them off.
Just clean up some of this rust right here. Do the same with the other side. And then, just take some brake caliper grease, and just put a nice, thin coat right here. Same on the other side. And then, take these pad slides, and do the same. Put on a nice, thin coat. And then, take these pad slides out. The slide pins. Take a little break parts cleaner and a rag. Just wipe these off. You can clean this out with brake parts cleaner as well. Wipe that down.
Take a little brake caliper grease, and just reinstall it, and do the same with the other side. Now, take the caliper bracket, and line it back up. Brake caliper bolts, get those started. Now, I'm gonna torque these bolts to 122-foot-pounds. Now, I'm gonna put the brake pads on. Now, the warning indicators are gonna go to the top. So, on the inboard pad goes at the top and same with the outboard pad. Just slide them into position. That's good.
Now, I'm gonna take the brake caliper off the hook. Now, I'm just gonna take the old brake pads and a caliper compressor tool and just compress the pistons. You need to push them back into the caliper, and just slowly compress it. You don't want to do it too fast. It's just gonna push the brake fluid through the hoses, through the lines, back up to the master cylinder, and into the reservoir.
All right. That's good. Fully compressed, and just slide it over the brake pads. Put the caliper bolts in. And take a 17-millimeter wrench, and torque this bolt to 30-foot-pounds. Do the same on the top. All right. Put the wheel on, and put the lug nuts on. Now, I'm gonna torque these lug nuts to 140-foot-pounds in a cross pattern so that it tightens the wheels down evenly, and just go around and double-check.
Tools used
Gonna take the center cap off, use a straight blade screwdriver. Take that off. Use a 22-millimeter socket, take off the lug nuts. Take the wheel off. Take these two caliper bolts out. I'm gonna use a 12-millimeter socket and then a 16-millimeter wrench just to hold the slide from spinning. Loosen these up.
Now just use a screwdriver, pry the caliper off. Pull it out. And you can use a caliper hanger and just support it from the upper control arm right there. Just make sure there's no tension on the hose. Slide it over here. Take the brake pads off. Just use the same straight blade screwdriver. And take an 18-millimeter socket, take these 2 caliper bracket bolts out. Take these bolts out and slide the bracket right off.
I want to separate the bracket from the caliper. I'm gonna use a 12-millimeter socket. Take these two bolts out. Now, before we put these anti-rattle clips or brake pad clips on, just use a little brake grease. Just put it right there. That's just gonna prevent some corrosion on the caliper bracket. You can put the clip down and give it a nice thin coat right on top. Do the same for the other side.
And take the caliper bracket, slide it in position. Take the caliper bolts, get those started. You can put some thread-locking compound on them. Now I'm gonna torque these bolts to 122-foot-pounds. Now take the brake pads with the wear indicator facing to the top, slide those in position.
Now we're gonna install this clip on the caliper itself. Just line it up. This piece goes towards the inside and just slips in like that. That looks good. Now take the caliper and line the caliper up. Get the bolt started. Now I'm gonna use a 16-millimeter wrench to prevent the caliper slide from spinning and then tighten this bolt to 31-foot-pounds. Do the same on the top one.
Now we want to top off the brake fluid before we attach the lines or even disconnect the lines because we don't want this brake fluid to go too low, or then it's going to be harder to bleed the system. And take the cap off, wipe it off first with a rag. Make sure you use the appropriate brake fluid. I'm just gonna top it off all the way to the top. That's good. Now we'll just put the cap back on.
Now, if you were not going to replace the brake hose when you're replacing the caliper, you would take this bolt out right here, the banjo bolt, and you're gonna replace the two gaskets on there. You're gonna use an 11-millimeter socket to take those out, put 2 new gaskets on, and then attach it to the caliper. We're gonna replace the hose in our video.
Now, take this cap off of here, take your banjo bolt with some new washers on them or gaskets, copper gaskets. Line this up. And then we're gonna torque this banjo bolt to 30-foot-pounds. Now I'm gonna take the cap off the bleeder right here. Just use a pick or something or even a little screwdriver. And make sure you have a drain bucket underneath or something to catch the fluid and we'll loosen up this bleeder screw. I'm just gonna let it gravity bleed first. Now, take your cap off. Double-check your fluid level before you bleed it, top it off. Now we had the brake line off for about 10 minutes. I only lost about that much fluid, which isn't too bad. So it only went down a little bit. So if you had to go about 10 minutes, that's probably acceptable. Put the cap back on. Now, the fluid started coming out of the bleeder, so it's gravity bled. I'm gonna use a 10-millimeter wrench, snug this up, and then if you have any other calipers or brake hoses to replace, now you can move on to the next one. Do all those before you perform a complete brake system bleed.
Now pump up the brake pedal, just go slow. So the pedal is still very spongy. Now what we're gonna do is hold the brake pedal down and open the bleeder up. So it's someone else pushing down on the brake pedal. Go ahead, push it down. When it's holding, I'm gonna open up the bleeder slowly. You're gonna see some air bubbles come out, then I'll close it, then I'll say, okay, you can let up, and then push it down again and have them hold it, open it up, more air bubbles came out. Let up. And hold it. Some more air bubbles came out. And doesn't look like there's any more air. So I can close this one up, tighten that, put the cap back on, just spray this area down with some brake parts cleaner and move onto the next wheel. Now you want to double-check your brake fluid level. Just use a rag, wipe it down, give it a shake. And there's a max line and a min line. Double-check it. Looks good. Adjust accordingly.
If for any reason before you were bleeding the brake fluid or before you were replacing the calipers, if the fluid level got below the master cylinder, you're gonna need to do an automated bleed afterwards. You're gonna need a scan tool and a pressure bleeder. But if you had the fluid up to par, you should be all set.
Reinstall the wheel. Put the lug nuts on. Now we're gonna torque these lug nuts to 140-foot-pounds in a star pattern to tighten the wheel down evenly. And just go around again, double-check. And reinstall the center cap.
Tools used
Brought to you by 1AAuto.com, your source for quality replacement parts and the best service on the Internet.
Hi, I'm Don from 1A Auto. I hope this how-to video helps you out, and next time you need parts for your vehicle, think of 1AAuto.com. Thanks.
In this video, we're going to show you how to replace the rear brakes on this 2002 Chevy Suburban. We show you on the passenger side, but the driver's side is the same procedure. The items you'll need are new brake pad and rotor kit from 1AAuto.com; 12, 18, and 22 mm socket and ratchet with a piece of pipe for extra leverage; flat blade screwdriver; large C-clamp; torque wrench; brake grease; brake cleaner; and jack and jack stands. Start off by loosening up these lug nut covers and we'll fast forward as Don does this. Once those are all loosened up, you can pull the hubcap free. You want to loosen the lug nuts preliminarily, raise the vehicle and remove them the rest of the way, unless you have air powered tools. Then, you can do it while it's up in the air.
To inspect your brakes, run your finger along the rotor, check for any deep grooves. You can look in here for the life of this brake pad and then through here for the life of the other brake pad. Remove these two 12mm bolts and we'll fast forward as Don does that. Use a large C-clamp. You put it on this end on the back of the caliper and on this brake pad and twist it in. This is going to push the caliper piston in and make it easier to pull the caliper up and off. Remove the large C-clamp, pull the caliper free, and set it aside. Pry up the brake pads.
Remove these two 18mm bolts and use a piece of pipe to help break it free. We'll fast forward as Don removes those two bolts. Pull your caliper bracket off. Pull the rotor off.
On the right is the old rotor and brake pads. On the left are the new ones from 1A Auto. You can see they're identical and they're going to fit exactly the same. Spray your rotor with some brake cleaner and wipe it down. Re-grease your caliper slides and apply brake grease to the tabs on either side of your brake pads.
Slide your new rotor into place and then twist on a lug nut to hold the rotor in place while you put the caliper bracket back on. Put your caliper bracket back into place and replace those two 18mm bolts and we'll fast forward as Don tightens those up. You want to torque these to about 85 foot-pounds.
To reset your caliper pistons, you want to put a brake pad in front of the pistons and twist the large C-clamp until it pushes the pistons in. Push your brake pads back into place and put your caliper back down into place and replace those two 12mm bolts. We'll fast forward as Don does this and tightens them up. You want to tighten these to about 30 foot-pounds.
Put your wheel back into place, and then, replace your lug nuts and tighten them preliminarily and we'll fast forward as Don does this. Lower the vehicle, and torque the lug nuts to 100 foot-pounds in a crossing pattern. Then, replace that hubcap and tighten up each of your lug nut covers.
Before taking the vehicle out on the road, you want to pump the brake pedal until it firms up, and then do a stopping test from five miles per hour, and then ten miles per hour and you're all set.
We hope this video helps you out. Brought to you by www.1AAuto.com, your source for quality replacement parts and the best service on the Internet. Please feel free to call us toll-free, 888-844-3393. We're the company that's here for you on the Internet and in person.
Tools used
Okay, friends, one of the first things we have to do is safely raise and support the vehicle. Once you have your wheels off the ground in the rear, we're gonna go ahead and remove all six of these lug nuts. Remove your wheel. Now, that the wheel is off, we have a clear view of our caliper. If you were to be able to see behind this tin, you're gonna be able to see where the caliper piston is. We need to be able to push that piston back.
To do that, if this shield wasn't here, you can come in between and just slowly pry, or if you do have that shield where you can come is right up along here, just get in between the pad and the caliper, and then slowly pry as well, and just keep working your way back and forth until the piston is all the way in.
The next thing that we need to do is remove our caliper bolts. These are the bolts that are gonna hold the caliper to the bracket. I like to hold onto my slider, so it can't spin. I'll leave that bolt loose, but leave it in for now. Do the same to the other one. I can get both these bolts outta here. Hold onto that caliper so it can't fall. Slide it off. I always like to take a peak at my caliper to make sure that it's not leaking any fluid along where the boot should be. Set this aside. Now, let's remove those brake pads. Set those aside.
Now, we have a clear view of our brake caliper mounting bolts. Remove them both. And then put in a couple threads. Remove the bracket. At this point, you wanna give your rotor a little wiggle. If it doesn't seem like it wants to break free, grab a lug nut, start it on there a few threads. Now, with your hand protection and eye protection, of course, we're gonna go ahead and give it a bonk with a hammer to break it free. You can come right up along the top here.
If that doesn't work and you're not reusing your rotor, of course, you could, of course, bonk on the braking surface, or even better than that, from the backside. Remove your rotor. Now, it's gonna be time to prep the brand new rotor. To do that, you wanna make sure you clean the braking surface. A little bit of parts cleaner, a nice rag. Get off any of the coding that might be on there. It should come with a little coding on there to prevent against rust. Go ahead and flip that over.
Now, you can see the other braking surface. We'll clean that. And now, we also wanna make sure we clean this area right along here, because this is where the emergency brake shoe is gonna ride. Now, at this point, you have a clear view of your e-brake shoe and of course of the axle mating surface where it's gonna connect onto the rotor. If you're axle looks as though it's in poor condition, maybe it's got a lot of rust, or rot, or debris, or anything like that all over it, you'd, of course, wanna sand it down, make it look nice and smooth, and then code it just like this with some copper Never-seez.
Before we go ahead and put the rotor on there, we also wanna take a look at this right here. This is your emergency brake shoe. If you happen to notice that your emergency brake shoe doesn't have any meat on it, maybe it looks a little bit more like this one where it's literally just a solid shoe of metal and it has no more breaking material, you need to go ahead and replace that. And if you need instructional video on how to do that, we have it. We get a nice new coding of Never-seez on there after we cleaned it down. We've got our rotor. Carefully, slide it up on here. We get the rotor on there.
Now, what we need to do is head up our vehicle in neutral, so that we can spin our rear wheels. And we just kinda wanna push in and give this a little spin, and listen for a scraping noise. I can hear a very minor scraping noise there. So that tells me that I don't have very much drag from my e-brake shoes to the inner portion of my rotor. If you put your rotor on, maybe it was a difficult time pushing on, and you went to turn it, and it just didn't want to turn at all, your e-brake shoes are probably over adjusted and you're gonna have an issue.
If that was the case, you would just pull this off and then you can look down here at your adjuster. With the caliper bracket over on the bench, I just wanna show you areas that you're gonna wanna clean up. You wanna clean up this area right along here, and right there, the same right here. If you were to take your tin and you were to put it over it, any area that touches that... If you were to take your tin and put it right over the bracket, you'll be able to see exactly where you need to clean up. Any areas that the bracket is gonna touch up against this tin need to be nice and smooth, and they also need to be lubricated. Just take your little brush, clean up in between there, clean up all this right here.
If there's any really tough areas that don't seem like they wanna break free but they're raised up, use a nice screwdriver or whatever you might have, and just kinda clean up any of that crud or anything like that that might be on there. Now, once you've cleaned all the mounting areas for where your tins are gonna go for your brake pads, you're gonna come right here to the sliders. Grab that, pull it right out. Take your rag, clean it up. Inspect the slider, make sure it's in good condition. If it looks like it's pitted or it's gonna cause restriction going in and out, you either need to clean it up better with a wire wheel or replace it.
If you were to look inside here, you're gonna need that to be nice and clean as well. You can do something as simple as maybe using a bore brush, something like that inside there. Of course, you don't wanna damage the boot, though, so you'd wanna be very careful. Get out as much of the crud as you can inside there, make it as clean as possible.
Maybe even take a nice rag, twist it, put it right inside there, and get out as much as possible. I'm gonna use some nice silicone here. This is Moly grease, it's great for calipers. You wanna make sure you get right up along this area right there. If you can see where that lip is, where my finger is, get some grease all up on there. It's gonna be super important because that's gonna help keep moisture out right along this seal.
Slide that in there. Give it a nice twist. Move along. Those sliders are in there. Let's go ahead and go right along the bracket. Just go right in this area. As you can see, I have it along all ridges going along. Now, I would put my tin on here. See if I can get this lined up. Slide it down. Do the same to the other side. Let's grab our caliper bracket and our caliper bracket bolts. If you have any leftover threadlocker on them, make sure you clean it off. And if you wanna put on some new, it's probably a great idea.
Put this right over. Start in both of your bolts before you tighten either of them down. Now, let's bottom them out and then we'll torque them to manufacturer specification. Let's go ahead and torque these to 148 foot-pounds. Now, it's time to install our brake pads. When you go to install it, you wanna make sure that you have your squealer or the wear indicator facing down. And so I got that one right here. Slide that in. And then my outer pad, I'm gonna do the same thing. My wear indicator facing down.
What I'm doing now is I'm lubricating the mating points where the pads gonna touch up against the caliper. So right along that piston, and then of course, both of these ears. Awesome. See if we can slide this over. Grab your bolts. If you want to use some threadlocker, once again, you're prerogative. Now, let's torque these to 31 foot-pounds. Hold that. There we are. So now, let's just go pump up the brakes.
Now, it's gonna be time to get the wheel up on here. Let's start on those lug nuts. And then we'll bottom them out. And we'll torque them to 140 foot-pounds. Let's torque them. Double-check them if you want. And if you have a center cover, put that on as well. Let's make sure we double check that brake fluid. Give it a wiggle. It looks as though this is low. There's the maximum line. Open this up. We're gonna add some DOT 3 brake fluid. Bring it right up to that maximum line. Make sure you close it back up, down the road, you go.
Tools used
Brought to you by 1AAuto.com, your source for quality replacement parts and the best service on the Internet.
Hi, I'm Don from 1A Auto. I hope this how-to video helps you out, and next time you need parts for your vehicle, think of 1AAuto.com. Thanks.
In this video, we're going to show you how to replace the rear brake pads on this 2002 Chevy Suburban. We show you on the passenger side, but the driver's side is the same procedure. The items you'll need are new brake pads from 1AAuto.com, 12 and 22 mm socket and ratchet, flat blade screwdriver, large C-clamp, torque wrench, and jack and jack stands.
Start off by loosening up these lug nut covers and we'll fast forward as Don does this. Once those are all loosened up, you can pull the hubcap free. Now, you want to loosen the lug nuts preliminarily, raise the vehicle, and remove them the rest of the way, unless you have air powered tools. Then, you can do it while it's up in the air.
To inspect your brakes, run your finger along the rotor, check for any deep grooves. You can look in here for the life of this brake pad, and then, through here for the life of the other brake pad.
Now, remove these two 12mm bolts and we'll fast forward as Don does that. Use a large C-clamp. You put it on this end on the back of the caliper and on this brake pad and just twist it in. This is going to push the caliper piston in and make it easier to pull the caliper up and off. Remove the large C-clamp, pull the caliper free, and set it aside. Pry out the brake pads.
Take your new brake pads and apply brake grease to the tabs on either end of the brake pads. You want to reset the pistons in your caliper so put an old brake pad in there and just twist the C-clamp and it'll push those pistons back in. Push your new brake pads into place, and then, put your caliper back down into place and replace those two 12 mm bolts. We'll fast forward as Don does this and tightens them up. You want to tighten these to about 30 foot-pounds.
Put your wheel back into place and then replace your lug nuts and tighten them preliminarily. We'll fast forward as Don does this. Lower the vehicle and torque the lug nuts to 100 foot-pounds in a crossing pattern. Replace that hubcap and tighten up each of your lug nut covers. Before taking the vehicle out on the road you want to pump the brake pedal until it firms up and then do a stopping test from 5 miles per hour and then 10 miles per hour and you're all set.
We hope this video helps you out. Brought to you by www.1AAuto.com, your source for quality replacement parts and the best service on the Internet. Please feel free to call us toll-free, 888-844-3393. We're the company that's here for you on the Internet and in person.