Replaces

This part doesn’t fit a . Select from parts that fit.
Frequently bought together
Specifications:
If you have any questions about this part fitting your vehicle, please call your local dealer with part number: 88962314. They will tell you if it is the correct part for your truck.
Note: If your vehicle requires a match to an RPO (Regular Production Option) code, you can usually find it on your original window sticker and sometimes either on the inside of your trunk lid, spare tire cover, glove box door, or the front driver's side door shell.
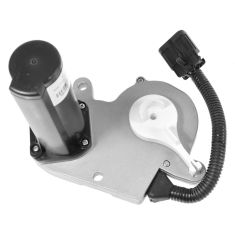
If you are having problems with your 4wd not engaging because of a defective 4x4 shift motor, then this part is for you!! Why search through junk yards hoping to find a used 4x4 electric transfer case shift motor when you can have brand new! Replace that defective transfer case 4x4 shift motor now with a brand new part.
Item Condition:
New
Attention California Customers:
 WARNING: This product can expose you to chemicals including Lead and Lead Compounds, which are known to the State of California to cause cancer, and birth defects or other reproductive harm. For more information, go to www.P65Warnings.ca.gov.
Lifetime Warranty
This item is backed by our limited lifetime warranty. In the event this item should fail due to manufacturing defects during intended use, we will replace the part free of charge. This warranty covers the cost of the part only.
Returns: Parts with electrical components cannot be returned once installed.
FREE Shipping is standard on Orders shipped to the lower 48 States (Contiguous United States). Standard shipping charges apply to Hawaii, Alaska and US Territories. Shipping is not available to Canada.
Expedited is available on checkout to the United States, excluding Alaska, Hawaii and US Territories as well as P.O. Boxes and APO/FPO/DPO addresses. Final shipping costs are available at checkout.

Created on:
Tools used
Hi, I’m Mike from 1A Auto. We’ve been selling auto parts for over 30 years!
Raise and support your vehicle. The driveshaft and the transfer case to the front axle is located here and connects to the front differential here. Before removing the front driveshaft, mark the two components, so that when we reinstall it, we can line them back up the way they came apart. Spray these bolts as best you can with some rust penetrant. Use the 11 millimeter wrench to break these free.
I'm also going to brace the driveshaft with a pry bar. I like this spot. Now that I've broken these free with a regular wrench, I'm going to use an 11 millimeter ratcheting wrench to speed up the process. These are pretty loose now, I'll take them out with my fingers and place those aside so you don't lose them. You need to get the driveshaft out of the U-joint, so I'm just going to pry up on it a little bit. This one's pretty stuck. I'm going to use the large punch and a hammer to try to free it up. There it is, just had to free it up. They get rusted together.
I'm going to spray some more rust penetrant in there. There it is, just had to work it out. This driveshaft can actually be pushed backwards, and then we'll spin it out of the U-joint. With the driveshaft in one hand, I will take a large pry bar or a large flat-bladed screwdriver. I'm going to work it under this boot and try to push it up as I spin the driveshaft. There is a lip it has to get over. I think I've got it. Once the lip is off of there, we can slide the driveshaft out of the transfer case.
Using a 15 millimeter socket, remove the 15 millimeter bolts holding the skid plate on. There is an electrical connector for the transfer case actuator motor on the top of the transfer case. It should be clipped in. Our clip is actually broken, so I can move the connector down. I'm going to push this to unlock it. Pull it apart. Remove the three 15 millimeter bolts holding the actuator in. You may need to use different length extensions with your 15 millimeter socket to reach all the bolts. That one came out. Just had to tug on that one a little bit. Now we just need to maneuver this out. It lifts off the transfer case, and we'll pull it down.
I'm going to wipe the area where the transfer case went, make sure it's clean of all dirt. If you did not put the transfer case in neutral before going underneath the vehicle, now would be the time to put it in neutral. The driveshaft here is locked. Truck's in two-wheel drive. If you reach up to this little actuator, there's a keyway that should be facing the ground or parallel with the ground. That will be in neutral, so we're going to turn it just counterclockwise. Very easy to turn with my fingers. Now this keyway is facing the bottom, and this driveshaft will spin freely.
The transfer case is in neutral. The new actuator motor is set up to start in neutral, so we'll line up with the three holes and the keyway, with the transfer case in neutral when you install it. This is our old transfer case actuator motor. It has a gasket on it. We can reuse this gasket. We're going to clean it up. It just pulls off. I'll put that aside for now.
As you can see, compared to the new transfer case actuator motor from 1AAuto.com, they are identical: same style connector; same three mounting holes; same motor. Over here in the new part, it ships with this plastic piece in here to lock it in place. You want to remove that before you install it.
This keyway that's in here and the keyway that's in the new one is in a little bit different position. The new one should be already set up in neutral. That's why we set our transfer case to neutral. This part looks really good. It'll bolt up and work great for us. I'm just going to use some glass cleaner, clean up our gasket.
Install our gasket under the new actuator motor. Figure out the way it lines up. When reinstalling the actuator motor for the transfer case, there's a dowel pin at the top. I've placed a little bit of grease all over it. Just make sure that you slide the top hole on the actuator motor over the dowel pin when installing it. Slide this up into position. I have to move some stuff around the connector. Try to keep the gasket in place. Basically just feel around until it gets over the keyway and the dowel. It should slide on there with not much resistance. Start reinstalling the top bolt. Get the bottom bolt captured. I got my 15 millimeter socket ratchet.
Start by tightening the top bolt first. Bring this bolt down just so it's tight. We will torque these at the very end. Tighten the bottom bolt. Tighten the middle one until it stops. Torque these to 15 foot pounds. Torque the bottom one and the middle one. Reconnect the electrical connector. We've got our body side connector here, another connector on the actuator motor. Plug them in together. Make sure they're locked. Our new connector comes with a new push lock tab to hold it in place. The old one is broken off. Up here on our little bracket in the top of the transfer case, I'm going to take some side cutting pliers and just cut it out of there and stick our new connector back where it belongs. I just cut it off with some side cutting pliers, and the other bit fell off. We'll take our new one, push it up. Clip it right back in the harness hole there where it's supposed to go. Reinstall the skid plate. You get all the bolts caught. Take the 15 millimeter socket extension. Tighten these down.
So we're going to line up our match-marks that we made earlier: this one here to this one here. But first, I'm going to slide it up over the cross-member. Guide the driveshaft into the transfer case to line up the splines, and it'll slide right in. Push it in, push the boot over. It'll go into a little channel, it'll lock. That's secure there. Now we can go back up, putting our front driveshaft into the differential. We may need to spin this around, but just be aware that we need to match up our lines that we made before. See if I can get this in here.
This actually has a little bit of play. You can go backwards a bit. Made this up like this. Just kind of move the U-joint around. Okay, so over here now we've got our match-marks, they're in the same spot. We're going to pull the driveshaft out and seat it into the little U-joint cups. Reinstall our bolts and the brackets that hold the U-joint on. Brace the driveshaft with a pry bar. Torque these bolts to 19 foot-pounds. Driveshaft is reinstalled.
Thanks for watching. Visit us at 1AAuto.com for quality auto parts, fast and free shipping, and the best customer service in the industry.
Tools used
Before you start this job, you want to make sure the vehicles in four-wheel high. You may have a different selector switch, and also put the parking brake on, and chuck the rear wheels if you're not lifting the vehicle completely off the ground. And it's a good idea to have the front wheels off the ground.
We're gonna take this four-wheel drive motor off the transfer case. We are doing another job that's why this bar is not in the way. Normally you would have this bar up in the way so it'd be a little bit tighter when you're working on it. What we wanna do is disconnect the connector right here, just push down on the tab, slide that off. There's the connector right there. Now there's a bolt right here, and there's three bolts on the motor housing itself. Take this bolt off here. Use a 10 millimeter socket.
And I'll take these bolts out. I'm gonna take those bolts out. And just gently underneath here, I'm gonna use a pry bar. Just be careful. You don't want to break the case. Loosen that up and just slide it off. I'm just gonna use a scraper. Just scrape some of the sealer that's on the case. Just be careful. Just wipe it down with a little brake parts cleaner. Just take a little RTV sealer. Just put a nice thin bead all the way around here.
Now take the new encoder motor. You may have to rotate the shaft right there to make it line up. But give it a try first and that's lined up. That's good. And take the bolts, get the bolts started. Now we're going to torque these bolts to 89 inch pounds. Now take the connector, line it up, and lock it in place.
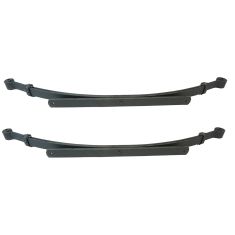
Replaces Chevrolet GMC Rear Driver & Passenger Side Leaf Spring 2 Piece Set Dorman OE Solutions DMFSK00035
$824.95
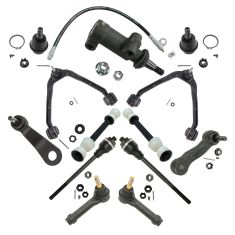
Replaces Chevrolet GMC Cadillac Front 13 Piece Steering & Suspension Kit MOOG MGSFK00141
$704.95
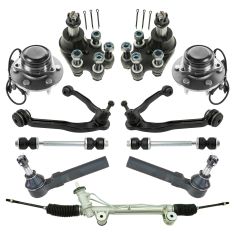
Replaces Chevrolet GMC Front 11 Piece Steering, Suspension, & Drivetrain Kit TRQ PSA28981
$654.95
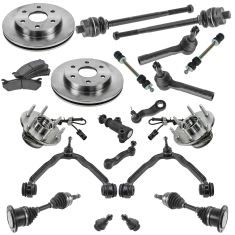
Replaces Chevrolet GMC Cadillac Front Steering, Suspension, & Brake Kit TRQ PSA64825
$634.95
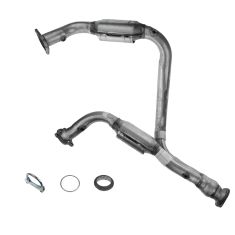
Replaces Chevrolet GMC Cadillac Front Driver & Passenger Side Catalytic Converter and Pipe Assembly 2 Piece Set DIY Solutions EXH00645
$589.95
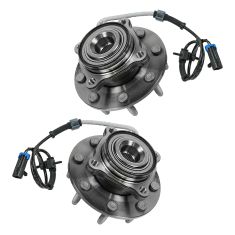
Replaces Chevrolet GMC Hummer Front 2 Piece Wheel Bearing & Hub Assembly Set Timken TKSHS00304
$564.95

Replaces Chevrolet GMC Front & Rear 21 Piece Steering, Suspension, & Drivetrain Kit TRQ PSA38054
$549.95
Replaces Chevrolet GMC Cadillac Hummer 8 Piece Ignition Coil Set ACDelco ACERK00006
$537.95
Replaces Chevrolet GMC Front 5 Piece Steering & Drivetrain Kit TRQ PSA36714
$524.95
Replaces Chevrolet GMC Cadillac Ceramic 22 Piece Steering, Suspension, & Brake Kit 12oz TRQ PSA72850
$519.95