Replaces
This part doesn’t fit a . Select from parts that fit.
Frequently bought together
Part Details
Item Condition:
New
Attention California Customers:
 WARNING: This product can expose you to chemicals including Lead and Lead Compounds, which are known to the State of California to cause cancer, and birth defects or other reproductive harm. For more information, go to www.P65Warnings.ca.gov.
Lifetime Warranty
This item is backed by our limited lifetime warranty. In the event that this item should fail due to manufacturing defects during intended use, we will replace the part free of charge. This warranty covers the cost of the part only.
FREE Shipping is standard on Orders shipped to the lower 48 States (Contiguous United States). Standard shipping charges apply to Hawaii, Alaska and US Territories. Shipping is not available to Canada.
Expedited is available on checkout to the United States, excluding Alaska, Hawaii and US Territories as well as P.O. Boxes and APO/FPO/DPO addresses. Final shipping costs are available at checkout.


Created on:
Tools used
Brought to you by 1AAuto.com, your source for quality replacement parts and the best service on the Internet.
Hi, I'm Mike from 1A Auto. I hope this how-to video helps you out, and next time you need parts for your vehicle, think of 1AAuto.com. Thanks.
In this video, we're going to show you how to replace a tailgate cable on this 2011 Chevy Silverado 1500. It's the same process on a large variety of GM models. The only tool that you're going to need is a 13 millimeter socket, and a ratchet.
You don't need to do anything up here, but you want to remove this 13-millimeter bolt, right here. I'm going to fast-forward as he removes that. Once that lower bolt is removed, you just push the clip up, and off.
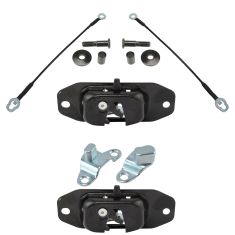
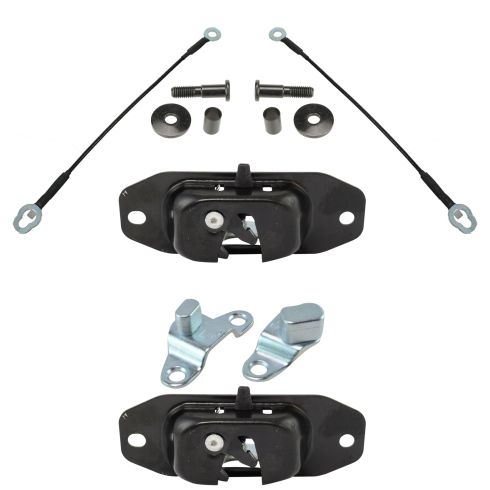
You can see here on the left is the old one. On the right is the new one from 1AAuto. They're identical. What you want to do is just put that bolt on by hand first, and tighten it up. Then use your socket and ratchet to tighten it the rest of the way. Now you just want to line that clip up on the bolt, and then pull it down, and it's all set.
We hope this video helps you out. Brought to you by www.1AAuto.com, your source for quality replacement parts and the best service on the Internet. Please feel free to call us toll-free, 888-844-3393. We're the company that's here for you on the Internet and in person.
Tools used
Tools used
Okay, to start this job, let's just compare it, make sure we're dealing with the correct part. This looks great. The next thing we're gonna wanna do is remove our tail lamp. To do that, use a Phillips head screwdriver and remove both those mounting bolts. Grab the lens. Carefully pull it away. Grab some penetrant. Go ahead and spray this down.
Let's use our 15-millimeter wrench right back here to hold this nut and our T40 Torx bit to take this off. There we go. Go ahead and grab that. Slide it in. Take your nut. We're gonna go ahead and put this together but we're gonna leave it nice and loose. The reason for that is because I want it to be able to move around. The next thing we're gonna wanna do is close the tailgate. When the latch comes up, it's gonna bring this to exactly where it lines up perfectly, and then we'll just go ahead and try to snug this at that point so we know exactly where it needs to go. Close this. All right. So, that's latched in. That seems like its exactly where it needs to be. And snug this. Go ahead and snug it up.
Put our tail lamp back in here. Lined up. Start and bolt the screws. After you've done that, go ahead and snug them right up. Okay, let's test it. Perfect.
Tools used
Tools used
Tools used