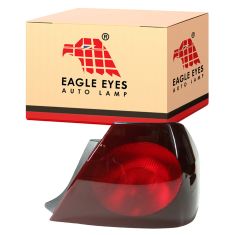
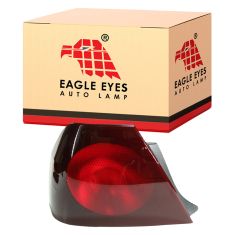
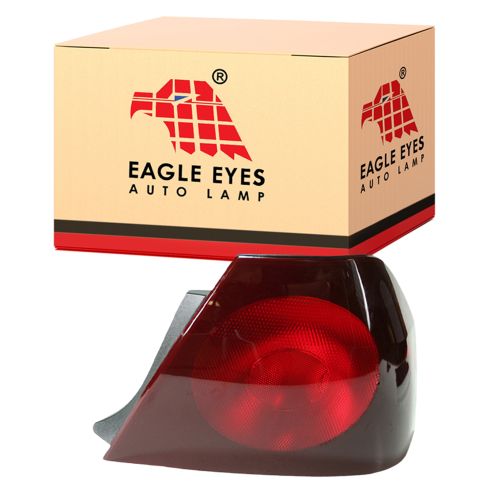
Replaces
This part doesn’t fit a . Select from parts that fit.
Frequently bought together
Assemblies may include halogen or incandescent test bulbs that should be replaced before installation.
Features and Benefits
Item Condition:
New
Attention California Customers:
 WARNING: This product can expose you to chemicals including Chromium (Hexavalent Compounds), which is known to the State of California to cause cancer, and birth defects or other reproductive harm. For more information, go to www.P65Warnings.ca.gov
This item is backed by our limited lifetime warranty. In the event this item should fail due to manufacturing defects during intended use, we will replace the part free of charge. This warranty covers the cost of the part only.
The bulbs are for testing and not covered under our warranty. Our warranty applies to the light assembly only.
FREE Shipping is standard on Orders shipped to the lower 48 States (Contiguous United States). Standard shipping charges apply to Hawaii, Alaska and US Territories. Shipping is not available to Canada.
Expedited is available on checkout to the United States, excluding Alaska, Hawaii and US Territories as well as P.O. Boxes and APO/FPO/DPO addresses. Final shipping costs are available at checkout.


Created on:
Tools used
Brought to you by 1AAuto.com, your source for quality replacement parts and the best service on the Internet. Hi, I'm Mike Green. I'm one of the owners of 1A Auto. I want to help you save time and money repairing and maintaining your vehicle. I'm going to use my 20 plus years experience restoring and repairing cars and trucks like this, to show you the correct way to swap parts from 1AAuto.com. The right parts installed correctly. That's going to save you time and money. Thank you and enjoy the video.
In this video we're doing a taillight on a 2000-2005 Chevy Impala. Pretty easy procedure, doesn't even require any tools. Taillight replacement on 2000-2005 Impala. Right here in the back. It's basically four thumb screws. This one is shaped so that if you have a cargo net. This one here. You just pull the trim back a little bit and there's another one here. Another one here. You can just take the light; comes out. You can unplug this connector. Now your taillight is free from the vehicle. If you need to service the bulbs you can do that. There's another bulb here. Obviously if you're looking to replace the light due to damage you can do that.
Put it back in is the reverse of the procedure. Clip in, put it into place. This goes here. This one here. Put your trim back in place. This is the one for the cargo net if you have that option. Okay, so there you have it. Whether you're just replacing a bulb or you have taillight damage from a little fender bender, that's how you do it. Hope this helps.
Brought to you by www.1AAuto.com. Your source for quality replacement parts and the best service on the internet. Feel free to call us toll free at 888-844-3393. The company that's here for you on the internet and in person. Thank you.
Tools used
Brought to you by 1AAuto.com, your source for quality replacement parts, and the best service on the internet.
Hi. I'm Mike Green. I'm one of the owners of 1A Auto. I want to help you save time and money repairing and maintaining your vehicle. I'm going to use my twenty plus years of experience restoring in repairing cars and trucks like this, to show you the correct way to install parts from 1AAuto.com. The right parts, installed correctly. That's going to save you time and money. Thank you, and enjoy the video.
In this video we're going to show you how to remove the taillight, replace the bulbs and reinstall the taillight. And no tools are necessary, but you may need a pair of pliers to get the clips out of the insulation in your trunk. This is the same for any '98 to '04 Intrepid.
Just go and open up your trunk, and you have a liner here that's actually the pins are missing on this car, but they're are little pins like this, and you can use a screwdriver or a pair of pliers to pull those up. And then you want to pull your liner back, and then there's three thumb screws. One here, and one over there, and then one up in there.
So we'll just fast forward here a little bit as I take off those thumb screws. And if they are tight, there is a bolt head on them that you can use a pliers or something to get a little more leverage.
Once you have the taillight assembly out, here's a connector that disconnects the whole thing. Just press on that tab and pull. So here's your taillight out. Obviously you're not going to disconnect it if you're just replacing the bulbs. If you're just replacing bulbs, twist counter clockwise. Pull it out. The bulbs pull out and back in. And then there's a smaller bulb here as well. For the side marker. Pulls out.
And then at 1A Auto we sell if you've had a broken rear taillight, we sell the whole assembly. So if you back into something or something like that, don't fret. This is going to go in and mount everything the same. I'm not going to install the new one, because you can see that this one is fine. You wouldn't want to take your connector off of this one, and transfer all your bulbs and harnesses and everything.
And obviously installation. Reconnect our harness. Slide it back in place. Just guide it in. Put your three thumb screws back on. And put your insulation back in place, and your pins back in, and you're all set.
We hope this helps you out. Brought to you by www.1AAuto.com, your source for quality replacement parts, and the best service on the internet. Please feel free to call us toll free 888-844-3393. We're the company that's here for you on the internet and in person.
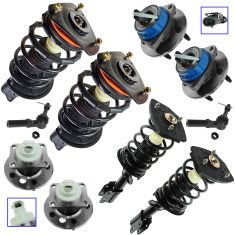
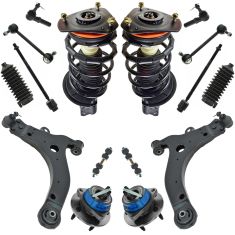
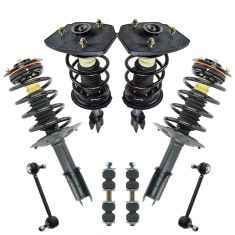
Replaces 2000-05 Chevrolet Impala Monte Carlo Front & Rear 10 Piece Steering, Suspension, & Drivetrain Kit TRQ PSA59613
$567.95
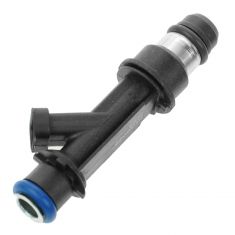
Replaces Chevrolet Buick Pontiac Olds 6 Piece Fuel Injector Set Standard Motor Products 1AEEK00493
$535.45
Replaces Chevrolet Buick Front & Rear 16 Piece Steering, Suspension, & Drivetrain Kit TRQ PSA59133
$449.95
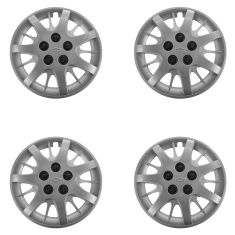
Replaces Chevrolet Impala Monte Carlo Hub Cap 4 Piece Set General Motors OEM GMWHK00035
$445.95
Replaces Chevrolet Buick Front & Rear 8 Piece Suspension Kit TRQ PSA85359
$429.95
Replaces Chevrolet Impala Olds Intrigue Front & Rear 8 Piece Suspension Kit TRQ SCA67070
$409.95
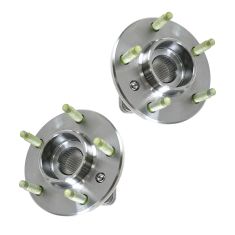
Replaces 2 Piece Wheel Bearing & Hub Assembly Set ACDelco ACSHS00003
$398.87
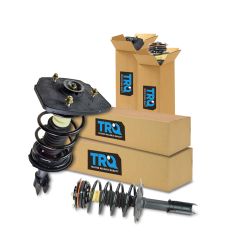
Replaces Chevrolet Buick Front & Rear 4 Piece Strut & Spring Assembly Set TRQ SCA57204
$389.95

Replaces Rocker Arm 12 Piece Set General Motors OEM GMEEK00017
$389.95
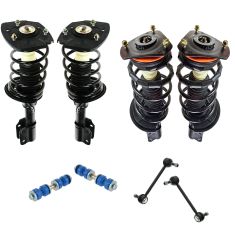
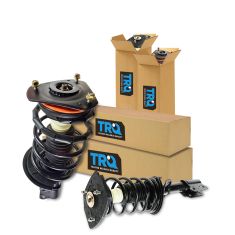
Replaces Chevrolet Impala Olds Intrigue Front & Rear 4 Piece Strut & Spring Assembly Set TRQ SCA57015
$364.95