Replaces
This part doesn’t fit a . Select from parts that fit.
Part Details
Product Features
Complete Repair in One Purchase - Stop searching for parts individually and complete your repair with a customized kit or set from DIY Solutions.
High-Quality Parts from Trusted Brands - DIY Solutions' kits and sets are selected from the best automotive brands and include hard-to-find and even obsolete parts you may need for your vehicle.
Guaranteed Fit - DIY Solutions ensures its selected parts are quality-tested to guarantee fit and function.
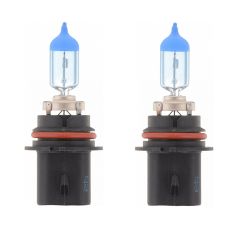
Assemblies may include halogen or incandescent test bulbs that should be replaced before installation.
Item Condition:
New
Attention California Customers:
 WARNING: This product can expose you to chemicals including Chromium (Hexavalent Compounds), which is known to the State of California to cause cancer, and birth defects or other reproductive harm. For more information, go to www.P65Warnings.ca.gov
Lifetime Warranty
This item is backed by our limited lifetime warranty. In the event that this item should fail due to manufacturing defects during intended use, we will replace the part free of charge. This warranty covers the cost of the part only.
FREE Shipping is standard on Orders shipped to the lower 48 States (Contiguous United States). Standard shipping charges apply to Hawaii, Alaska and US Territories. Shipping is not available to Canada.
Expedited is available on checkout to the United States, excluding Alaska, Hawaii and US Territories as well as P.O. Boxes and APO/FPO/DPO addresses. Final shipping costs are available at checkout.

Created on:
Tools used
Brought to 1AAuto.com. Your source for quality replacement parts and the best service on the internet. Hi, I am Mike Green. I am one of the owners of 1A Auto. I want to help you save time and money repairing and maintaining your vehicle. I am going to use my 20-plus years experience restoring and repairing cars and trucks like this to show you the correct way to install parts from 1A Auto. The right parts installed correctly, that is going to save you time and money. Thank you and enjoy the video.
In this video we are going to show you how to replace the headlight on this Ford F-250. The first couple minutes we'll just deal with if you're just replacing the bulb. Then after that we go into how to change the whole headlight assembly. The headlights on these trucks get faded, cloudy, and yellow quite a bit. So they're a pretty popular reinstallation item. The only tools you'll need a bent-tipped awl and a Phillips screwdriver.
Okay. To change your light bulb, you want to come in behind and you can see the back of the light bulb with that ring around it. Reach in, turn that ring counterclockwise. Okay here you can see close-up better angle, this is what you are reaching for. You turn this counter clockwise, pull it off. Then you kind of have to use it to kind of shake your headlight up and down and then bring it out.
Right up here pull the collar back. Just use a screwdriver, kind of force that off. There is your bulb disconnected. Reconnect, just put the bulb in, push the harness together, Then pull that back to just make sure that is connected correctly. When putting the bulb back in you want to look right here you can see there is kind of a slot right on top of the housing. That lines up with the slot on the bulb and push together and lock your ring on.
Okay. To remove all these headlights you're first going to have to pull two tabs up. One here and one here. Okay, so here is the back of the headlight. So the clips go right down on here. So you can see that they hold on a couple different ways. You can see that these arms curl in to lock into these slots. So that's why you put this down in there, lock this in. Then pull on it up to try to get those right out of those slots. Okay, and it's also shaped, it has a little. It's got almost a little ridge right here. That's why you have to kind of pry back and then up and out to get these off.
So now I am going to go back to these clips here. Take my bent tipped awl and put it in, pull out, and up. Then go down to the other side pull out, then twist out, and up. Okay. Now notice I have a glove on. What I am going to do is hook my awl into that slot at top. I'm going to pry this way which forces the clip out away from the truck, and I am going to put my glove on top of the clip as well just to kind of hold it in place. So that when I pull it out it stays on my awl. Do the same thing for this side. Use a flashlight. Pull up on one side. Hook it into the other side. Pull up on that side, put my awl down in there, get your fingernail down in there. Push out and pull up, and there is my other clip out.
Okay the next part of this is a bit difficult to film, but right down in here is the headlight. Down a little further, my hand gets in the way, down a little further you could see another little clip poking through the fender. Okay looking at my new light, it has this right here and it has a couple little wings on it. These squeeze actually pretty easy. So what you want to do is reach down in there, kind of give these and squeeze while you pull out.
Okay so I reach down in. You'll probably squeeze them one at a time. Squeeze the top or the bottom with your fingernail or take a small screwdriver with you. Then it releases and then you can pull the headlight out. Take that off then pull the bulb right out. Then disconnect the harness. Here's the light that was in the truck, new light from 1A Auto. Lights from 1A Auto, they are just like the original. They are going to shine. They're DOT approved. One thing you want to do before you go to put them in, is you see here, this is an adjuster and you can see the length between there and there. On my one - one that was in the truck the length is much shorter here. So I am going to adjust this to match that. I am also going to do the same thing at the top here and with this one here. So I am just going to make the adjusters the new light match the old light. With the one exception being, you can see that the design of this mount is a little different than the original. So that adjuster, I am going to actually measure the distance between the light and the adjuster and make them the same.
Here's my new light. I am going to plug in my bulb and make sure this adjuster goes back into the slot where its supposed to be. See that's going right into that hole and that's going to go right into that hole. Push the bottom in to lock it and the tops are in. Now I am going to put my clip down in carefully. Push back on the light some. Get it started. So this one I am going to use my bent tipped awl just so I don't drop it. Put it down in, get it started, push the light in. Just use my Phillips screwdriver here to try to push these clips all the way down on. Then the lights all set.
Okay to adjust your headlight, this screw here adjusts your light left to right. If you look at the line down here, as I go counter clockwise light goes in, clockwise light goes out. Then the other screw is way down in here, right in here. Counter clockwise light goes down, clockwise light comes up.
We hope this video helps you out. Brought to you by www.1AAuto.com Your source for quality replacement parts and best service on the internet. Please feel free to call us toll free at 888-844-3393. We're the company that is here for you on the internet and in person.
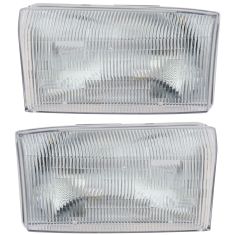
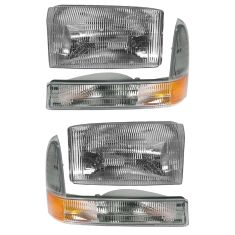
Replaces Ford 4 Piece Lighting Kit DIY Solutions LHT04163
$142.95
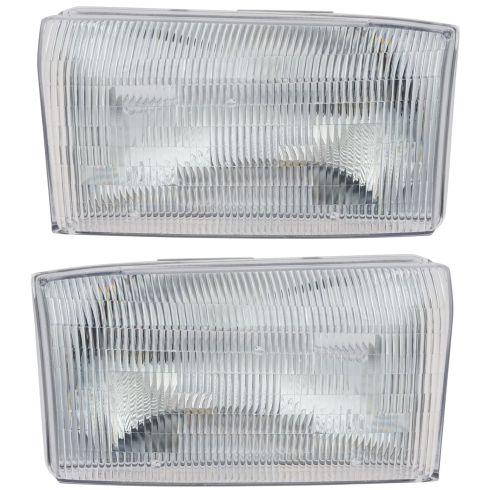
Replaces Ford 4 Piece Lighting Kit DIY Solutions LHT04093
$124.95
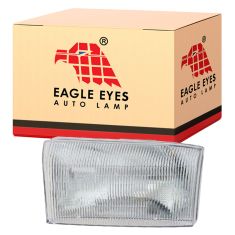
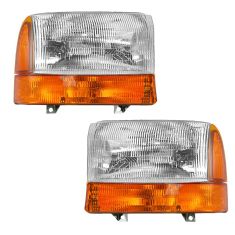
Replaces Ford Driver Side Headlight Assembly Eagle Eyes FR272-B001L
$52.95
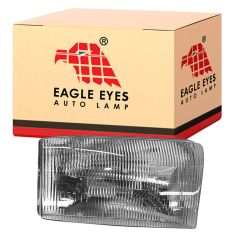
Replaces Ford Passenger Side Headlight Assembly Eagle Eyes FR272-B001R
$52.95
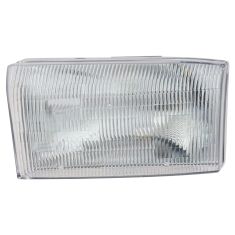
Replaces Ford Driver Side Headlight Assembly DIY Solutions LHT01374
$49.95

Replaces Ford Passenger Side Headlight Assembly DIY Solutions LHT01375
$49.95