Brought to you by 1AAuto.com, your source for quality replacement parts and the best service on the Internet. Hi, I'm Mike Green. I'm one of the owners of 1A Auto. I want to help you save time and money repairing and maintaining your vehicle. I'm going to use my 20+ years' experience restoring and repairing cars and trucks like this to show you the correct way to install parts from 1AAuto.com. The rights parts, installed correctly; that's going to save you time and money. Thank you, and enjoy the video.
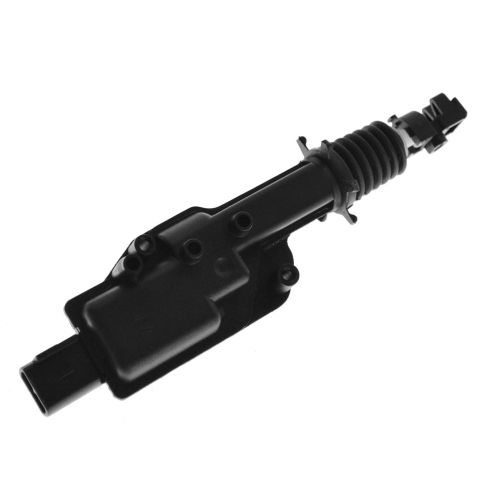
In this video we're going to replace the tailgate lock actuator on this '98 Explorer. Tools you'll need are a Phillips screwdriver, an 11 millimeter socket and ratchet, and a pair of pliers and a regular screwdriver, probably a small regular screwdriver as well. We're going to start out opening up the glass and then opening up the tailgate as well to remove the inside panel. Basically, what you want to do first is take out two screws that hold the door pull-on, and then the door pull slides out a little slot. Then there's a screw underneath the trim panel here, so remove that screw and now there's a series of clips up near the window; I think there's six of them, two on each side and four across the top. You pull pretty good on the sides, I think I actually kind of give up on this one and just go for the top. You give a good, firm tug, try and get as close to the clips as possible, and then once you release those clips around the sides, then the whole panel slides kind of towards the inside of the truck, and then it comes down. Here you want to remove two pins that hold this panel up just so it can flop down. I actually ended up using needle-nose pliers to break them off. Now an 11 millimeter socket and ratchet to remove these two bolts that hold the door lock actuator. You can pull that down, pull the lock actuator up and out, and then use a small screwdriver here to help you release the tab that's on that connector; you just kind of pry up a little bit and then pull with your other hand and it releases.
We're actually going to remove the whole bracket and lock mechanism. You want to remove two bolts up here near the window, near the center of the window, and then another bolt down closer to the bottom, and then you're going to want to release two yellow clips. Okay, so we'll kind of go fast through getting the bolts off. Now use a pair of pliers to grab on to the clip and release it. Okay, you can't really see this, but I'm just using a small screwdriver to release the clip that's inside the tailgate there. And now removing that lower bolt. At this point there's a clip that holds the wire harness to the tailgate. Basically, just using the pair of pliers to kind of push that clip up through. You have to kind of pull that wire back and out of the way in order to slide the lock mechanism and bracket and everything out. Okay, now there's actually a small clip up in here, and you can see here I drew an arrow to it because I didn't get a very good shot of it. It's actually pretty easy to get to, this shot makes it look like it's way up in there but it's not that hard to get to.
The easiest way I've found to get to it actually was to see it from the other side and flip the clip off from the other side. Then you pull that rod out and then you can actually, you pull the whole mechanism over to the side a little bit, which you can see I'm doing here, I'm kind of sliding it to the driver's side of the tailgate. Now back to the middle near where the glass latches, there's another clip that you just push off that rod, and then you swing it around and you push the rod up out of the hole. Now you can take the whole assembly and slide it out. It's a little clunky, but there's your assembly out of the vehicle. Now, to get the actuator off, you just take it and just kind of wiggle it a little bit and pull the actuator rod up and out. Now, when you go the replace your actuator, this one's fine so we're just kind of taking it out and putting it back in, but you use a screwdriver to pry off this bracket. It's just kind of held on to two nubs, I guess, I don't know. You just pry it off with a screwdriver, which I'll get to eventually, there you go.
To get it back on, lay the actually like that, and then pull the tabs apart and put them down onto the actuator. Then it just kind of clips into place. Then put the actuator back onto the lock mechanism, feed it up into the tailgate, and now you want to make sure that wire goes up and over it, and then kind of twist it into the upright position and pull it over. Then you're going to reconnect your rod here that has the little swing clip that clips on to the rod, and then we'll feed it up better into position here and get the studs pointing up to the top. Then we'll put the bolt in the bottom, just kind of put it in finger-tight, just to kind of hold things in place a little bit. Okay, and now we're going to clip on the actuating rods for the latches on each side. You can see, I pushed that one in there, and then we'll get a close up of the one door, push that one right in. You want to kind of -- these have a little travel, so you want to shake them back and forth a little bit. You'll see they move a little freely, just kind of try to clip them in the middle of their travel. This last one, that's kind of in the center, clip that one in.
One thing I did forget to do, as I'm putting in the motor, I did forget to film putting the wire harness, clipping that back into the door, the one that we pushed out with the pliers, so make sure you do that. Then put on the bolts, or the nuts for the actuator, plug in the actuator, tighten up the nuts. When you tighten these things up, you want to get them nice and snug, they don't have to be incredibly tight. Here I use a wire tie, both my clips broke so I use a wire tie on one side and I had an extra pin laying around. Here is the top of the window mechanism, and that's adjustable. You see I'm tightening up here, and I'll put the window down and decide that I want to have it just a little tighter, so I actually just move that latch inside towards the car and get it nice and tight. Keep the window open, tighten up that bolt, and now I'm ready to put back on my trim. Put it up in there, slide it down, and then make sure all the clips go into the slots, put it on nice and tight. I just actually put the screw on the top; I didn't film that, but then put the window down. Now I'm putting the pull handle on. Tighten up those screws pretty good. Lastly, close it up for a quick test, I'll go and lock the doors, try the handle. It locks, which is good. Then unlock the door, maybe. Here I come! There we go, and it's working good.
We hope this helps you out! Brought to you by www.1AAuto.com, your source for quality replacement parts and the best service on the Internet. Please feel free to call us toll-free, 888-844-3393. We're the company that's here for you on the Internet and in person!