Replaces
This part doesn’t fit a . Select from parts that fit.
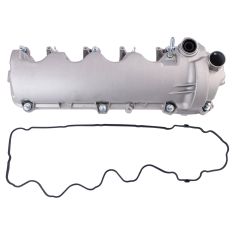
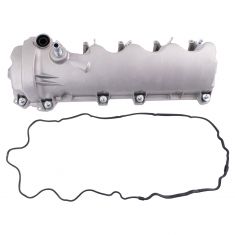
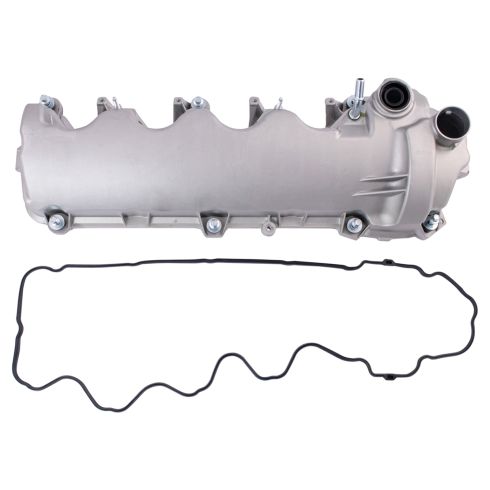
Part Details
Highest Quality Materials
Made from highest quality materials that meet or exceed OEM standards
Direct Fit Replacement - Guaranteed to fit and function for your specific application
Item Condition:
New
Lifetime Warranty
This item is backed by our limited lifetime warranty. In the event this item should fail due to manufacturing defects during intended use, we will replace the part free of charge. This warranty covers the cost of the part only.
FREE Shipping is standard on Orders shipped to the lower 48 States (Contiguous United States). Standard shipping charges apply to Hawaii, Alaska and US Territories. Shipping is not available to Canada.
Expedited is available on checkout to the United States, excluding Alaska, Hawaii and US Territories as well as P.O. Boxes and APO/FPO/DPO addresses. Final shipping costs are available at checkout.


Created on:
Tools used
Okay, friends, to get started on our passenger side valve cover, you're gonna notice that more than likely you're gonna have debris on top of the engine. Let's go ahead and spray that off with some compressed air. Now that we have that blown off, let's continue on by removing our ignition coils. You're gonna have four of them on the passenger side. I'm just gonna go ahead and grab onto the wiring. There's a little tab where my index finger is gonna be, squeeze on that, lift this up. Always check every electrical connector for any funny colors. This one looks great, so we'll set it aside. Next, we're gonna remove our ignition coil mounting bolts and remove the coil. Give it a little twist. With the ignition coil out, just make sure you inspect the boot. If it seems as though it's damaged or firm in any way, go ahead and replace the boot with the internal spring as well. Now let's just do the same to the rest. All right, now, with this out of here, let's go ahead and put it in a spot where we can remember which cylinder it was in, that way there, when we reinstall them, they'll go back into the original cylinder. Next, we're gonna remove the vapor line from the valve cover. But before we do that, follow it up to the intake area. We'll grab this tab, give it a little pull, pull it right off of there. Now let's remove this lower one, push on the little tab, give it a little twist, draw it right up and out of there. We're gonna set this aside. Remember that the side with the sticker on it was the lower aspect.
Now let's go ahead and get this off of the valve cover. Next, let's go ahead and disconnect our fuel injectors. There we are. Let's go ahead and grab onto this wiring. I'm just gonna separate these two pieces here. We'll give this a little flip. Looking at it from this side, you can see there's an area that you can get under with your screwdriver, lift up right there, and separate these two wires. Now we need to unsecure the wiring from the valve cover. You're gonna notice there's one up front here and give that a little tug. It just kind of presses in there. And then as you move down along the valve cover moving the wires around, you'll probably be able to feel some more. Go ahead and disconnect all of them. Let's remove our oil cap. And then we're gonna remove our eight mounting bolts for our valve cover. That's one. Do the same to all the rest. Now that we did the top four bolts, let's go ahead and get those bottom four. Now that we have all of those mounting bolts loose, let's take this wiring, bring it right up and over this. Now with a rubber mallet, let's give this a couple loving bonks and try to break it free. Let's continue on by relieving more of these mounting areas here. We wanna dis-attach these two wiring harnesses from each other. That's gonna give us some extra slack. And then if you follow this back along the back, you're gonna find another area where it's on to the bracket. Let's go ahead and get it off of there as well. That way there we can move this wiring out of the way. Let's get our air intake system out of the way here. You're gonna find that there's a clamp on this side. Loosen that. Loosen this clamp. Set this aside.
Now we're just gonna wiggle this around so we can weasel it out of here. There it is, friends. Now to get this off, we have to go ahead and pull on this outer tab. Once you have the outside tab lifted, we're gonna come from the inside with a nice pick, and you're gonna find that there's another tab. Lift up on that tab and then you should be able to spin this. There we are. Let's take this right out. There it is. All right, before we can go ahead and install this into our brand new valve cover, we wanna make sure we clean up this gasket if not replace it. Go ahead and wipe it down and then you wanna make sure that you thoroughly inspect it. Make sure that it's not dry-rotted, and cracked in any way. If it is, just go ahead and replace it. Now that we have this cleaned down, let's just apply a little bit of engine oil around the seal there. We're gonna go ahead and get this started on here and we're gonna twist it until it comes right along this lip. There we are. That's nice and locked in. Make sure it's completely secured. Now it's gonna be time to get our valve cover gasket on here. Pay special attention to these areas that look like this. There should be two of them on your gasket. You wanna make sure that those line up with the areas on your valve cover. Let's set this up in here. Just kind of work its way all the way around. Make sure everything lines up perfectly, these little knobs. As you go around, just make sure that you press it all the way into the valve cover as far as it can go, so there's no way that it can fall out. And then we'll continue. Perfect.
Before we install our valve cover, let's use a tiny bit of engine oil along the inside of this seal right here. Now it's where that VVT sensor is gonna go. We wanna make sure that it's nice and lubricated. Back over at the engine, we need to make sure we clean down the mating surface where the gasket is gonna ride. I like to tuck a nice rag inside here to try to collect as much of the debris as possible. But mainly what we wanna do is just try to carefully scrape around this area here and get off any of the debris or build-up that's on it. There's gonna be two areas on each of your valve covers that you're gonna wanna pay special attention to. There's one area right here that's gonna have some black RTV or gasket maker on there. We wanna make sure we get that off and then on the lower side in the same exact spot. So right here, except right down over there. We're gonna make sure we get those clean and clear. We'll go ahead and scrape down the rest of it. Just be careful not to mar up the metal on the actual engine. Once it's clean, we'll continue on. As we're scraping this, we wanna make sure that we scrape away from the inside portion of the engine. Let's try to keep out as much of this debris as possible. So now that we have the area where the valve cover gasket's gonna ride nice and clean, we wanna make sure that we coat this area and of course the area that was down there that we cleaned as well with a little bit of RTV or gasket maker. That's gonna help ensure that this little ridge right here is gonna be nice and sealed for when we get the actual gasket on there as well.
Okay. So now that we have the valve cover into this area, let's continue on with that RTV on our two areas that I told you about. Right here, put a nice coating, and then of course the bottom side as well. All right, with both those spots nice and coated with RTV, let's carefully put our sensor through our seal here, and then we'll set our valve cover down into its resting area. Carefully starting all of your bolts, we're just gonna bottom them out and then we'll torque them to manufacturer's specifications. Now, as you go to start snugging these up, what you wanna do is you wanna make sure you start from the center bolts, go up top, down bottom, and then work your way out towards the front and towards the rear. As you do this, go 1, 2, 3, 4, 5, 6, 7, 8. Now let's torque these to 89 inch pounds. All right, now it's gonna be time to get our ignition coils back in here. I like to use a little bit of dielectric grease right on the boot here. That's the area that's gonna go on to the spark plug. Let's go ahead and start that into the engine here. Push it down onto the spark plugs so it's completely down, start in your coil bolt, and then we'll snug it up. All right, once you have that bottomed out, torque it to 53 inch pounds. There we are. Let's continue on and install all the rest of our ignition coils. All right, now that we have those ignition coils in and torqued, let's go ahead and secure our wiring harness. Go ahead and push all your tabs into the valve cover or the corresponding areas where they need to be connected into to be secured. I'm just gonna go right down the line here and do them all. Let's get this white clip in here. Perfect. Okay. All these look good. All right, now at this point, let's start connecting in our wiring. We had our little gray wire. Let's connect that back in. Listen for the click. Of course, that goes back into here so it's nice and secure. It can't dangle around. Let's get this clip in here. There we are.
Now it's gonna be time to connect in the rest of our connectors. You're gonna notice you have grays and blacks. The grays are gonna go to your fuel injectors and the blacks are gonna go to the actual coils themselves. So I'm just gonna go ahead and connect this in. Listen for a click, give it a nice tug. And do the same here for our fuel injector. Listen for a click, nice little tug. Do the same right down the line. Okay. So we have all of our connectors in. Just give a quick double-check just to make sure everything's completely plugged in. Once you're sure everything's in, let's continue on by reconnecting this vapor line here. We remember the sticker was down in the downward position. This is gonna come right under here like this. You're gonna slide this down and on this. It should click right in. Give it a nice tug. Right up top here, push on the tab. There we are. Now it's time to get our air intake back on here. Slide it on there, slide it on this side. You wanna make sure that it's completely bottomed out and straight as can be. Snug up that clamp. Do the same to this side. Okay. Nice and tight. All right, now it's gonna be time to get the oil cap back on there. But one thing I like to mention before we go ahead and do that is it's a good idea to go ahead and do the oil change. The reason why you'd wanna do an oil change is due to any of the debris that might have fallen into the valve cover area in the engine. By doing an oil change, it pretty much ensures that you're gonna get out the majority of it. Okay, friends, after you've gotten that oil change done, go ahead and start up the truck. You wanna make sure that you don't have the check engine light on. Assuming there's no check engine light, take it for a road test.
Tools used
Brought to you by 1AAuto.com, your source for quality replacement parts and the best service on the Internet.
Hi, I'm Mike from 1A Auto. I hope this how-to video helps you out, and next time you need parts for your vehicle, think of 1AAuto.com. Thanks!
In this video, we're going to show you how to replace the ignition coils on this 2006 Ford Explorer. It has the 4.6 liter V8, and the only tool you'll need is an 8 millimeter socket with a ratchet and extension.
Open up the hood, and in the engine, there are four coils on each side: one, two, three, and four here on the driver side. You'll need to unplug the harness. There's just a little tab that you can press with your thumb and then pull. Pull and wiggle it a little bit to get it off. Then either a 7mm or 8mm bolt that holds the coil down. You see the ones on the driver side. Passenger side is obviously located somewhat in the same position on the other side.
I'm going to remove the second one back. It's just the easiest one to video. Again, push the tab with your thumb. Pull off the connector. 8mm socket with a ratchet and extension, remove that bolt. Then once the bolt is off, make sure you retrieve it. Then the coil will pull out with just a little bit of a half turn, as well as just moving it back and forth and it pulls up and out.
The new coil from 1A Auto is going to go right down in just like the original one. You want to push it down in and give it a good firm push. Make sure that the hole lines up with where the bolt goes into the intake manifold or head. Start that bolt on and tighten it up. Obviously you'll repeat this procedure for all eight, or however many you want to replace. Make sure you reconnect all of your coils, and you're all set.
Thanks for tuning in. We hope this video helped you out. Next time you need parts for your car, please visit 1AAuto.com. Also check out our other helpful how-to and diagnosis videos.
Tools used
Okay, friends, to get started on our driver-side valve cover, we wanna make sure that we blow off any of the dirt or debris that's in this area. The less dirt that we have here, the less dirt that could make it inside the engine. Next, we're gonna remove the air intake system. Loosen this clamp and this one right down here. Set this aside. Now let's remove this bolt right up here. And this clamp right here, we'll just loosen that. Grab onto this piece, give it a little wiggle, remove it. Now let's move along to getting this out of the way. Just pay special attention to where the sticker is. It's on the lower aspect closest to the valve cover. Grab this little gray tab, give it a little squeeze. Draw this off of the valve cover. I'm gonna just do the same thing to the top, and now we'll set this aside.
So now we're gonna start disconnecting some of our wiring. I'm gonna start right up in the front here. Squeeze this tab, dry it right off of there. Every time I disconnect an electrical connector, I always like to look for funny colors. If you see any corrosion, it's something that needs to either be serviced or replaced. Now let's disconnect this one. Tap on that tab, slide this out. You're gonna see that you have four ignition coils going down the line. Let's disconnect all four of them. Up along the top, you're gonna see some gray connectors. Those lead to your fuel injectors. Remove all four of those connectors as well. Give this a little squeeze, pop that off as well.
Okay. At this point, you're gonna notice that you have some anchor points holding your wiring down. We wanna grab a little fork tool and pry these away from the valve cover. I'm just gonna grab onto this wiring harness, give it a little wiggle. Try to drop the connecting clip. There we are. Comes across here and then over here. Okay. This is looking good. Let's get this off of here as well. And then we can set this aside, it won't be bothering us anymore. Let's continue on by removing our ignition coils. You're gonna find a mounting bolt on each one. Now let's just grab onto that, twist it, and lift it up and out. And there's our coils. We're gonna do the same to all four. And when you take them out, put them in a spot where you can remember which order they came out of.
So the front cylinder can be on the left, and then work your way to the rear as you go to the right. Let's take this wiring, slide it over towards the center of the engine. Now we're gonna remove this from the vacuum booster. Just give a little wiggle and you should be able to pry it right out of there. Once you've done that, we're gonna lift up on this piece right here and try to get the tube off of the valve cover. There we are. And set that aside. Let's grab this wiring, we'll set this aside as well.
The next thing we need to do is remove the mounting bolt that holds the dipstick to the engine. We want this to be able to have plenty of room. If you were to feel down along the dipstick, you'll be able to feel where the bracket is and, of course, the 8-millimeter headed bolt. Let's go ahead and remove that. All right. There it is. There's our bolt. And now the dipstick can move around.
Before we continue on to removing the valve cover, let's cover up the ports that lead into the engine, that way there no debris can make it inside. You have one here, one here, and then one located right there. Just go ahead and cover those up. And now we're just gonna take our blowgun, and once again, blow off any debris that might be in this area. Next, we're gonna remove our nine mounting bolts. You're gonna find four mounting bolts that look like this up along the top, and then five down along the bottom of the valve cover. Let's remove them all. Now that you have all the bolts nice and loose, let's continue on with a nice, rubber mallet. We're just gonna give the valve cover a couple of loving bonks to try to break it free from its holding point. After you've done that, we'll just lift it up and get it out of here.
There it is, friends. With the valve cover off, it's a good idea to make sure you get off any debris that's remaining around this area. I'm gonna typically do this with a vacuum cleaner, get off the majority of it, and then I'll continue on by scraping it with a nice razorblade. Certain areas that you wanna pay attention to is along the front area of where the valve cover used to ride. You're gonna see that there's RTV or gasket maker located in two areas, one up along here and then one up along the lower area down there, which is in the same exact area as this one. Let's go ahead and vacuum this off. We'll scrape it down, get it nice and clean.
Once you have it all scraped down, just go ahead and wipe it with a nice, clean rag with some parts cleaner on it. We wanna try to get off as much of the debris as possible along the area where the gasket's gonna ride. So now it's gonna be time to get our new gasket into the valve cover. A couple of areas that I like to pay attention to is the areas that have these nubs. You're gonna see that there's gonna be two of them on your valve cover gasket and there's also gonna be two on your valve cover itself. That's gonna kind of let you know where this is gonna be situated. I'm gonna start this in right like this and just go right along the line. What essentially we wanna do is make sure that all the curves line up with the corresponding curves on the valve cover. If they don't, more than likely, the gasket's just kind of twisted.
All right. Once you have it situated, just kind of go around one more time and make sure everything's pushed in as far as it can. We're gonna try to make it so this does not fall out during the installation process. Now we're just gonna take a little bit of engine oil and just go around the inner portion of this seal. That's gonna help lubricate it so the solenoid you can go through.
All right, friends, back over at the truck, we wanna grab some black RTV gasket maker. Just get a little bit of that on our finger and we're gonna go along those two areas that we cleaned up. You wanna make sure that you fill in the cracked area, that way there you'll have a nice seal when we put our gasket and our valve cover on. Now it's gonna be time to get our valve cover back on. Something that we wanna pay special attention to is the solenoid right here. You wanna make sure as we're putting on the valve cover, we don't bonk on this and potentially break it. Carefully slide this in. You wanna pay special attention to that gasket as well. Make sure that it doesn't fall out of there and get caught on something and potentially ripped, torn, or damaged in any way.
Okay. Now that I have it close, I'm just gonna kind of feel around that gasket, make sure it's still up and inside the valve cover before I completely set it down and on. Let's slide this down, paying attention to where our solenoid's coming through the seal. Okay. Perfect. Now we're just gonna go ahead and start in all of our mounting bolts. And when we tighten these up, the way that we wanna do it is starting from the center and then working our way out. That way there, as we tighten it, it's gonna potentially push the gasket a little bit away instead of bunching it up towards the center. Now let's torque this to 89 inch-pounds. I'm gonna come up diagonal.
Now it's gonna be time to get our ignition coils reinstalled. To do that, you wanna make sure you use a little bit of dielectric grease and come right inside this boot area where the actual spark plug's gonna ride. We'll do that on all of these, and then we'll get ready for our install. As we reinstall these, we wanna make sure we put them back into their corresponding cylinders right back where we got them from. Start in that bolt, snug it up, and then torque it to 53 inch-pounds. Do the same to all. Now that the coils are on, let's get this back on to the valve cover as well. Okay. Reconnect it to your brake booster. Make sure that's nice and secure. It needs to have good vacuum. Very important. This looks great.
Let's continue on by connecting in some of our wiring. As we connect in the wiring, you're gonna happen to notice that there's black connectors and gray connectors. The two of them are gonna be located very close to each other and the black one is gonna go to your ignition coil. Give it a nice clip. Give it a nice pull. Make sure it's completely secured. The grays are gonna go to your fuel injectors. Do the same down the line. Working our way back up here, we have our forward connectors as well. Let's make sure we get this connected in. And then, of course, we have over here. Put that into its securing point. Now let's resecure the rest of this and bring it down here. Coming down along the front, we've got our forward sensor. Of course, resecure that wire.
Feeling down along, let's continue on with securing everything. We don't want anything dangling or moving around on its own. Okay. Double-check everything. Make sure you don't have any loose connectors. If anything's falling out or you have a connector that isn't connected somewhere, obviously that's gonna be an issue. This looks good. So let's move along. Let's get this out of the way. Let's get this vapor line back on here. It's gonna clip on right here and then right down here. We wanna make sure that we get this off of there. Set that aside for recycling.
Click this bin, make sure you lift up on it. Make sure it's completely secured. Same thing with this one. That feels great. Let's get this back on here as well. I'm just gonna grab that clamp. Slide this right onto the intake. Bring it down so it matches up right here. Make sure this is completely fastened and it's all the way up against there. You don't wanna suck any dirty air into there. Start in this mounting bolt, snug it up, and then torque it to 89 inch-pounds.
Now let's go ahead and resecure our oil dipstick tube. We've got our little mounting bolt. I'm just gonna reach down here. I'll start in the bolt and snug it up. All right, friends, now it's time to get our intake back on here. Let's get this right up against this one up here. As you go to install this, you wanna make sure that it's completely flat up against. We'll snug it up. There we are. Do the same thing for this one. You wanna pay special attention. Make sure it's completely flat up against here and secured. You wanna make sure that there's no way that dirty air can get sucked into the engine.
Okay, friends, after you've gotten that oil change done, go ahead and start up the truck. You wanna make sure that you don't have a check engine light on. Assuming there's no check engine light, take it for a road test.
Replaces Ford Mercury Rear Driver & Passenger Side 2 Piece Suspension Knuckle Assembly Kit Dorman OE Solutions DMSFK00044
$792.95
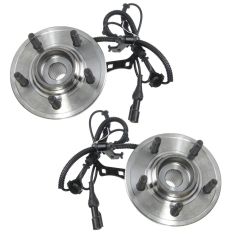
Replaces Ford Mercury Front Driver & Passenger Side 2 Piece Wheel Bearing & Hub Assembly Set Motorcraft MCSHS00002
$719.95
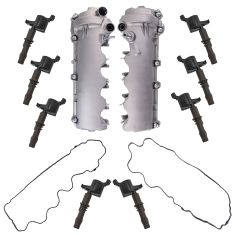
Replaces Ford Lincoln Mercury Ignition Kit DIY Solutions ENG00074
$640.95
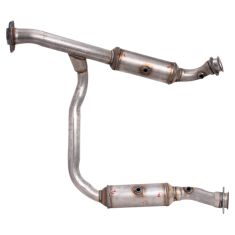
Replaces Ford Mercury Front Catalytic Converter Davico Mfg 19333
$554.95
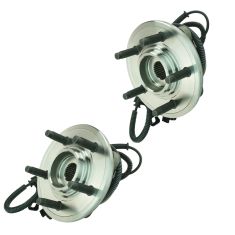
Replaces Ford Mercury Front Driver & Passenger Side 2 Piece Wheel Bearing & Hub Assembly Set Timken TKSHS00402
$550.95
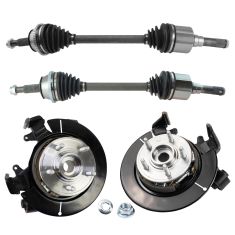
Replaces Ford Mercury Rear 4 Piece Drivetrain Kit TRQ PSA27219
$469.95
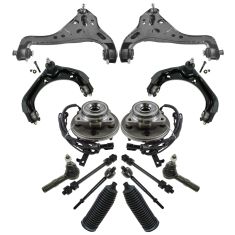
Replaces Ford Mercury Front 14 Piece Steering, Suspension, & Drivetrain Kit TRQ PSA43291
$466.95
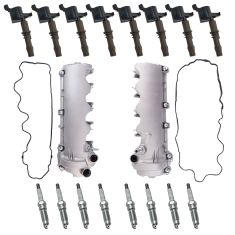
Replaces Ford Lincoln Mercury Ignition Kit DIY Solutions ENG00078
$434.95
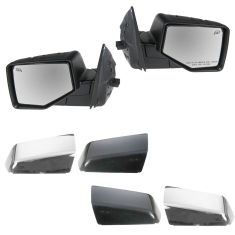
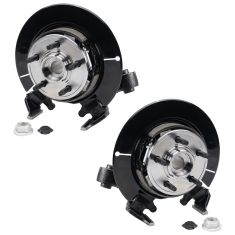
Replaces Ford Mercury Driver & Passenger Side 6 Piece Mirror Set with Chrome Mirror Caps with Paint to Match Mirror Caps DIY Solutions MIR04000
$414.95
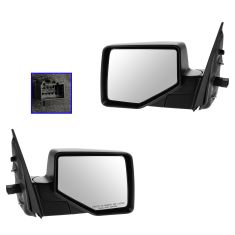
Replaces Ford Explorer Explorer Sport Trac Driver & Passenger Side 2 Piece Mirror Set DIY Solutions MIR04332
$411.95