Brought to you by 1AAuto.com, your source for quality replacement parts and the best service on the Internet.
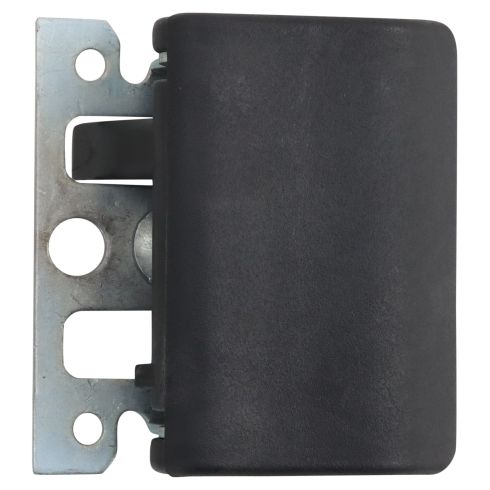
In this video, we're going to show you how to replace an inside door handle. One of the front inside door handles on this '03 F250 Super Duty. It's pretty much the same for any '99 to '07 Super Duty truck. Tools you'll need include a 7mm socket with a ratchet extension, a 9 mm socket, as well as a flat blade screwdriver.
If you wanted to prevent the battery from running down, if you have the doors open for an extended period of time, just disconnect your negative battery cable using an 8mm wrench. Loosen up the nut and then pull the cable off. Using a small flat blade screwdriver, take this lens, pop it off, and mine's actually broken. It should pry out here, pop it off. Okay, here, you're going to do the same thing. You're to going to kind of pop it off with your hand, going to use your screwdriver a little bit, right in the front. Pull that up, pull it forward. Then you disconnect all the harnesses. There's little push tabs on them. Push on the tabs with your thumb and kind of pull the harness here. Push on the tab right here, tab here, push on it. Move it. Same thing here, just pull down this trim panel.
Okay, it's got two clips that hold it on. Now, there are two 7mm bolts, one right there and then one right there. 7mm socket with a ratchet and extension. A ratchet will work, as well. Let me fast forward as I just remove those two bolts. Okay. Once those two bolts are out, just lift up on your panel and bring it out. Okay and behind is your courtesy light. Just turn it counterclockwise, pull the socket out, and your door panel comes off.
Okay, now there are two 9mm nuts: one there and one there. Okay, so with them off, the old handle pulls off. A lot of times, what happens is this breaks right here. Here's your new handle from 1A Auto. You want to make sure that this goes in underneath the little rod that's here, so we'll put it in, kind of face it down, and then on.
Just put our nut into our 9mm socket. Start one of the nuts. Okay, fast-forward as we put those two 9mm nuts back on and when you tighten them, you want to tighten them nice and firm but just don't want to over tighten them. Before you put it all back together, this should work nice and smooth. If it's catching at all, make sure that you put a bunch of penetrating oil and then some white grease into your latch. Also, you can spray some cleaner to penetrate onto the back side of the latch, and then just make sure this is working nice and free.
Okay, to reinstall the door panel, what you want to do is take your bottom clips. They're actually designed to just kind of go on here and rest in place. You can reach down and put in your courtesy light and turn it clockwise to walk it in. Okay, then make sure all these harnesses can pop through. Kind of press it against, lift it up a little bit, make sure your door lock comes through. Press it against, you kind of lift it, just pop it a little bit, push it in, bring it down on, and make sure you're nice and tight against the door. Nice and tight against the door over here.
Okay, we'll speed up again as I take those two 7mm screws, put them in and then tighten them up nice and firm. Now I'm going to clip the molding on up top to cover the mirror mounting holes and then take my switch panel, reconnect all of my harnesses. Then I slide the tab back into the back first. Make sure no wires are getting pinched in there. Then clip it down in place and that's all set. If you disconnected your battery, then reconnect it and tighten up the 8mm bolt.
We hope this video helps you out. Brought to you by www.1AAuto.com, your source for quality replacement parts and the best service on the Internet. Please feel free to call us toll-free, 888-844-3393. We're the company that's here for you on the Internet and in person.