Brought to you by 1AAuto.com, your source for quality replacement parts and the best service on the Internet.
Hi, I'm Mike from 1A Auto. I hope this how-to video helps you out, and next time you need parts for your vehicle, think of 1AAuto.com. Thanks.
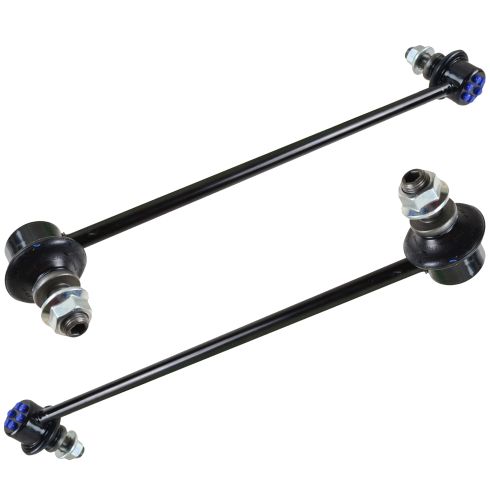
In this video, we're going to show you how to replace the front stabilizer bar links on this 2003 Honda Pilot. It's pretty much the same for any 2003 to 2008 Pilot as well as the Acura MDX. We're going to show you on one side, but both sides are the same procedure.
For this repair you'll need new stabilizer links from 1AAuto.com, jack and jack stands, 17mm to 19mm sockets and a ratchet, a pipe breaker bar or pipe for some extra leverage, 19mm wrench, wire brush, penetrating oil, and if you want to do it the way the pros do it, they usually just either torch and cut them off or use a reciprocating saw and cut them off to save themselves a little bit of time. But you can easily get them off with regular hands tools.
A tell-tale sign of bad stabilizer links is a rattling sound that actually will go away when you're going around small, slight curves. You can reach in with your wheel turned, grab a hold of the stabilizer link, and try and shake and pull on it. If you can get it to make noise or feel play in it, then you know you need to replace them.
Lug nuts are 19mm so use a 19mm socket and ratchet, or you can always use your lug wrench as well. Loosen up the lug nuts with the vehicle on the ground, then raise and secure the vehicle, remove the lug nuts the rest of the way as well as the wheel and tire.
The top, the stabilizer link connects to the strut. Wire brush, clean off any of the dirt and stuff from the stud part of the stabilizer links. Just helps. Then you'll probably want to spray it down with some penetrating oil. These are 17mm bolts on the originals. I'm sorry, they're 17mm nuts. Put a 17mm socket on there, make sure it goes on well. Then I'm going to use a ratchet and I'm going to use a piece of pipe as well to give me some extra leverage to loosen up the nut.
Now I'll put a 19mm wrench on the backside. There's a nut that you can hold onto. You can see that wrench is going to start moving, so I'll get it up and get the strut to hold it for me, and then loosen up that nut. The nuts have nylon locks on them, so they tend to come out a little bit, and then the locks will engage and it will stop turning, so you actually tighten it back up and spray it down with some rust penetrant. After a few rounds of doing that, they usually come right off. This is usually what the professionals avoid with the use of a torch or reciprocating saw. Do the same thing for the lower part and remove the stabilizer link.
Installation is a pretty simple reverse of the procedure. Put the link back in place, put the nuts on, use a wrench to hold the backside and tighten them up. When you tighten them up, you want to just tighten them up nice and tight. They don't really need to be torqued or anything, they just need to be good and tight. If your links are greaseable, be sure to give them a few shots of grease.
Once you have the links replaced, then reinstall your tire. Lug nuts on by hand first. Make sure you don't cross thread them. Tighten them up preliminarily with the vehicle in the air. Then let the vehicle down and make sure you torque those lug nuts to 100 foot pounds each.
Thanks for tuning in. We hope this video helped you out. Next time you need parts for your car, please visit 1AAuto.com. Also check out our other helpful how-to and diagnosis videos.