
How to Replace Strut Assembly 2000-05 Chevy Cavalier
Created on: 2013-08-27
Watch this video to learn how to replace the front strut assembly on your 00-05 Chevy Cavalier.
-
step 1 :Remove the wheel
- Loosen the lug nuts
- Raise and secure the vehicle
- Remove the lug nuts and wheel.
-
step 2 :Remove the bottom of the shock
- Unbolt the two bottom bolts securing the shock.
- Use a breaker bar and a 21 mm socket and some penetrating oil.
- You might need a hammer to work the bolts out once you have removed the nuts.
- Use a pry bar to pry the spindle free from the strut
-
step 3 :Remove the top of the strut
- Pop the hood and secure it.
- Use your 13 mm socket and ratchet and some penetrating oil to remove the three bolts securing the top of the strut.
- Pull the strut down and out.
-
step 4 :Install the new strut
- Work the strut into place and bolt in the top three 13 mm bolts
- Torque the three 13 mm nuts to 35 ft lbs
- Bolt in the bottom two nuts and bolts and torque to 100 ft lbs.
-
step 5 :Replace the wheel
- Put the wheel back on and hand tighten the lug nuts
- Lower the vehicle and torque the lug nuts to 90 ft lbs
Tools needed
-
1/2 Inch Breaker Bar
Socket Extensions
13mm Socket
10mm Socket
18mm Socket
Pry Bar
Jack Stands
Ratchet
19mm Socket
Floor Jack
Brought to you by 1AAuto.com, your source for quality replacement parts and the best service on the Internet. Hi, I'm Don from 1A Auto. I hope this how-to video helps you out, and next time you need parts for your vehicle, think of 1AAuto.com. Thanks.
In this video, we are going to show you how to replace the front-strut assembly on a 2000 Chevy Cavalier. It's fundamentally the same operation for 2000 through 2005, and it is the exact same in terms of the tools and the strut you'll need from the left side to the right side. To perform this repair, you're going to need new struts from 1A Auto, a jack and jack stands, 21-, 19-, and 13-millimeter sockets and socket wrench, a breaker bar and pipe for extra leverage if needed as well as a pry bar.
Take a 19-millimeter socket and by hand, remove the lug nut caps that are attached to the hubcap, and once you've done that, pull your hubcap off. And if you don't have the benefit of air tools, you'll want to start with your vehicle on the ground, loosen the lug nuts first, then raise and secure the vehicle and then remove the lug nuts, wheel, and tire. There are two nuts on the ends of bolts that go through the spindle. Turn the whole spindle assembly to get better access. We're going to use some oil and spray down those two nuts on the end of the strut assembly just to make it easier for them to come off. Using a 21-millimeter socket and a breaker bar and a pipe for extra leverage, I'm going to break those nuts free on both the top and the bottom. And once I've got those nuts loose, I'm going to use a ratchet to make it faster for me to get those off. I'll fast-forward as I take those two nuts off. I'm going to use a hammer, and I'm going to tap out the bolts that go through. Be sure not to hit too hard or to hit the threads because you don't want to have a hard time putting the nut back on. Use a pry bar or a long screwdriver to pull apart the lower strut and the spindle.
In the engine compartment on the top of the strut tower, you're going to find three 13-millimeter fasteners, two nuts, and one bolt. I'm using a socket wrench with a 13-millimeter socket on it to remove those, and I'll fast-forward as I take those out. Now with the strut assembly totally loose, I'm going to go from the bottom and wiggle it a little bit and give it a tug to the left or back, and it should pop right out. And here you see a side-by-side, old part, new part, direct replacement fit from 1A Auto. Going in with the strut, I'm going to line up the hole for the two posts that go through. And once I got that kind of set in place, I'm going to let it hang there for a second. And then holding it from the bottom, keeping it in place, I'm going to tap on it with a hammer to get the two studs that go through the bracket on the top of the strut tower. If you have cruise control, that's where it mounts, and the bracket goes around those two studs. And then from the bottom I'm just going to twist it so it all lines up. And then I'm going to tighten down on the two 13-millimeter nuts as well as the one bolt that goes through the center there. And I will go ahead and fast-forward as I put those back in.
Now that the upper strut is tight, I'm going to fit into the spindle at the bottom, and I'm going to reinstall the two bolts, and they have a bit of a spline to them. So I'm going to use a hammer and hit them in to seat them once I've got them both in. And once I got those seated, I will reinstall the 21-millimeter nuts that go on the ends, and I will fast-forward as I tighten those up. Now with those two tight, I'm going to go ahead and torque them to 100 foot pounds. You can reinstall your wheel at this point and get the five lug nuts tight. With the car back on the ground or the wheel back on the ground, I'm going to torque the lug nuts to 90 foot pounds in a star pattern. And then once I got that done, I'm going to use the 19-millimeter socket to tighten up the plastic caps on the hubcap. Just remember that there is a notch in the hubcap here for the valve stem, and you're going to want to line those up. And then once I got those all lined up, go ahead and tighten them up. And at this point, I recommend having an alignment done on the vehicle. Make sure it's driving nice and straight down the road.
We hope this helps you out. Brought to you by www.1AAuto.com, your source for quality replacement parts and the best service on the Internet. Please feel free to call us toll-free, 888-844-3393. We're the company that's here for you on the Internet and in person.
Shop Products


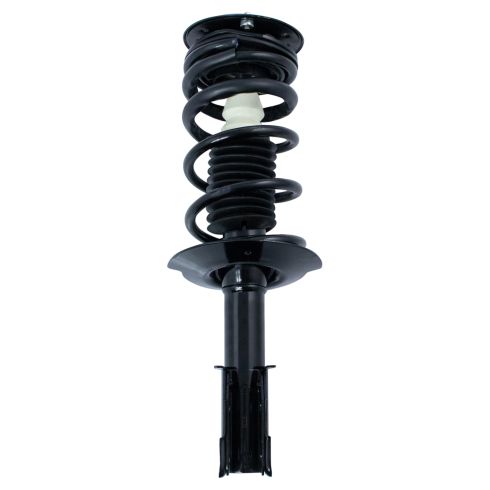
2000-05 Chevrolet Cavalier Pontiac Sunfire Front Strut & Spring Assembly TRQ SCA70169
- No specialty tools required
- Easy install - Pre-assembled, loaded struts

How to Replace Front Struts 1994-97 Honda Accord
Learn how to replace clunking or bouncy struts on your 94-97 Honda Accord by watching this tutorial video from 1A Auto.

