Hey friends, it's Len here with 1A Auto. Today we're going to be working on our 1996 Dodge Ram 1500. I want to show you something fairly basic, replacing the front differential four-wheel drive actuator. Super easy. I can do it and you can do it too. As always, if you need this or any other part check us out at 1AAuto.com. Thanks.
Okay. Go underneath the vehicle. We're going to cut this wire tie. Your vehicle may or may not have one. That's just there... Looks like somebody may have put it there just to hold this from flopping around, and honestly I'll probably do the same.
This piece right here, it's just a couple little rubber hoses. Pull that off of there and take a look. If it looks like these are torn or broken or anything like that you're going to want to replace it. This one actually looks fairly decent, surprise, surprise.
Going to take this off right here. Your clamp may be different, but this one right here is a 9/32. Take this clamp up there, grab your hose, twist and pull. It should slide right off. Take a look at your hose. This one, aside from being pretty gunked up inside, doesn't look too horrible. I'll probably clean that up a little bit, double check it. We'll set it aside for now though right down there. Extra part, a little thick, nice.
Take off our electrical connector, a little tab. Just bring that down and give this a tug. Always check your electrical connectors. Look for funny colors. If it looks like it's dirty or anything like that you can clean it out. Put that aside.
Okay. Got a little shield right here. That just protects this. We're going to take out these 11 millimeters. Start with the lower ones. Hopefully I'll be able to get this shield out of the way. Okay. So before we go ahead and take these out we're going to take this off of here and we'll take this off of here. I'm going to continue with my 11 millimeter. That'll take this off.
As you can tell, fluid is dripping out already. It's going into our collection bucket. Take this off. We're going to clean this up so it's nice and pretty. We'll put on a little bit of thread sealer on there and we'll put it into our new one when we get to that point. Put that aside.
Let me grab the right... So we'll take this off and this off, so we'll just continue with these. This bolt right here has a little bracket that holds this wire and everything on there. Bolt number three, same as the other two. Take that bracket off there. Just remember this bracket goes on that one, left side upper.
This is going to be the last one holding this unit in. Come on baby, we're almost there. There's a washer, same as the other three. Pull this off. Fluid is going to come out right into our bucket. Awesome.
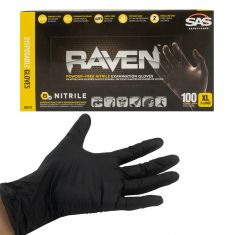
Okay friends, so we've got our four-wheel drive actuator here. Right inside... I'll show with this, there's a little clamp with a clip. Let me show you with the new one here if I can get it open with my gloves. All sorts of new goodies in this. That's always good. See that? That is right up against here and it's holding this piece in, okay? So we need to get that out of there.
I'm just going to take a screwdriver, let me see if I can pop it up and out. Almost there. There's our clip. Set that aside. Grab this. Give it a little pull. There it is. Okay.
On this right here, get yourself another one of those little clips, and the other side another one. So I went ahead and grabbed a pick. I'm just going to see if I can get this to lift up. There it is. Well, that one was in there pretty good. I'm going to slide this down so I get a better look at the other one. Hopefully we can get a good grab onto it and pull it out of there. Just using my pick. Sometimes these go flying, so you're of course going to watch your eyes. There we go. Set that aside.
You can grab this, slide it straight out just like that, out like that. Okay. Now we just need to get this off of here, so we're going to be putting this into our new unit. Put it in our vice. I'm going to grab a wrench and we'll take it out of there.
Okay, so we're just going to take this off of here. You can either use a 7/8 or a 22 millimeter. Just put it on here and turn to the left to break it free. Feels like it's getting ready to come off here. All right. We'll clean this up and we'll do a product comparison.
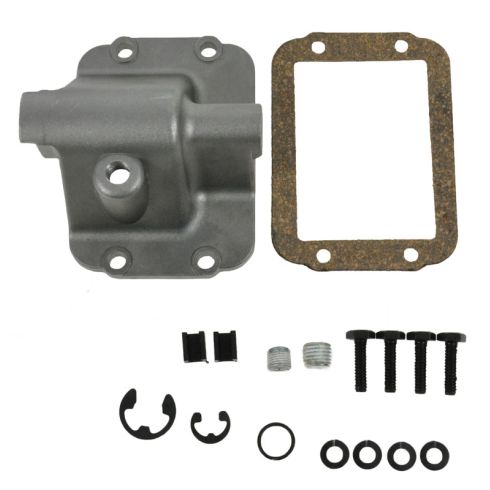
So here we are friends, a quick product comparison for you. Right here you have your original four-wheel drive actuator off the front differential on our 1996 Dodge Ram 1500. Over here you have your brand new quality 1A Auto part. As you can tell, you've got the same mounting holes, four mounting holes, right? You have a hole right there, there, and a threaded hole on this side. The inside looks exactly the same. I would say that these parts are created 100% equal. Put that down.
It also comes with a brand new gasket. It's nice and thick. This is a quality gasket. It's not some flimsy paper gasket or anything. It even comes with brand new hardware. You've got mounting bolts. You've got your little snap ring clips, the C-clips, looks like some washers. This has everything literally, everything you're going to need to do this job with the exception of maybe some tools. But you can get those at 1AAuto.com as well.
With that said, I don't see any reason why this isn't a quality part to install, so I want to go ahead and do it. As always, if you need this or any other part check us out at 1AAuto.com. Thanks.
Okay. So we're just going to put this in here so we can hold it. Get a nice light clamp, nothing too crazy. You can install this in the vehicle if it's easier for you and you don't have a vice, but since I do have a vice and it's right here, this is easier for me.
I'm going to screw this all the way in until it bottoms out. It's a good idea to put a little bit of thread sealer on there if you have any. Give it just a nice little... Once it bottoms out, just a teeny bit more, just a little bit more. There's that.
Bring it back over to the bench. All right, so here's what we're dealing with. Got all our other parts. If you want to, you can go ahead and clean it up. Let's see what's in our little bag of mysteries here. I'm fairly interested to see. There we are. All right. So we've got a couple of these. Those go on this arm right here. Those are nice. We've got our mounting bolts with some lock in washers. Very nice.
We got some clips. You got your nice big one, a couple small ones here. Very nice. So as you can tell, it's got everything you need to install this. Let's do it.
All right. So I got one. Need the other one. Just grab it, lift it up over there. You're going to take your new one, set it right up on there like that. Take some pliers and squeeze it right on there. There it is.
We're going to take off this rubber gasket right here, bring it up, get it out of its little groove into the next groove apparently. Got to get past that one too. Grab that on there. Try to get it out of that groove and into the farthest one out. There we are. Very nice.
I'm just going to take a little bit of this axle lube that's on here and put it on that gasket. You can use whatever you wanted to. If you have a little bit of grease of some sort you could do that as well. It'll help keep moisture out of this, which is super important. Maybe I'm going to grab a little bit of grease and I'll do the same actually. Okay. Put a little bit of this stuff on there. It's going to help keep moisture out. The last thing you want is any moisture getting into your differential or into your actuator area. Close that up.
Okay, so here we go. This piece right here, you'll notice that it's got a different bend to it, right? It kind of goes a little bit off to the side. It goes this way. It does not go this way, okay? Put it in the way that it goes, just like this. Start this. I'm going to go right on through just like that. Okay.
You can see where the groove is right in here. We're going to put one of our small clips there and then we'll move this and we can put another small clip there. Okay. First we're going to double check to make sure we know which way that this goes and then we can continue.
All right, so when this sits inside the vehicle it's going to be on the differential just like this. We want these facing out and this facing out of course. Then you have your little breather up here. Okay. So just set it up so it looks like these. They're facing out in the same direction where this is.
Put it in there, give it a little push, bonk, there we go. Pick whichever clip you want to do first. Whatever. We'll go with this one. Why not? One of our little clippy-dos, we're going to see if we can get it down in there. To do that what I'm going to use is some needle nose pliers and I'll see if I can get it down in there. Just use some of these needle nose. You just got to get it down in there all the way, okay?
There it is. Just check it. Just check it and make sure it's spins, that's all. That spins around good. Awesome. We're going to do this side, see if we can get it in there. Get it started with our needle nose and then we'll force it down in. Okay. That's in. Just give it a little spin just to make sure. Yeah. Awesome. Cool. So we've both of those clips in there. You can hear when you move this back and forth air getting sucked and blown back and forth through there. That's how it actuates the pressure from there. Awesome.
Okay. That looks pretty great. What this does right here is it just kind of senses... When this shaft comes over it pushes a little piton in there and it kicks on a light that goes up to your dash and says hey, you're in four wheel-drive. So here's that stuff.
We've got one more clip and that goes right up against the side right there. Got a big clip. Let me see if I can slide it down there. Wish me luck. Just squeeze this together. It should give you a little bit of room there. Pretty close. Put this up against me here. Just check it. Yep, that looks really good, in there for sure. I can't pull this apart. Perfect. All right friends, let's go ahead and install this into the vehicle.
We're right up on the differential still. We have our old gasket. You need to make sure that you get this off of there before you go ahead and put on your new gasket. Makes sense. Just use my little scraper. Nothing too special about it. You could probably use pretty much anything, razor blade, screw driver if you had to.
There's our gasket. As you can tell, it's pretty flimsy at this point, so it's really nice that 1A Auto provided us with a new one. I'll grab a rag, clean this down so I can see what I'm dealing with here, how much I have to clean and what not. Looks pretty good. Give it a couple little scrapes. Pretty gunky in there. There we are. Awesome. Dispose of that. Okay, so we're going to grab our new bolts, we'll grab our new gasket and our new actuator and we can continue.
Okay, so here we go. I grabbed a couple of our bolts and I put on a washer on each one. We have our gasket. We can go right over the actuator through the gasket just like that. The same thing for this one. Bring up the differential. We're going to line up these forks with this right here, okay? Make sure you line it up. If you don't line it up and this isn't sitting inside this groove right there, you just wasted all this time. You're going to have to tear it all back apart and line it up because you're four wheel-drive isn't going to work.
Okay. Get that one started. Grab our next bolt. Insert that in there. Okay. This bottom one. We don't want to forget the shield. It's easy to forget these things. That's just going to help prevent anything from getting picked up and potentially damaging the unit. Make sure we get those started.
All right. Bottom them all out and then we'll torque them down. All right. I'm going to torque this down to 96 inch pounds. It comes out to approximately 8 foot pounds if you have only a foot pound torque wrench. There we are. Let's go around and double check them real quick. Awesome.
Okay. So we got our shield on here for sure. We got our bracket on there for sure. If you forgot, whatever. No big deal. Accidents happen. Just unbolt whatever you have to unbolt and get it on there.
We got our little electrical connector here. We've got our vacuum connector on this side. That's going to go just right there and slide right on there. Okay. That's just going to create vacuum down through here. It's going to put pressure inside this right here, negative pressure more than likely. It's a vacuum of course, right? Once we get our little piton on there it's going to help us out, but that's what's going to move that actuator around and put us in four-wheel drive.
So we get that on there. We'll get this on here in one second. I'm just going to get a little bit of lubricant, and we can move along. Okay, I put on a little bit of dielectric grease on here. It's going to help keep moisture out of there. Push that in there so it clicks. Give it a nice little tug. That feels great.
Get this, put on a little bit of thread sealer on there and start it into the threads here on this. Grab my socket. There we go. So you want to look at the threads, and essentially you just want to go about halfway down the threaded area. You don't need to go and bottom this all the way out against there. That's just overkill. Just go about halfway. As long as you have thread sealer on there you'll be doing all right.
Grab our hose. Going to clean this out real quick. Just rust and all sorts of crud. Good enough. Take a little bit of this and go right along here to help keep any moisture out. Even though I've got the clamp on there, it'll help keep moisture from getting in there and building up rust.
We'll put this back on there. Just need my ratchet. You want to make sure you have this nice and snug, okay? Give that a nice tug. It's not going anywhere. Perfect. You got all this. You can wire tie this up if you want, put it all together. This is supposed to spin like this. It doesn't actually screw into anything. You saw how it goes with the clamps, right? So you can just go ahead and wire tie this together. Do whatever you want with it.
All right. So that's how you go ahead and install it. I'm just going to grab a wire tie and we'll finish it up with that. Trim off that extra. You don't need it hanging around. There we go. Awesome.
Now you can just try out your four-wheel drive and make sure it works. Easy peasy.
Thanks for watching. Visit 1AAuto.com, your place for DIY auto repairs, for great parts, great service, and more content.


