Replaces
This part doesn’t fit a . Select from parts that fit.
Frequently bought together
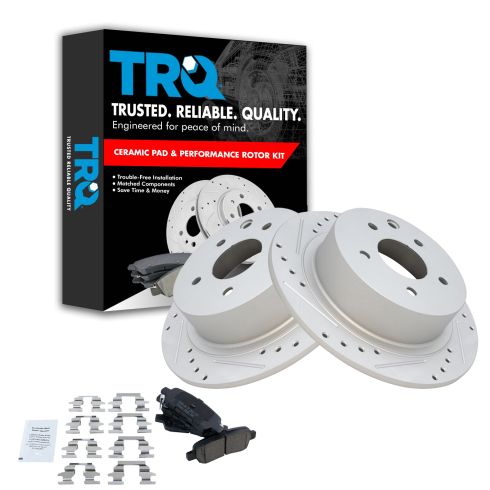
Part Details
Product Features
Item Condition:
New
Attention California Customers:
 WARNING: This product can expose you to chemicals including Lead and Lead Compounds, which are known to the State of California to cause cancer, and birth defects or other reproductive harm. For more information, go to www.P65Warnings.ca.gov.
Lifetime Warranty
This item is backed by our limited lifetime warranty. In the event that this item should fail due to manufacturing defects during intended use, we will replace the part free of charge. This warranty covers the cost of the part only.
FREE Shipping is standard on orders shipped to the lower 48 States (Contiguous United States). Standard shipping charges apply to Hawaii and Alaska.
Shipping is not available to a P.O. Box, APO/FPO/DPO addresses, US Territories, or Canada for this item.
Expedited is available on checkout to the United States, excluding Alaska, Hawaii.
Final shipping costs are available at checkout.


Created on:
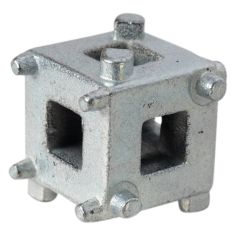
Tools used
Hey everyone. It's Len down here at 1A Auto. Today I'm going to be showing you how to do a complete rear brake job on 2010 Nissan Altima. It's going to be a very simple job, and I'm going to be the guy that shows you how to do it. If you need these or any other quality parts, you can always come down to 1aauto.com. Now we have our vehicle partially supported off the ground. We want to make sure the wheel's still touching. We're just going to break to all five of these lug nuts free and we don't need to loosen them up very much. We just want to break them free so when we get it up off the ground we don't have to worry about spinning the wheel, trying to break them free.
One, and we're going to be using our 21 millimeter socket. We're on our last two. That one off, all right. What I like to do is I like to leave one on there when I'm removing the last one, so I'll just put that second to last one back on a couple threads. Now we'll go ahead and remove this last one. The reason for that is so the wheel can't come loose, fall and hurt anybody. Safety is key here at 1A Auto. The last one. Now we'll just go ahead and remove this second to last one that we started on, holding the wheel.
Take off the hub cap. Here we go, being careful not to drop it too hard. One of the first things we're going to want to do is make sure we're wearing safety glasses and hand protection. Also, you want to make sure you have a receptacle to catch any brake fluid that might fall. You're going to remove this Bleeder Boot. We're going to try to break this bleeder screw free. Broke free nice and easy, I can see fluid coming out. You always want to make sure if fluid comes out, if fluid doesn't come out, there might be an issue with the bleeder screw, in which case when you try to push back the caliper piston, it's going to cause an issue, forcing it back up through your brake lines and it will be a big issue for your ABS unit. So for now, I'm just going to snug that up again. For me I like to use something like this. It just goes down into a sealed receptacle so I can go like that. I'm going to open up this bleeder screw once again.
Now I can use a small pry bar, or you can use a screwdriver, or whatever you might have. You can go between the caliper and the pad and try to force the caliper this way. And basically what that's going to do is it's going to push the piston in, and then we'll be able to diagnose if this piston's any good. Just nice and easy, it's not a race. That pushed back nice and easy. We can see the caliper can move freely, so we know the sliders are good. The piston's in as far as it can go. Now we can close up this bleeder screw. We're clear to remove these two screws or bolts which is the caliper to the caliper bracket.
All right, so we've got our 14 millimeter wrench. We're going to try to break this free. Then we'll come up here to the top. Something we might notice is that when this comes free, the caliper slider's going to want to slide out. We've got an arm in the way, so what we're going to do is we're just going to break it free, the other one free, and then we're going to come down and we're just going to remove the whole bracket and then we'll be able to get this right out of the way and we can finish removing this from the caliper bracket. It's a lot easier to break it free while it's still mounted to the vehicle.
There we are. Now we can go ahead and remove these caliper bracket bolts, using a 19 millimeter socket and a ratchet or a wrench if that's what you'd prefer to use. The first one broken free. Leave it in there though. Move on down to the next one. See if we can get to it. As you can tell, there really isn't very much room, what we might have to use here is a shallow socket with a swivel head extension or even just a swivel socket. So I decided to go with a 19 millimeter wrench because it's something that more than likely everybody has, and a rubber mallet. I'm going to very carefully break this free, a couple of more whacks. It feels good. Now that I know I have both these freed up, I can go ahead and use a ratchet wrench.
Got this pretty loose. Leave that one in there. Looking down here I'm just going to finish taking this one out. Almost there. There's one, has a washer, second one's about to come out. There's two. It also has a washer. You want to make sure that you keep those washers. If you happen to lose one, you need to make sure that you get another one. If you don't have a washer in there, the bolt's going to come through further than it should and it will probably hit up against the inside of your rotor and that'll cause an issue. Now we can go ahead and remove the caliper. You'd never want to let the weight of the caliper hang on the hose. It could cause a tuck. You don't want a tuck, so if you have something you can hold it up with that works, or if you just want to rest it on something that's already in the vehicle, that works as well.
Next we just removed the rotor. Might take a couple of whacks with your big fabulous hammer, but this one's already ready to come off. So let's pull that off. You can take a look inside. This is where your emergency brake shoes ride. These are your emergency brake shoes. They look like they're in good shape. Rotor looks like it's in fair shape. But we're going to go ahead and replace these anyway, and what we're going to use is a quality 1A Auto part. So now we're just going to pull the pads out, just like this. Should slide out of there fairly easily, but for the purpose of this vehicle, or the video, it's not going to. Here we are, like this. You can go ahead and take this right apart if you want. Remove that boot, remove this boot, and there we are. Here's the caliper bracket, can get this cleaned up.
Now we can continue removing these the rest of the way, removing the boots. There's no specified origin for these. Something that I would know is that the two caliper sliders are different. You'll notice that this one has a little rubber bushing, this one doesn't. If you want to mark the bracket or the caliber, but either way mark it where the one with the bush in goes. We have our old part out of our Nissan Altima and we have the new part that we're going to be installing with a quality 1A Auto part. As you could tell, the pads match up. Both of them have the squealer. This is your ... for your pad depth. When you get down to a certain depth, which is about 1/32nd the squealer will start hitting the rotor and that's when you know it's time to replace.
As you'll note on these new rotors, they come drilled and slotted. It's very important for heat dissipation and also getting rid of dust that might build up. It's a friction material. So as with anything, if you have ... If you're creating friction, it's going to create dust, powder, heat. And that's what all these are for, heat and dust dissipation. You'll notice that the insides are in very good condition on the new ones, the old ones, a little warned. This is where the e-brake shoe's going to ride. It's very clean. These are zinc coated, and they last a very long time and I don't see any reason why these wouldn't be the best part you can install on this vehicle. So, if you need these or any other quality part, you can always come down to one 1aauto.com. All right everyone, now that we've got our rotor off, we can see all the inside. We want to take note of the condition of our e-brake shoes.
These look as though they're in really good condition. Everything is just a little bit dirty under here, so I'd want to take care of all that. Making sure that the hub's nice and clean of any debris or rust. Some things to look for is stuff like that. A little bit of rust that can fall down in between here somehow. It's not going to be down here, but anyway it could cause noise, it could cause flaking and drivability issues. So what we're going to do now to get to the point as we're just going to clean up this hub, we'll clean up the e-brake shoe area. I'm going to show you how to adjust this up and then we'll go from there.
So standing back, making sure we're wearing our safety glasses. Give it a little spritz, parts cleaner. I like to go around the center of the hub first. It gives me a starting point. Now I can go around the lug nuts afterward. It's preference, as long as you're cleaning the whole thing. Go around one single lug nut each time you want, whatever you want to do.
Doesn't have to look shiny and new, it's not shiny and new, but if you do want it to look shiny and new, you could always go on to 1aauto.com. I'm sure you could find something that'll help you out with that. I think this looks pretty great. I'm going to spray it down again real quick, making sure that I have my receptacle down there.
Here we go. Still a little rusted. That's okay. What I'm going to do is I'm going to feel around for any raised lips. If you're not wearing gloves, don't do this. You don't want to get any type of chemicals on your skin. It will soak in and it could cause health issues. Safety first. I don't feel any. I don't feel anything there. This all feels really good. I think that feels good. I'm going to hit it again. Now we can move on to cleaning up our e-break area. Make sure we don't have any flakes in there and we'll show you how to adjust this up.
Okay. If you're cleaning up the e-brake shoe area, there's only a couple of tools you're really going to need. That will be some parts cleaner, a little bit of sand paper, and a wire brush. So I'm going to stand back. I'm going to spray basically everything in the e-brake area just so I can get a preliminary view of what I need to do with the sandpaper and the brush.
I don't need to go too crazy because I'm going to be doing this again. It's pretty good. Let that dry for a second. You don't want to breathe in the vapors from any type of chemicals like that. It's harmful for your brain. Let's try to keep your brain around for a little while. You're going to need it for the rest of your life probably. What I usually like to do is I like to take a little bit of sandpaper. You can use whatever grit you want. And I'm just going to scrub this up a little bit. This right here is preference, but I'm creating a new surface for the shoe to grip onto, so why not have a new surface of the shoe to grip onto the drum. You don't want to go too crazy because every bit of sanding you're doing, you're taking away life from your shoe.
That looks pretty great. I'm going to go ahead and do the same thing to the other side. Now what I'm going to do is I'm going to take my brush. I'm going to get to all the areas that I haven't gotten yet. I'm going to try to go around the backing plate, can see where all the big flakes are. I want to get rid of as much of that as possible inside here where the adjuster is. Make sure there's no rust or rot there. This actually looks really good. I made sure to spray it down already and then down here, this is where your e-brake pivot is. If this looks like it's rusted up, you might want to double check to make sure that your e-brake's working properly. If it isn't, this could be a probable cause. But this one I know works well so we're not going to worry about that. Going to take my wire brush, I'm going to go along the edges.
All right, now that I've got this all cleaned up, everything looks pretty good. What I like to do is to use a little bit of copper never seize and I'm just going to try to spray it where the adjuster is. If you were to take all this apart, it would be a good idea to fully unscrew this, clean this side and that side. This will actually come out as well, and then you can put it back together with a little bit of copper never seize. For this application, I'm only going to put a little spritz right here, just like that. Maybe a little bit more because it didn't go where I wanted to. That looks pretty good. I'll wipe down the access.
What's important to remember is you don't want any of that on any of the braking surfaces. So as you can tell it's nowhere near any of the braking surfaces. So that's good. Using a little bit more of our copper. Just go around the hub base here. It's where it connects to the rotor. I'm lining this up. Goes on there pretty good. That's the sound of the shoes hitting inside the ... well, the drum of the rotor, but that would be the drama right here of the rotor. Once we get this on like this, we can go ahead and put a lug nut on so it holds it nice and tight and then we'll go through this peephole right here and we can adjust the e-brake. All right, so now I'm just going to use something, basically a piece of scrap. Essentially anything that'll go over the stud.
I'm going to start one of these lug nuts on and this is just to hold the rotor on so I can continue what I'm doing. I don't want the rotor moving around, in and out, in and out. A little chunk of rust can fall in between there, or really anything, and I don't want anything getting in between there that's going to mess up any of the work that I just finished doing. Doesn't have to be tight just enough so it can't move.
Next what I'm going to do is I want to use a flashlight. I'm going to look through this peephole and you can kind of remember from the video where the adjuster was. So basically I'm going to go through this peephole, I'm going to turn that adjuster to the point that I can't turn this drum anymore. Well, the drum surface of the rotor. It's a rotor, but the part that I'm adjusting is essentially the drum where the shoes ride. Once I get to that point, I'm going to back it off a couple of clicks or a little bit out until the point that it's not holding any more and then it should be adjusted properly.
It feels pretty good. Can move freely, not too much drag. The more drag you have going on in there, the more heat it's going to have. So essentially drag is friction. You get a lot of friction, this is going to heat up, it's going to warp on you. You're going to get vibration coming from the rear. The hotter it gets, the more the metal's going to swell, the more it's going to swell, and then it's just be kind of ... it's going to become an issue for you.
So you don't want very much drag as you could tell. That's pretty good right there. Rubber plug, hole. You want to put it ... start it in. I'm just kind of give it a little push. If you happen to push too far and it goes in, it's okay. You just take this off, remove the rotor, you can get to it. Don't leave it in there. That'll become an issue for you. Tech tip. Easy peasy. Take it back off. Only takes a minute and you'll save yourself plenty of time and hassle down the road. So I continue removing this caliper, what we're going to do is we're going to pinch off this brake line. So brake fluid can't continue to drip out.
Just pinch this, make sure our ratchet's in reverse, which is to the left. Break that free. Now hold it. Make sure I'm wearing my safety glasses and my gloves. Here we are, let me put that down over here. Now we've got our caliper out. So out with the old, in with the new. Here we have a quality 1A Auto part. Comes with everything you need for the install and installation video by me. We've got the little copper crush gaskets here. These are very important to replace. You never want to use the old ones that came out with your old caliper because they've already been crushed and fitted into the old hole.
As you can tell, everything's the exact same on this. Bleeder screw placement. It's the same. Here your sliders, brand new boots, this is a very high quality part right here, it comes with new tens, which is very important. To me personally I wouldn't see any reason why this wouldn't be a great part to replace this original quality part with. So for this or any other quality part, you can always come down to 1aauto.com, and we'll be sure to help you out.
So we've got our caliper out. We can separate it. One thing that I would like to mention. If you were having an issue with this brake caliper and you thought it was hanging up, there's a couple possibilities of reasonings why it could be. One could be the ABS unit is holding pressure in there for some reason. That's a story for another day, but basically what I want to talk about is caliper sliders right here. If these aren't lubricated in here and they're rusted up, it'll make it so your caliper can't slide on the bracket. These are fine. Another thing that I'd like to mention once I get this off is your caliper piston, which is right here. Sometimes what you'll notice is you can't push this caliper piston all the way back. It'll stop maybe about this high or wherever it wants to stop really, in that scenario what I would do is I will go down to 1aauto.com and I'd order one of these.
It's only a few extra bucks. Totally worth it. But if you did want to you know, go about working this one and cleaning it all up, that's completely up to you. Can take off these tins, clean it up with a wire brush underneath both of them, make sure you lube them and we have another video on the same vehicle, which is a 2010 Nissan Altima where I did front brakes. You can just follow the instructions for how I clean the brackets and go from there.
So now even though we have our new caliper, we're still going to disassemble it all. Make sure everything's clean and lubed. Sometimes from the assembly it doesn't get that way. When we were removing the old caliper, remember that we saw a bushing, so we want to make sure that we mark where that goes. I'm going to put a little marking right here, that's just going to tell old man where that one goes. Now we can take this off. We'll set it aside. Now we're up to the bracket, so we're going to take this little mini screwdriver or whatever you've got, pop off these tens, they should look the same so you don't really have to remember where they go.
As you can tell, they are the same. If you go this way they're the same. This way they're opposite, or whatever. Now we can take a little bit of brake lube or silicone, whatever you might have. I like to just go along the bracket where the caliper tens are going to ride and this just helps keep moisture out from in between the bracket and the tens. Get a little bit of moisture in there, creates rust, rust swells, lifts up those tens, holds the pads and the bracket so it can't move. Now you've got a breaking issue. Len, what you're showing me? This is what I'm showing you. Just put a little lube. Here we go, that's nice.
We don't need too much. What will happen is if you end up putting too much, it's going to squeeze when you put it in the brake pads, it might get on the rotor or on the braking surface of the pads, which will cause braking issues down the line. You want to make sure you keep any lubrication off of this and the breaking area on your rotors. So now we can go ahead and put these tens back on. They press in with just finger strength. Anybody can do it. I like to say anybody can do it, except for me. Here we go. We'll do the other one. Same thing. There we are. Now we can turn this.
We'll take a look at our pins. They're brand new, nothing to worry about. Just put a little bit of lube on there. I like to try and get all the way up into this little groove right here, at least with just a little bit. Now we're there, when I put it in, it's going to get into there and right along, right where the boot rides and it's going to keep moisture out from getting in there, so that's very important to think about. We want to keep the moisture out of there as well. Water's good for life, but bad for metal.
Let's get a little bit more up there. We don't need to get any on the threads. Something that you could put there as a little bit of a thread locker. That's completely up to you. For this application I'm not going to worry about it. Now we can move this aside. Now we're onto the caliper portion of it. This is the muscle, the piston, when you step on the brake it forces fluid through here, pushes your piston out. Once the piston pushes the pad against the rotor, the rest of the pressure will make the caliper slider slide. And then the outer pad will start gripping onto your rotor.
So your primary pads, the inner side, and then the outer side would be the secondary. So once your caliper piston pushes out, push against the rotor, move the whole caliper, the outer pad hits up against. Now you get a good squeeze. So what we want to do is we want to put a little bit of lube on the caliper piston, and on the ears of the caliper, just where the pads ride. You don't need to go all over the place. You definitely don't even need that much lube.
Just get a little bit on there. And then on the caliper piston like I said. It's okay if you get a little bit on the boot, it's not going to hurt anybody. And that's that. There's no reason to put any caliper lube up here, here, here, here, here, anywhere, but where I showed you. Now we're clear to get this all put back together onto the vehicle. So that's where we'll move on to now. So now we're going to install this caliper. One thing that I like to note is that when we were taking it apart, we noted that we wouldn't be able to get the sliders completely out with the caliper bracket attached to the knuckle. So what we're going to do is we're just going to put the caliper together as is on the bench.
Something to pay attention to is where the brake squealer is. We want to make sure that it matches up as it does. If we were using the pad from the other side of this vehicle, the squealer might be on this side, you know, basically backwards, in which case you would have to go get the pad from the other side or switch it if you haven't mounted it yet.
And just get the right pads. And the way that you also want to make sure is that you can see where the caliper piston hits, the little ring there. So that makes us know that this goes on the inside. So now we can go ahead, goes on in this direction, should just slide right in. Nice. We'll do the same for the outer pad, being careful not to push it too far.
Here we are. Caliper, doesn't want to swear, slide it right over. Okay, now we have our two pins. Do you remember that the one that had the boot that goes on the side of our crown, slide it in. Slide that in. As I mentioned before, we can use a little bit of thread locker. For this application I'm not going to worry about it. I'm using a 14 millimeter wrench, I'm going to tighten these down to the right, clockwise. I'm sure there is a torque specification form. It's just a little bit hard to do it on the bench like this. So all I'm going to do is I'm going to make sure they're nice and snug. I will let you know the torque specification so you can go ahead and do that if you so see fit. For this application I'm not going to worry about it.
So we noticed with our new caliper it came with two new crush washers, and when I took this off it only had one. So you want to pay special attention. Sometimes you'll find that one of the crush washers is still stuck. So if that's the condition you want to make sure you pry that off and dispose of it properly. You don't want to leave that on there and put another one on. You're going to get yourself a leak. So you can use a small pry bar or small screwdriver I should say. Or in this case, just use your finger apparently. Should come right off.
Now we're clear to go ahead and put on one of these. We're going to put on one. Now we're going to put it through the hose. We're going to put on the other one, and then we're going to screw it directly into the backside of the caliper. So you want to double check your hose on both sides to make sure there's no real rust buildup or corrosion. This right here looks like it's just discoloration. I don't think it's anything that's going to cause too much of an issue. We'll check the other side, looks fine as well. There's no copper crush washers. If there is, you want to make sure that you remove it, just clean it off real quick.
As I stated, we're going to take our bolt. We're going to put it through one side. Now we can grab our new caliper from 1A Auto, so these are the caliper bracket mounting bolts. As you can tell, the threads are pretty gunked up. If you want, you can use a little wire brush or even a wire wheel. Clean these up. It's up to you or you can just jam them right in there. Either way, I would use some thread locker if that's what you want to use. It's completely up to you. I'm just going to go ahead and clean these up and then we'll be all set to go from there.
Now it's time to go ahead and mount this caliper that we just finished cleaning and getting ready. Something that I wanted to note is the bleeder screw is facing in the upward position, so when the caliper's mounted, it'll be up here and not down there. If you happen to notice that the bleeder screw's located down here, it's an easy fix. Go over to the other side of the car and use that caliper because that would be the caliper for the other side and you can just switch them. So this looks right. We're going to go ahead and we're going to mount these. These are 19 millimeter heads. We'll get our flex hose right out of the way, making sure we're wearing our safety glasses in case it's flings and gets a little brake fluid at us.
Start both these in by hand before we start tightening anything down. The torque specification for this is 62 foot pounds. If you were going to do that, what you would have to do is remove this lower arm and that should give you enough swing to be able to get a torque wrench in here. For this application, which is just an instructional video, I'm not going to worry about that. Getting close. It felt like it was, here we go. Get it nice and snug.
Now I'm going to grab a longer wrench, and I'm going to use a rubber mallet, all I'm going to do is I'm going to put it on with a 19 millimeter wrench. I'm going to give it a little bonk. That just locks them in good. If I had a little bit of thread locker, I would use that.
Now all we have to do is just get this flex hose on and then we can get to bleeding it out. Now we're going to make sure that we have our copper gasket up here like we put in before. We're going to take our other one, brand new. We're going to go ahead and put this into the hole. See if I can get it. We're going to start it in by hand. You'll notice it has a little ear. The caliper has a little hole, should line up perfectly. If it doesn't, just give it a little wiggle. Get this snugged up by hand. Now we can go ahead and tighten down this right here. It's a Banjo Bolt using a 12 millimeter, you can use a wrench, socket. Whatever you're into. I like to give it a little bonk. That's my thing. Bonk, bonk. Here we go, move our hose crimpers and now we're clear to bleed this out.
All right, now it's time to start bleeding these brakes. What we're going to do first is a gravity bleed. What you need to do first on the gravity bleed or any bleed situation would be to pump up the brake pedal so you can activate that caliper. By activating the caliper I mean you're going to try to force fluid down into it, which is going to force the caliper piston up against the pad, and the pad into the rotor. So what we're going to do is we're just going to use a pry bar for this application, and I'm going to push on the brake pedal nice and slowly.
We don't have to go whole height ... We don't have to go hard. Just try to push it down. Bring it up slow. We don't want to go fast. We don't want to aerate the brake system. Push it down, bring it back up, and we're just going to do this a few times. So you can go however many times it gets ... takes to get that caliper piston pushed out. So I'll just go a couple more times here, just for good measure. I can feel it getting a little more step. So that's good. Next what we're going to do, make sure we have our recycling receptacle under. We're just going to open up our bleeder screw with an eight millimeter wrench.
We'll just leave this open and wait for a steady trickle of fluid and then we'll close it up and we'll be ready to bleed this brake. So here we go. We've got a pretty steady trickle of fluid here. This looks good. I can do it, I'm wearing a glove. Don't do it with your bare fingers. I like to tickle the hose. I'll give it a little wiggle. We're going to watch it again. Make sure we don't see any air bubbles coming out. I'm going to close this up, turning it clockwise to the right.
Once this is properly sealed up, we'll be clear to go ahead and complete the brake fluid bleed, and after you're done bleeding it, you want to make sure that you put on this little rubber cap. It's just going to cover it like this. The reason for that is to make sure that you don't get any water or dirt or grunge down inside there, which will seize up this bleeder screw, which will make it impossible to get out the next time you go to do a brake job. All right, and now we've finished bleeding all four brakes. We do it by manufacturer specifications so you can look that up if you want, and if you need it to, you can also check out one of our videos on how to bleed brakes on your own. That's up to you. It's your preference, but definitely finish bleeding all four brakes.
So what you can do, you're going to come up here, you're going to double check your master cylinder. You can see where the levels are. We showed you that at the beginning. So open it up, double check to make sure you got the right fluid. This one says DOT 3, that's the type of fluid, so we're going to match that up with what we've got. This is good. You never want to mix it with DOT 5, if it's supposed to be DOT 3, use DOT 3. Now I'm going to use a little funnel. Make sure that I have a rag handy. The reason for that is because if I spill any, I want to make sure I clean it up. You don't want to get this stuff on your hands. If you do, make sure you wash it. Just fill a little bit at a time.
We're going to try and get the level up to the maximum. It's like a little bit more. It's going to come up. That looks really good. We're going to take our rag, try to catch as much of that brake fluid as we can, and as quick as we can, without dropping the cover. We're going to make sure we cover it back up. You never want to leave this open, DOT 3 brake fluid is hydroscopic, so that means that it's going to absorb moisture. You don't want moisture inside your braking system and you definitely don't want any dirt or grinds that might accumulate around here. So it's always a great thing to clean up around here and make sure you don't have any grange before you open it up. And like I said, just make sure that you cover it right back up as soon as you can.
Now we've completed our brake service. We're going to go ahead and torque the wheel and we should be all set to go. So we're at the point we're going to take off our securing lug nut here. This was basically just to hold the rotor on so it didn't wobble around, we remember that. If it feels stiff you can go ahead and use your 21 millimeter socket. I'm going to hold that in my hand, grab my tire. It's easiest to roll it right up your knee so that way there you can use your abs to lift it instead of your back. So I'm going to go like that. Use my leg. Put it right up on here. Just like that. Hold it still. I'm grabbing my hubcap, or wheel cover, whatever you want to call it.
21. Put it on here. We're going to go ahead and start all five of these. We'll snug them up and then we'll go ahead and torque it right down. Just go ahead and snug these down. Our next step is to get this wheel so it's just barely touching the ground so it won't spin. Now we're going to torque these lug nuts to manufacturer's specifications. Now it's time to torque this puppy down. We're going to go to 83, that's the manufacturer's specification. We're going to use our torque wrench with a 21 millimeter socket. We're going to make a star pattern. It's five lugs, so a star.
Here we go. Now maybe you got distracted. Somebody came over and talk to you. You don't remember if he got them all. Just go around again. I mean, it's not like you got to pay for it. Turn them again.
Thanks for watching. Visit 1aauto.com for quality auto parts shipped to your door. The place for DIY auto repair. And if you enjoyed this video, please click the subscribe button.
Tools used
Tools used
We're going to take these lug nuts off. Use a 21-millimeter socket, and remove the wheel. These two bolts out, use a 14-millimeter wrench. That one's stuck.
I'm going to take this lower caliper bolt off. I'm going to use a 14-millimeter socket. I'm not going to take the top one off because the brake hose is in the way, so I'm just going to have to tip this caliper up and slide that out.
I'm just going to use a straight-blade screwdriver, just compress the caliper. Just compress the caliper a little bit, and then just slide it up and off like that. And you can work it back and forth. This one's a little bit seized in here, so I'm going to have to clean that up, but normally, it should just slide right off. And slide it right off like that. Take a right brake caliper hanger and just hang it up. Make sure there's no tension on the brake hose.
We'll take the brake pads off. You can use a screwdriver and pry them out. We're going to take this caliper bracket off, take these two bolts off. We're going to use a 17-millimeter socket. Take those bolts out, and just slide the caliper bracket right off.
Now, we're going to take the brake rotor off. Just take a hammer. I'm going to hit it right here, here, in those areas. Just be careful not to hit the studs. Give it a tap, slide it off. And just take a wire brush, clean up some of this rust. If anything's built up, make sure you get that off. That's all cleaned up. Just use a little bit of copper anti-seize, just a nice thin coat, so the rotor doesn't get stuck on.
All right, take the rotor. We're just going to install it backwards. Take some brake parts cleaner, clean this off. Use a rag. There is a coating on the brakes themselves, on the rotor. Flip it around. Do the same on this side and wipe it down.
On the old rotor, there's a little plug right here. Just take a pocket screwdriver, pull that out. Just install that in the new one. Just line it up. We're good to go.
Just take this anti-rattle clip off, or pad slide clip, and just use a pocket screwdriver, slide this off. Take a wire brush, just clean up this area. Take a little brake caliper grease right there and right there. Take the new anti-rattle clip, slide it in place. Do the same on the other side.
And just take a little brake parts cleaner. Just clean out the...where the brake caliper pins go. And use a rag to clean that out. And also, the pins themselves, a little brake parts cleaner, clean it up. And you can use a little bit of brake caliper grease on these. And we'll reinstall these when we put the caliper back on.
Just take a little more brake caliper grease, put it on the slides, right there and right there. Slide the bracket over the rotor. Take the two bolts, get those started, and torque those bolts to 62 foot-pounds.
Take the brake pads. The inside brake pad is going to have the one with the wear indicator at the base of the pad, just like this. And the outside one with no indicator, slide that in position.
Take the brake caliper off the hanger, and you want to use a brake caliper compressing tool. I'm just going to take an old brake pad, slide it in here, and compress the brake pad. That's going to push the piston back, push the fluid through the hoses and lines, back up into the master cylinder. Just do it nice and slow.
And just some brake caliper grease on this slide pin, and that's good. Slide that back in. Make sure that seals up there. And take the other slide pin and bolt, and slide that back in. And torque that bolt to 32 foot-pounds. If you took that top bolt out, torque that one as well. We didn't take it out, so we're good.
Reinstall the wheel. Put the lug nuts on. Now I'm going to torque the lug nuts to 83 foot-pounds in a star pattern to tighten the wheel down evenly.
And I'll just go around again, double check. And pump the brake pedal nice and slow. There's going to be an air gap between the brake caliper piston and the brake pads. And then, check the brake fluid level and adjust accordingly.
Tools used
Hi. I'm Mike from 1AAuto. We've been selling auto parts for over 30 years!
Before you raise and support the vehicle, take a breaker bar and a 21 millimeter socket and break the lug nuts free while the vehicle's on the ground. Raise and support your vehicle. Once the lug nuts are loose, I can use the socket and finish removing them. Remove the wheel. Place it aside.
Start by grabbing the caliper before you remove it and pushing it, or pulling it outward to try to compress it so that when we go to unbolt it, it will slide away from the brake pads. I want to take a 14 millimeter wrench and see if I can break these free. They're pretty tight. I'm going to use a dead blow mallet and break that one free. Do the same with the bottom one. It goes loose so I can switch to a ratcheting wrench. We use a ratcheting wrench to finish removing these.
Now these are actually the slide bolts and we pull them out. So what I'm going to do – with this lower slide bolt, the control arm is in the way. I can't pull it out. We're going to roll the brake caliper down, I'm just going to thread the lower bolt back in a little bit.
That way it stays put, and I can remove the brake pads. Use a flat bladed screwdriver or a small pry bar. These ones are pretty stuck. Use a small screwdriver. That's okay if they fall on the floor. They’re old brake pads anyways. I'm not too worried about the rear one if I can't get it out because I've kind of released the pressure from it by removing the front one. I'm going to unbolt the bracket and I'm just going to pull the whole thing off together.
I'm going to remove the two 19 millimeter caliper bracket bolts. The lower one is here. The upper one is here. I'm going to start with the upper one, with a 19 millimeter wrench on here. Take my dead blow mallet, break it free. With the top one loosened I will loosen the lower one. Same thing, I'll use a dead blow mallet to break it free. Since these are loose, I'm going to switch to a ratchet and 19 millimeter socket to speed removal. I get that one pretty loose but not all the way out, because I want to work on the bottom one. It's going to need an extension. Try an extension in here, ratchet out here, and this 19 millimeter socket and extension. Now remove the lower bolt and finish removing the top one, the one with the bracket because it will become loose. It needs a little persuasion. It was frozen in there. Now I can unscrew, take off our slide pin bolts, lay the caliper up here for now. Take a bungee cord, just hold it up and out of the way.
The e-brake should be released but this is pretty rusty. There might be a rust ridge in here. I’m going to try to get this rotor off. Normally there's a rubber cap here. You pop that out and you can reach the adjuster and turn the adjuster in to pull the e-brake shoes, which are inside here together to help release this rotor. You may have to do that. I'm going to try spraying some rust penetrant around the edge of the hub and around the studs. I'm going to give it a couple whacks with our dead blow hammer, see if the rotor will just come right off. Otherwise, I'll have to work on releasing the e-brake. We might get lucky. It slid right off without having to release the adjustment. If you had to release the adjustment, you'd use this access hole and you'd go through here and turn this so the shoes would pull themselves in here.
These are our old rotor and pads for our vehicle. They're pretty rusted up. The car was sitting for a while so they needed to be replaced. See the new ones from 1AAuto.com are an exact match in the style of pad, they've got the wear indicators, the backing shims, same amount of lug holes, same opening to get to the e-brake adjuster. These will fit on your car great and help you stop really well.
Install the new rotor. I'm going to start out by installing it backwards. This way I can clean the oil off it that keeps it from corroding in shipping. I'm going to spray the inside because that's where the parking brake shoes are going to run. Take a rag, wipe down any excess, down the inside. Flip it over and install it over the studs.
Since the new rotor is brand new it's thicker and it won't fit over our parking brake adjuster or parking brake shoes, so we need to spin the auto adjuster in to give us more clearance. I'm just going to turn it up with this flat bladed screwdriver. It's going to pull the shoes in. This is automatic adjustment so as soon as you pull the handbrake a couple times or the parking brake handle, it will adjust out and it latches. These little notches lock against the spring, so once it goes this way it can't spin back. It has to be flipped back manually by doing this. Since I touched them, I'm just going to clean them off with brake parts cleaner. Let's try our rotor this time. There it is. So it should slide over with no resistance. I'll take a lug nut to hold the rotor in place.
We're going to remove the brake pad clips. They're stainless. We can clean them up and reuse them. So use a flat bladed screwdriver, pop them out. Pop out both sides. I'm just going to clean where they sit. Take some brake parts cleaner and wire brush and knock off the loose stuff. Repeat for the other side. Then I clean the clips with brake parts cleaner. Then I brush. Reinstall them on the caliper bracket. They click back into place. This is ready to go back on the car.
Unhook our brake caliper. I'm just going to lay it there for a second. You need to compress the piston inside here. Use our C-clamp and an old brake pad, and just gently compress the caliper piston in. That's good. Place these aside.
Before we can install the bracket fully, the lower slide pin that has the rubber bushing on it has to go through the caliper. You can actually start threading in a little bit. It's going to sit here. Because the suspension arm is in the way, I can't slide it in, so it needs to sit like this. Now I can line up the bracket and capture the top bolt. Now I can capture the lower bolt. Start tightening the bolt.
Before you go too far, I skipped it, but we're going to do it now, clean this brake rotor surface down from the protective oil that it's shipped with. You can wipe off any excess with a rag.
Now we can install our pads. Going to make sure that we didn't touch the surface of the pad. If you did, you can just clean with some brake parts cleaner. Put a little bit of caliper grease on the ears. Again, the same thing, make sure these pads are nice and clean. Use a little bit caliper grease.
I’m going to place the outside pad in here. We can slide our caliper back over. I'm going to push the little boot in. Slide our caliper pins in here. Thread them in.
When I had this rotor off and we were cleaning up I actually found the rubber plug that belongs in here, and I replaced that. I'm going to torque the brake caliper carrier bolts, these two big ones back here, torque as 116 to 144. I got my torque wrench set to 120 foot-pounds. For this top one, I don't need the extension. For the caliper slide pins, torque is 20 to 35, got my torque wrench set to 30.
For the final step after installing the wheel and torquing the lug nuts when the car is on the ground, gently step on the brake pedal. What that's going to do is bring the caliper piston out to meet the pads. See right now the brake caliper is loose. It's moving on its slide pins. When you step on the brakes, it pulls it in, pulls the brakes to the rotor. That's what helps you stop. We need to bring that piston out so it takes up the gap that's here and you'll be able to stop.
Install the wheel. Thread them on by hand first. Torque on these is 72 to 85. I've got the torx wrench set to 80 foot-pounds. I'm going in cross pattern. The wheel's installed and torqued.
Thanks for watching. Visit us at 1AAuto.com for quality auto parts, fast and free shipping, and the best customer service in the industry.
Tools used
Tools used
Tools used
We're going to take these lug nuts off. Use a 21-millimeter socket, and remove the wheel. These two bolts out, use a 14-millimeter wrench. That one's stuck.
I'm going to take this lower caliper bolt off. I'm going to use a 14-millimeter socket. I'm not going to take the top one off because the brake hose is in the way, so I'm just going to have to tip this caliper up and slide that out.
I'm just going to use a straight-blade screwdriver, just compress the caliper. Just compress the caliper a little bit, and then just slide it up and off like that. And you can work it back and forth. This one's a little bit seized in here, so I'm going to have to clean that up, but normally, it should just slide right off. And slide it right off like that. Take a right brake caliper hanger and just hang it up. Make sure there's no tension on the brake hose.
We'll take the brake pads off. You can use a screwdriver and pry them out. We're going to take this caliper bracket off, take these two bolts off. We're going to use a 17-millimeter socket. Take those bolts out, and just slide the caliper bracket right off.
Now, we're going to take the brake rotor off. Just take a hammer. I'm going to hit it right here, here, in those areas. Just be careful not to hit the studs. Give it a tap, slide it off. And just take a wire brush, clean up some of this rust. If anything's built up, make sure you get that off. That's all cleaned up. Just use a little bit of copper anti-seize, just a nice thin coat, so the rotor doesn't get stuck on.
All right, take the rotor. We're just going to install it backwards. Take some brake parts cleaner, clean this off. Use a rag. There is a coating on the brakes themselves, on the rotor. Flip it around. Do the same on this side and wipe it down.
On the old rotor, there's a little plug right here. Just take a pocket screwdriver, pull that out. Just install that in the new one. Just line it up. We're good to go.
Just take this anti-rattle clip off, or pad slide clip, and just use a pocket screwdriver, slide this off. Take a wire brush, just clean up this area. Take a little brake caliper grease right there and right there. Take the new anti-rattle clip, slide it in place. Do the same on the other side.
And just take a little brake parts cleaner. Just clean out the...where the brake caliper pins go. And use a rag to clean that out. And also, the pins themselves, a little brake parts cleaner, clean it up. And you can use a little bit of brake caliper grease on these. And we'll reinstall these when we put the caliper back on.
Just take a little more brake caliper grease, put it on the slides, right there and right there. Slide the bracket over the rotor. Take the two bolts, get those started, and torque those bolts to 62 foot-pounds.
Take the brake pads. The inside brake pad is going to have the one with the wear indicator at the base of the pad, just like this. And the outside one with no indicator, slide that in position.
Take the brake caliper off the hanger, and you want to use a brake caliper compressing tool. I'm just going to take an old brake pad, slide it in here, and compress the brake pad. That's going to push the piston back, push the fluid through the hoses and lines, back up into the master cylinder. Just do it nice and slow.
And just some brake caliper grease on this slide pin, and that's good. Slide that back in. Make sure that seals up there. And take the other slide pin and bolt, and slide that back in. And torque that bolt to 32 foot-pounds. If you took that top bolt out, torque that one as well. We didn't take it out, so we're good.
Reinstall the wheel. Put the lug nuts on. Now I'm going to torque the lug nuts to 83 foot-pounds in a star pattern to tighten the wheel down evenly.
And I'll just go around again, double check. And pump the brake pedal nice and slow. There's going to be an air gap between the brake caliper piston and the brake pads. And then, check the brake fluid level and adjust accordingly.
Tools used
Brought to you by 1AAuto.com. Your source for quality replacement parts and the best service on the internet. Hi, I'm Don from 1A Auto. I hope this how to video help you out. The next time you need a part for your vehicle think of 1AAuto.com. Thanks. In this video we show you how to replace the rear brakes on this 2003 Nissan Altima, pretty much the same for any 2002 to 2006. We show you the right hand, the left hand is the same procedure. We do always recommend you replace your brakes in pairs.
The items you'll need for this repair are new brakes pads and rotor kit from 1A Auto.com; 8, 12, 14, 19 and 21 mm sockets with a ratchet. A piece of pipe for some extra leverage. Brake cleaner, brake grease, brake fluid, jack and jack stands and a torque wrench. Raise and remove your wheel and tire. If you don't have the benefit of air tools, loosen the lug nuts with the vehicle on the ground, then raise and support it and remove the lug nuts the rest of the way. Inspect your brakes. You can look through and see the brake pads, and there's not much left to the brake pads on this vehicle and the rotor is in rough shape, pretty corroded with some large gouges. To just replace the pads you can see we took that top bolt out, but we're going to take the whole rotor off because it's actually frozen on this car.
Its two 19 mm bolts and you can see we use a 19 mm socket with a ratchet and a pipe for some extra leverage. You'll need to do this if you want to replace the rotor anyways, because you need to take the whole caliper bracket off in order to get the rotor off. Once the bolts are removed, using a flat blade screwdriver pry that off. Then you can set that aside. Your old rotor pulls right off. You want to use a flat blade screwdriver and pop this plug out of the rotor. Spray down your emergency brake assembly with some brake cleaner. Now using brake cleaner wipe down your new rotor. Then you put some brake grease on either end of your brake pads. You can see here's your adjuster for your other brake and that hole in the rotor is so you can reach the adjuster with a screwdriver. Turn it until you feel the parking brake drag on the inside a little bit; once adjusted then you can replace the plug. As we said before, our caliper was in bad shape. We ended up having to replace it, but you can ad lib along with us. You can put your caliper back in place.
Take the pads out of your caliper, and then put the caliper back in place. Put the two 19 mm bolts in place and then tighten them up to 85 - 90 foot pounds. Now you want to remove this 14 mm bolt right here. Once the bolt's removed pull your caliper back and then push, your brake pad slides into place. Once the sides are in place you can put your brake pads back in and push your caliper back into place and replace that 14mm bolt. Fast forward as we tighten that bolt back up to 25 foot pounds. - to your brake lines. Now we're going to fast forward here as Don replaces the wheel. You want to put the lug nuts on preliminarily. Lower the vehicle and tighten them the rest of the way. Now torque the lug nuts to a 100 foot pounds in a crossing pattern. After doing any repair on the brakes, before taking it out onto the road it's important to do a couple of things first. First you want to pump the brakes until the brake pedal firms up. Then you want to do a stop test from five miles per hour and then 10 miles per hour.
We hope this video helps you out; brought to you by 1AAuto.com. Your source for quality replacement parts and the best service on the internet. Please feel free to call us toll free 888-844-3393. We're the company that's here for you on the internet and in person.
Tools used
Hi. I'm Mike from 1AAuto. We've been selling auto parts for over 30 years!
Before you raise and support the vehicle, take a breaker bar and a 21 millimeter socket and break the lug nuts free while the vehicle's on the ground. Raise and support your vehicle. Once the lug nuts are loose, I can use the socket and finish removing them. Remove the wheel. Place it aside.
Start by grabbing the caliper before you remove it and pushing it, or pulling it outward to try to compress it so that when we go to unbolt it, it will slide away from the brake pads. I want to take a 14 millimeter wrench and see if I can break these free. They're pretty tight. I'm going to use a dead blow mallet and break that one free. Do the same with the bottom one. It goes loose so I can switch to a ratcheting wrench. We use a ratcheting wrench to finish removing these.
Now these are actually the slide bolts and we pull them out. So what I'm going to do – with this lower slide bolt, the control arm is in the way. I can't pull it out. We're going to roll the brake caliper down, I'm just going to thread the lower bolt back in a little bit.
That way it stays put, and I can remove the brake pads. Use a flat bladed screwdriver or a small pry bar. These ones are pretty stuck. Use a small screwdriver. That's okay if they fall on the floor. They’re old brake pads anyways. I'm not too worried about the rear one if I can't get it out because I've kind of released the pressure from it by removing the front one. I'm going to unbolt the bracket and I'm just going to pull the whole thing off together.
I'm going to remove the two 19 millimeter caliper bracket bolts. The lower one is here. The upper one is here. I'm going to start with the upper one, with a 19 millimeter wrench on here. Take my dead blow mallet, break it free. With the top one loosened I will loosen the lower one. Same thing, I'll use a dead blow mallet to break it free. Since these are loose, I'm going to switch to a ratchet and 19 millimeter socket to speed removal. I get that one pretty loose but not all the way out, because I want to work on the bottom one. It's going to need an extension. Try an extension in here, ratchet out here, and this 19 millimeter socket and extension. Now remove the lower bolt and finish removing the top one, the one with the bracket because it will become loose. It needs a little persuasion. It was frozen in there. Now I can unscrew, take off our slide pin bolts, lay the caliper up here for now. Take a bungee cord, just hold it up and out of the way.
The e-brake should be released but this is pretty rusty. There might be a rust ridge in here. I’m going to try to get this rotor off. Normally there's a rubber cap here. You pop that out and you can reach the adjuster and turn the adjuster in to pull the e-brake shoes, which are inside here together to help release this rotor. You may have to do that. I'm going to try spraying some rust penetrant around the edge of the hub and around the studs. I'm going to give it a couple whacks with our dead blow hammer, see if the rotor will just come right off. Otherwise, I'll have to work on releasing the e-brake. We might get lucky. It slid right off without having to release the adjustment. If you had to release the adjustment, you'd use this access hole and you'd go through here and turn this so the shoes would pull themselves in here.
These are our old rotor and pads for our vehicle. They're pretty rusted up. The car was sitting for a while so they needed to be replaced. See the new ones from 1AAuto.com are an exact match in the style of pad, they've got the wear indicators, the backing shims, same amount of lug holes, same opening to get to the e-brake adjuster. These will fit on your car great and help you stop really well.
Install the new rotor. I'm going to start out by installing it backwards. This way I can clean the oil off it that keeps it from corroding in shipping. I'm going to spray the inside because that's where the parking brake shoes are going to run. Take a rag, wipe down any excess, down the inside. Flip it over and install it over the studs.
Since the new rotor is brand new it's thicker and it won't fit over our parking brake adjuster or parking brake shoes, so we need to spin the auto adjuster in to give us more clearance. I'm just going to turn it up with this flat bladed screwdriver. It's going to pull the shoes in. This is automatic adjustment so as soon as you pull the handbrake a couple times or the parking brake handle, it will adjust out and it latches. These little notches lock against the spring, so once it goes this way it can't spin back. It has to be flipped back manually by doing this. Since I touched them, I'm just going to clean them off with brake parts cleaner. Let's try our rotor this time. There it is. So it should slide over with no resistance. I'll take a lug nut to hold the rotor in place.
We're going to remove the brake pad clips. They're stainless. We can clean them up and reuse them. So use a flat bladed screwdriver, pop them out. Pop out both sides. I'm just going to clean where they sit. Take some brake parts cleaner and wire brush and knock off the loose stuff. Repeat for the other side. Then I clean the clips with brake parts cleaner. Then I brush. Reinstall them on the caliper bracket. They click back into place. This is ready to go back on the car.
Unhook our brake caliper. I'm just going to lay it there for a second. You need to compress the piston inside here. Use our C-clamp and an old brake pad, and just gently compress the caliper piston in. That's good. Place these aside.
Before we can install the bracket fully, the lower slide pin that has the rubber bushing on it has to go through the caliper. You can actually start threading in a little bit. It's going to sit here. Because the suspension arm is in the way, I can't slide it in, so it needs to sit like this. Now I can line up the bracket and capture the top bolt. Now I can capture the lower bolt. Start tightening the bolt.
Before you go too far, I skipped it, but we're going to do it now, clean this brake rotor surface down from the protective oil that it's shipped with. You can wipe off any excess with a rag.
Now we can install our pads. Going to make sure that we didn't touch the surface of the pad. If you did, you can just clean with some brake parts cleaner. Put a little bit of caliper grease on the ears. Again, the same thing, make sure these pads are nice and clean. Use a little bit caliper grease.
I’m going to place the outside pad in here. We can slide our caliper back over. I'm going to push the little boot in. Slide our caliper pins in here. Thread them in.
When I had this rotor off and we were cleaning up I actually found the rubber plug that belongs in here, and I replaced that. I'm going to torque the brake caliper carrier bolts, these two big ones back here, torque as 116 to 144. I got my torque wrench set to 120 foot-pounds. For this top one, I don't need the extension. For the caliper slide pins, torque is 20 to 35, got my torque wrench set to 30.
For the final step after installing the wheel and torquing the lug nuts when the car is on the ground, gently step on the brake pedal. What that's going to do is bring the caliper piston out to meet the pads. See right now the brake caliper is loose. It's moving on its slide pins. When you step on the brakes, it pulls it in, pulls the brakes to the rotor. That's what helps you stop. We need to bring that piston out so it takes up the gap that's here and you'll be able to stop.
Install the wheel. Thread them on by hand first. Torque on these is 72 to 85. I've got the torx wrench set to 80 foot-pounds. I'm going in cross pattern. The wheel's installed and torqued.
Thanks for watching. Visit us at 1AAuto.com for quality auto parts, fast and free shipping, and the best customer service in the industry.
Tools used
Tools used