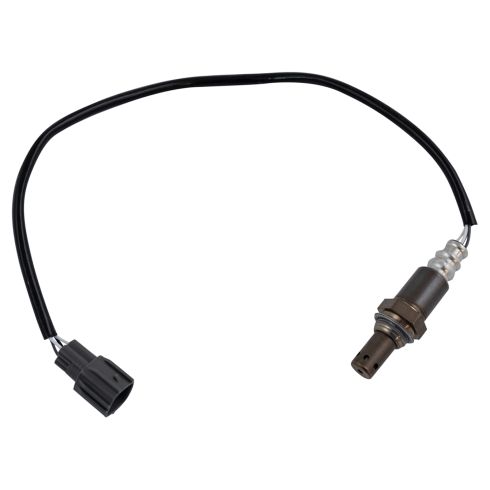
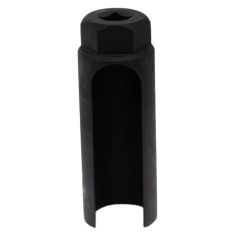
TRQ oxygen sensors are manufactured to precise specifications using premium raw materials to optimize your vehicle’s emission system. Each sensor is isostatically-pressed for improved strength and durability, and plasma-sprayed to improve sensitivity and prolong the service life of the sensors. Oxygen sensors wear out over time and should be replaced every 60,000 miles to prevent poor engine performance. TRQ recommends replacing the oxygen sensors in sets to optimize fuel economy and reduce overall emissions. All products are fit and road-tested in our Massachusetts R&D facility to ensure we deliver on our promise of Trusted Reliable Quality.
Product Features
Application Specific Design: No modifications and pre-calibrated
Isotatic-pressed and plasma-sprayed for extended service life
Double-Layered 310S Stainless Steel: Additional protection from moisture and debris
Restored Engine Performance: Improved fuel economy and lower emissions
What is Upstream vs. Downstream?
Upstream location is between the catalytic converter and the engine
Downstream location is between the catalytic converter and the tailpipe
Install Tip: You may be required to reset the vehicle computer after installation of this part.
Item Condition:New
Attention California Customers:
WARNING: This product can expose you to chemicals including Lead and Lead Compounds, which are known to the State of California to cause cancer, and birth defects or other reproductive harm. For more information, go to www.P65Warnings.ca.gov.
Lifetime Warranty
This item is backed by our limited lifetime warranty. In the event that this item should fail due to manufacturing defects during intended use, we will replace the part free of charge. This warranty covers the cost of the part only.
Returns: Parts with electrical components cannot be returned once installed.
FREE Shipping is standard on Orders shipped to the lower 48 States (Contiguous United States). Standard shipping charges apply to Hawaii, Alaska and US Territories. Shipping is not available to Canada.
Expedited is available on checkout to the United States, excluding Alaska, Hawaii and US Territories as well as P.O. Boxes and APO/FPO/DPO addresses. Final shipping costs are available at checkout.
How to Replace Upstream O2 Sensor 2007-12 Toyota Camry
Created on:
Tools used
Socket Extensions
Flat Blade Screwdriver
Rust Penetrant
22mm Wrench
9mm Socket
Ratchet
Needle nose pliers
1. Removing the Air Intake
Remove the 10mm bolts from the air box
Disconnect the two sensors
Loosen the intake tube hose clamp
Unclip the hose from the air box
Remove the air box
Remove the air filter
2. Removing the Upstream O2 Sensor
Disconnect the O2 sensor connector
Unclip the wiring from the radiator hose clamp
Send the sensor through a 22mm wrench
Remove the sensor with a 22mm wrench
3. Installing the Upstream O2 Sensor
Apply copper anti-seize to the threads on the O2 sensor
Tighten the O2 sensor by hand
Tighten the O2 sensor with a 22mm wrench
Clip on the bracket
Thread the wire into the bracket
Clip the wire into the bracket on the radiator hose
Connect the sensor
4. Installing the Air Intake
Reinstall the air filter
Press on the air box
Press on the air intake hose to the air box
Tighten the hose clamp
Connect the two sensors
Tighten the 10mm bolts to the air box
Hi, I’m Mike from 1A Auto. We’ve been selling auto parts for over 30 years!
Open the hood. Pull the release handle down here above your knee. Release the safety, which is right here. This hood had hood struts. On this PZEV Camry, bank one sensor one is at the top of the exhaust manifold here. The wire goes over here to the connector. And can just see the connector. And you can just get to the lock port, it's kind of difficult. I'm going to remove the air box, just slightly out-of-the-way so I can get to this connector better and undo it before I remote the O2 sensor from the manifold.
Use a 10 millimeter socket and ratchet to loosen this up. There's a second one on the backside. Unplug this electrical connector here. Unplug this one here. This harness is actually connected to the air box, so can't pop it off. I'm just going to leave it here and move it to the side. Loosen this clamp, the intake tube. Lift up the air box. Make sure those are fully released. Take our air filter out of here so it doesn't get damaged. This harness here has a little push connector. I'm going to take these needle nosed pliers and just push them together. And just pop it out and put it aside. Put this aside so it doesn't get damaged.
Can see the sensor connector here for the O2 sensor. Push in the lock. Need a flat bladed screwdriver to push the lock open. Push the lock open with a flat bladed screwdriver and work the O2 sensor out, just like that. To un-clip it from this clamp that's holding around the upper radiator hose, going to squeeze these little tabs together. Just kind of unlock it. Just leave that in place. Lift this up. Pull it out of this clamp, this metal clamp. It keeps the wire from touching the hot exhaust and melting, so you'll want to keep that and use it. It should pop right off of the O2 sensor. We'll just put that over here.
I'm ready to remove the O2 sensor from the exhaust manifold. This is a 22 millimeter on the O2 sensor. Luckily, it's actually big enough for the connector to go through, so you can slide the box into the wrench on there. Get it seated. Give it a nice pull. There's the O2 sensor.
Here's the old O2 sensor and our brand new one from 1AAuto.com. The same length of wire. The same style connector. This should fit in the vehicle and work great for you.
The O2 sensor does come with anti-seize on it. I'm going to add a little extra copper anti-seize to it just before I install it. Make sure you keep it on the threads and away from the sensor tip. Hold the wire up. Thread it in by hand. You have to spin the wire around with it. Make sure the thread's in nice. Take a 22 millimeter wrench and just tighten it up until I feel the gasket crush. I'm going to clip this little bracket back on to place. Snaps over just like that. Clip my wire into it. Keeps it away from the exhaust manifold. Run the wire down over the plastic clamp, just like the original. Clip it back together. The connector is here. I'm going to line it back up just like the original and hold the back of this connector and push together so it clicks.
Reinstall the air filter. Take the upper air box. Connect those tabs underneath that lock it into place. Push it down. There's an alignment tab or opening here on the rubber hose that matches up with this tab here. I'm going to push this down. It should slide right over. Make sure that this claim is seated in the grooves. Tighten it back down. Reinstall the bolts that are holding the air box cover down. Don't forget the one in the back. Finally, don't forget this harness. Plug it back into the air box where I pulled it out of. Put it back into the mass airflow meter. Plug it back into this connector here. The air box is reinstalled.
Thanks for watching. Visit us at 1AAuto.com for quality auto parts, fast and free shipping, and the best customer service in the industry.
OSA61780
In Stock
Product Reviews
Loading reviews
4.78/ 5.09
9 reviews
5 Stars
4 Stars
3 Stars
2 Stars
1 Star
8
0
1
0
0
Great
Catherine
June 18, 2021
Works great. Better mpg
wayne
October 8, 2021
Everything went good Ill continue to buy my parts from 1a auto
Brian
December 5, 2022
Perfect part and delivered quickly.
Still looking good on my car.
Abiodun
June 23, 2023
Good product.
TRQ O2 Sendor
Daniel
November 20, 2023
The O2 sensor worked like it should
Great quality
michael
February 28, 2024
Good quality!
2007 Toyota Camry O2 sensor
Michael
March 30, 2024
Quick shipping and easy to install. Great price also.
O2 sensor double duty
Luis
June 13, 2024
The first think I did check the length of the cable second the plug connector third compared completely with the old one before installing the new sensor I erased the check engine light and everything went back to normal. Thank you 1A Auto
David
July 18, 2024
I've been purchasing parts from 1Aauto for number of years now and have had perfect fits on every part and when I needed help with purchase the employees have made it very easy
Customer Q&A
How many oxygen sensor in toyota camry 2002 4 clinder california?July 22, 2021
John D
10
This vehicle will have four oxygen sensors.
July 23, 2021
Emma F
How many oxygen sensor in scion xb 2008?November 12, 2021
Alex M
10
Hello, I apologize we would not have this type of informtion. You can try looking in your owner's manual or contact a mechanic locally for that answer.
November 12, 2021
Ricale A
Is it califyemmision approved?September 9, 2022
Virgilio R
10
Yes it should be. California emissions standards are dependent on the cars system as a whole not just one component.
September 9, 2022
Charles C
10
Yes this is California legal.
September 9, 2022
T I
Does this fit a 2004 Toyota Camry 2.4l & how many o2 sensors is there?July 10, 2023
John D
10
My camry is 2005 and the sensor is fit, but i found out that my problem is catalytic converter not sensor. And it jas 2 sensor one on the front and one under
July 11, 2023
Virgilio R
10
Yes, this part will replace the Upstream Oxygen sensor on your vehicle. There are 2 oxygen sensors on your 2004 Toyota Camry 2.4L.
July 12, 2023
Andra M
is this sensor and afr sensor?October 7, 2024
John D
10
This is an oxygen sensor.
October 8, 2024
Kemal S
Customer service
877-844-3393
Monday - Friday 8:00am - 9:30pm ET Saturday - Sunday 8:00am - 4:30pm ET
Scion is a registered trademark of Toyota Motor Corporation. 1A Auto is not affiliated with or sponsored by Scion or Toyota Motor Corporation.See all trademarks.
Enter Vehicle Year Make Model
Specify your vehicle's year, make and model to guarantee fit.
Year
Make
Model
Options
Drivetrain
This part doesn’t fit a . Select from parts that fit.