Replaces
This part doesn’t fit a . Select from parts that fit.
Frequently bought together
Part Details
Install Tip: You may be required to reset the vehicle computer after installation of this part.
Direct Fit Replacement - Guaranteed to fit and function for your specific application
Item Condition:
New
Attention California Customers:
 WARNING: This product can expose you to chemicals including Lead and Lead Compounds, which are known to the State of California to cause cancer, and birth defects or other reproductive harm. For more information, go to www.P65Warnings.ca.gov.
Lifetime Warranty
This item is backed by our limited lifetime warranty. In the event this item should fail due to manufacturing defects during intended use, we will replace the part free of charge. This warranty covers the cost of the part only.
Returns: Parts with electrical components cannot be returned once installed.
FREE Shipping is standard on Orders shipped to the lower 48 States (Contiguous United States). Standard shipping charges apply to Hawaii, Alaska and US Territories. Shipping is not available to Canada.
Expedited is available on checkout to the United States, excluding Alaska, Hawaii and US Territories as well as P.O. Boxes and APO/FPO/DPO addresses. Final shipping costs are available at checkout.


Created on:
Tools used
Brought to you by 1AAuto.com, your source for quality replacement parts and the best service on the Internet.
Hi, I'm Mike from 1A Auto. I hope this how-to video helps you out, and next time you need parts for your vehicle, think of 1AAuto.com. Thanks.
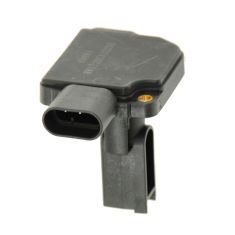
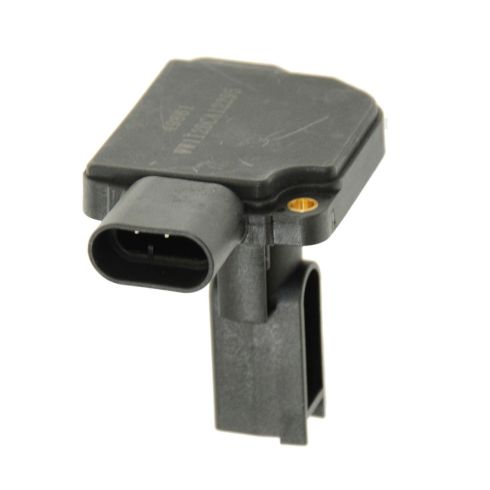
In this video, we show you how to replace the mass air flow sensor on this 2000 Toyota Celica. It's the same part and process on a large variety of Toyota, Lexus and Scion vehicles from the years of 2000 through 2006. All you need for this is a new mass air flow sensor from 1AAuto.com and a Phillips screwdriver.
Your mass air flow sensor is located right here. You just want to push in the tab and disconnect the harness and then remove these two Phillips screws. Once those screws are out, it just pulls right up and out. On the right is the old one, on the left is the new from 1A Auto. You can see they're identical and they'll mount exactly the same. Now you just want to push your new mass air flow sensor down into place and replace those two Phillips screws, and just reconnect your harness.
We hope this video helps you out. Brought to you by www.1AAuto.com, your source for quality replacement parts and the best service on the Internet. Please feel free to call us toll-free, 888-844-3393. We're the company that's here for you on the Internet and in person.
Tools used
Tools used
Hi, I’m Mike from 1A Auto. We’ve been selling auto parts for over 30 years!
Open the hood. We have to pull the release inside the car. It's just inside. Right around your left knee on the driver's side. I need to release the secondary, or safety release. Just kind of feel around for it. This one is right here. Squeeze up.
Mass airflow meter is located here at the back of the air box. To remove it, start by unplugging it, push down on the connector to unlock it, and then wiggle the connector off. Use a Phillips head screwdriver to remove the two screws. Grab the screw, and put it aside so I don't lose it. Do the same for the other one. This should lift right out of the intake tube.
This is the original mass airflow meter from our car, and the brand new one from 1AAuto.com. It has the same style connector and the same style mounting holes. This should fit and work great in our vehicle.
So you can only install it one way because the screw holes aren't going to line up. So line them up like that. Just push it in, and it will go past the rubber O-ring. Use your magnet if you don't have a magnetic screwdriver. Get that in place. These are just self-tapping screws. As soon as I feel them get tight, I'm just going to stop. That's nice and tight. Reconnect the plug. The job is complete.
Thanks for watching. Visit us at 1AAuto.com for quality auto parts, fast and free shipping, and the best customer service in the industry.
Tools used