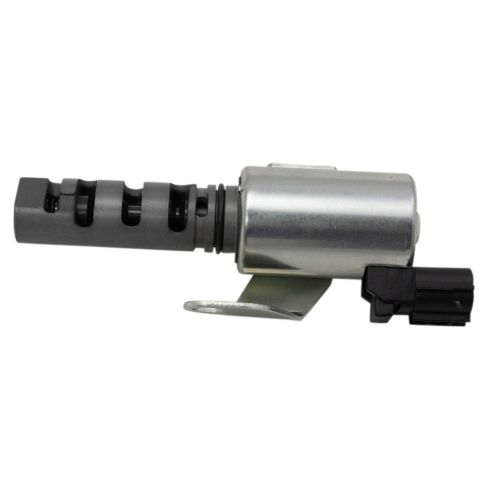
Hi, everyone. Sue here from 1A Auto. Today we have a 2001 Lexus GS300 in the shop. It has the notorious 2JZ engine in it, and we're going to talk to you about the codes P1346 and P1349. Both are indications for the VVT solenoid, which is mounted here in the top of the valve cover.
Front of the oil fill, and it's behind the dry belt. It's a connector right here. Someone else has been in this car, and I could tell because it looks like they broke the factory clip on the harness side, and they put a wire tie in to hold it in there. Unfortunately, I'm going to have to do the same thing, but I'm going to show you how to get to it and how to replace it.
First thing you're going to do is take your edging cover off here and just four mounting screws. It's a 10-millimeter socket. I'm going to lift that right up and get that out of the way. Now we can expose the top of the engine. You'll see the over throttle body and the upper intake throttle body. Here's the nose of the valve cover. It's a straight six cylinder. This cover is nice that Lexus Toyota put a plastic on top of the valve cover where the VVT solenoid goes in. You're going to need an Allen head, and it's a five-millimeter socket or Allen head socket hex. Take these mounting screws out. There's four of them.
Now you're going to expose the actual nose of the timing belt. You're going to want at this point to make sure you don't drop anything down in there. You don't have stuff laid out here on the front of the engine. You want to leave it nice and clean, so you can just lift that up, and there's your timing belt. You got your two cans, and your VVT solenoid is mounted right here. We're going to get something to cut the wire tie with and a 10-millimeter socket. I'm going to get my cutters. I'm going to cut this wire-tie. Pull that plastic out of the way.
Now you can see that the clip is broken. There should be a big plastic, flat clip right here just like this one, this one right there. This is what happens when it's not there. It just falls off. Now I see oil in there, we don't want that. We want to clean that up too. We can take some cleaner spray. Spray in there, get rid of that oil. Here's the VT solenoid, VVT solenoid. Take that bolt. Now we're going to twist and move this out of the way. Just give it a pull that way. There it is.
The main thing about VVT solenoids, a lot of the cars have them, most of the modern cars have them, is oil changes. Those are the main problem that causes these to go bad. You have to do oil changes. Dirty oil gets in here, and it will start to clog up. Some of them have screens, pick up screens. The screens get clogged, andthe pressure drops. The solenoid burns out, sends a code. I always say do an oil change when you're replacing your VVT solenoid. Don't just throw the solenoid in and say, "Ready to go." You want to do an oil change at the same time. If you just did an oil change, and you know your mileage and your correction, you're within that time, then don't do it. But please use the best judgment you can.
Here's our new VVT solenoid from 1A Auto, and here's the factory one. It comes with the O-ring. This O-ring is crushed down. It's been in there for a while. Something tells me it's been changed because they did break the clip, or maybe it was tested.
Line that up. That O-ring is right there. I know that the shaft in here in this valve cover gets quite a bit of oil in there, so I didn't need to lubricate that O-ring. I'm just going to push firmly and wiggle. Line that up. Now I can put the little screw back on. Tighten that down. It would be no torque specs here. We'll just tighten that and snug it. I'm just going to take some parts cleaner. I'm just going to clean this real quick. I'm going to let that dry before I connect that. You can take a shot of air to it, if you need to. I'm also going to need a wire-tie, so I better go find one of those too.
Now I'm back with the wire tie, and I took an air gun, Shop-Air. I just blew a little bit in there with the Shop-Air to make sure it's nice and dry. I'm going to reconnect it, push it in all the way. Now I'm going to take my wire tie. I'm going to go right through the bracket, zip it through. I just want to make sure it doesn't loosen up and doesn't wiggle off. I'm going to get rid of the excess. Holding onto it because I don't want it to go down there. It doesn't go internally to the engine, but the tension is down there and so is the main crank here. You don't want to ever try to cause any problems to your timing belt.
Now we can put our cover back on. Those are the four hex screws, which is a five-millimeter. Place those in. Snug them down. Pretty rusty. One left. Now we can put our engine cover on. Just four mounting nuts--10-millimeter socket. Snug these down too. Then we'll be ready to go. We're going to clear the code with our little code reader that we sell on 1A Auto site, and we'll just take her down the street. Make sure everything is good.
Thanks for watching. Visit 1AAuto.com for quality auto parts shipped to your door, the place for DIY auto repair. If you enjoyed this video, please click the subscribe button.