Replaces
This part doesn’t fit a . Select from parts that fit.
Frequently bought together
Part Details
Item Condition:
New
Attention California Customers:
 WARNING: Cancer and Reproductive Harm - www.P65Warnings.ca.gov.
Lifetime Warranty
This item is backed by our limited lifetime warranty. In the event that this item should fail due to manufacturing defects during intended use, we will replace the part free of charge. This warranty covers the cost of the part only.
FREE Shipping is standard on Orders shipped to the lower 48 States (Contiguous United States). Standard shipping charges apply to Hawaii, Alaska and US Territories. Shipping is not available to Canada.
Expedited is available on checkout to the United States, excluding Alaska, Hawaii and US Territories as well as P.O. Boxes and APO/FPO/DPO addresses. Final shipping costs are available at checkout.


Created on:
Tools used
Hi, I’m Mike from 1A Auto. We’ve been selling auto parts for over 30 years!
Open the glove box. Pop the side cover off. Put that aside. Lift this up. Take this little damper string off. Push the glove box side in. Pop it off. Do the same for the other side. Just pull it in. The glove box will lower down.
To remove this screw and clip, use a Phillips head screwdriver. Loosen it. Pull its clip out. Put that aside. Push in on the tab on this side and then the glove box will come right out. Take out this upper compartment. This just lets you see down inside what you're doing, so just kind of lift it up, pull it straight out, and put that down aside.
The cabin air filter is back behind here, but just to let you look down inside because we need to remove this access panel here, so there's one, two, three, four screw clips. Use a Phillips head screwdriver to loosen these. There's a fifth one over here. Reach in here. Pull out. Push it back. Pull it out. I can see the bottom. There's two tabs. Push these up and on the top there's two tabs.
You're going to take your two hands with your thumb and index finger and reach up in here and squeeze them together and then pull that out. I'm going to carefully pull this out because this one is really dirty and filled with junk. Might never have been changed. Oops, my finger's stuck in there. I'm going to try to slide it out without dumping it into my blower motor. Wow, that is nearly clogged. This might not even been This probably smelled really bad and probably had very poor air flow through the heater and A/C. That is one of the worst I've seen.
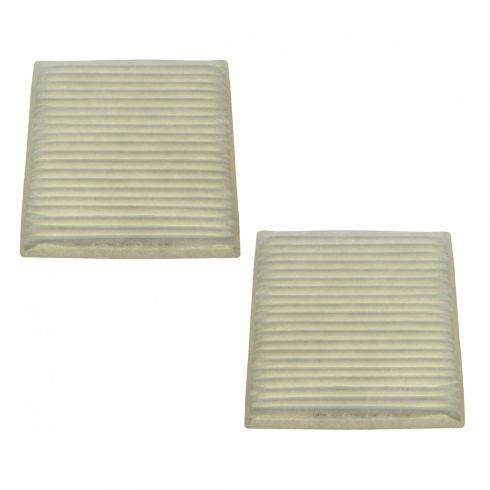
Here's the cabin filter we pulled from our vehicle. It is completely clogged and filled with dirt. There's no way that any air is getting through this. It probably smells awful. This potentially could be original to the car. These should be changed every year or 12,000 miles. As you can see, this is a brand new one from 1aauto.com. It's the same exact style and size and design. This will fit in the tray. I'm going to pull this old one out over the trash brown, throw it away, and then we'll slide the new one in place. It'll fit great and work way better than this old one.
I'm just going to take a rag I've dampened with some glass cleaner. You could use water, anything, just to clean up some of the dust that's in here. There is a direction of flow marked on the air filter. The arrow is pointing down so the air comes in and goes into the blower motor, so we want that arrow pointing down. This will just slide into place, again, pretty flexible and gently push it down and in. Goes under these little tabs here and under this tab on this side. Should be one in the middle there. That's our brand new cabin air filter ready to be reinstalled.
Slide this tray back into place and then just push it right in. It does have an arrow pointing up. Now it's locked in place. Reinstall this cover. One of these clips was broken off, but there's three clips, so push up into place. Reinstall the threaded clips. Put this one over here. They'll just kind of push into place. Line them up. Push them as far as they'll go and then you can screw them back in. Just repeat this for all of them. Push it in. Put the glove box back in place. There's an opening here and a pin here. It's going to sit on that pin and slide this one up into place and then we'll push it up on the pins.
Before you forget, install the upper little cargo pocket. So it does say up. Now we go towards the top part. It just slides in place and clips in. Reinstall the clip on this side. You might have to move this around or adjust the clip out. Just thread it out. Just catch the top thread so it can squeeze together. Get it in place. I'll get that pushed in. Then put the center in, just like that. Hook up the little damper rope. Reinstall the side cover. Push it just beyond that trim there, get that clipped in. The cabin filter is replaced.
Thanks for watching. Visit us at 1AAuto.com for quality auto parts, fast and free shipping, and the best customer service in the industry.
Tools used
Hey friends. It's Len here at 1A Auto. Today I'm working on a 2007 Toyota FJ cruiser. I'm going to be replacing the cabin air filter. It's going to be very simple and you can do it too. If you need this or any other part, you can always check us out at 1aauto.com. Thanks.
We're going to open up our glove box. On the side over here there's a little piston. All you do is grab it, pull it off to the side. You're going to squeeze the two sides of your glove box and they have little tabs. When you pull them in, they move away from the up top part of the dash. Then you can just pull it out straight towards you. Now that our glove box is out of the way, we can see where the cabin air filter is. It's located right here. It's very simple to get to. All you do is you just grab this. Grab this, pull it straight out. As you can tell, the cabin air filter, and this is extremely filthy and it's well past time to be replaced. Thank goodness 1A Auto has this part. I'm going to go ahead and install it. To take this out, you want to use gloved hands, of course. This is disgusting. I'm just going to grab it. Pay special attention to which way you take it out. Okay.
Wow, that's nasty. All right. With it being out, you can see that the fin side faces upward. When we put it in our new one, we're going to do the same exact thing. It's going to look just like this. Here we are, friends, a quick product comparison for you. Right here we have our cabin air filter out of our 2007 Toyota FJ cruiser. As you can tell, it's absolutely disgusting. Over here we have our brand new quality 1A Auto part. They're both exactly the same shape. I don't want to touch it up against there because, well, I don't want to contaminate this brand new part. As you can tell, it looks exactly the same and exception of I'm not going to be breathing in nasty gross disgustingness with this one. With that said, I don't see any reason why I wouldn't want to install this into my vehicle, so I'm going to go ahead and do it. If you need this or any other part, you can always check us out 1aauto.com. Thanks.
Okay, so we're going to take our brand new quality 1A Auto part. We're going to install it into the tray. I'm just going to go down like this, right along the edge. Here we are. Down. Down. Okay. Make sure it's all the way down, all the way around here. Just use a small pocket screwdriver. There's little lips right here. You just got to push the filter down underneath those. It locks them down in, and that way they're ... the filter can't move around and possibly let any debris or a potential mouse crud past and through your vents so you're breathing them in. There we are. Let's go ahead and install this tray.
Okay, so it's time to install the tray. We've got our fins facing up. Our writing, "Toyota, up" facing up. Everything looks good. Just going to slide it right in just like this. Here we are. Onto the next step. Along the bottom of the glove box, you've got a couple of little hooks here. Okay. They're going to sit right along here. I'm going to set my hooks into there. Okay. We've got our little piston here. This just makes it so the glove box goes up and down nice and slow. It sits onto this piton right here. I'm going to bring it up. Push those up. I'm going to grab my piston. I'm going to slide it right on. There we are. Bring it up.
Speaker 2: Thanks for watching. Visit one 1aauto.com for quality auto parts shipped to your door, the place for DIY auto repair. If you enjoyed this video, please click the subscribe button.
Tools used
Tools used
Tools used


