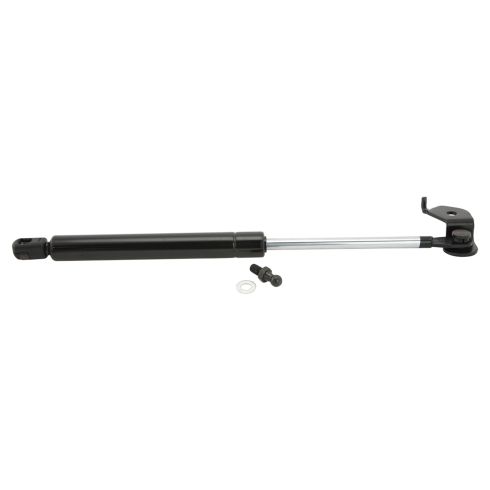
Install Tip: Keep & reuse your original hardware, new hardware is not included with this item.
Item Condition:New
Attention California Customers:
WARNING: Cancer and Reproductive Harm - www.P65Warnings.ca.gov.
Lifetime Warranty
This item is backed by our limited lifetime warranty. In the event that this item should fail due to manufacturing defects during intended use, we will replace the part free of charge. This warranty covers the cost of the part only.
FREE Shipping is standard on Orders shipped to the lower 48 States (Contiguous United States). Standard shipping charges apply to Hawaii, Alaska and US Territories. Shipping is not available to Canada.
Expedited is available on checkout to the United States, excluding Alaska, Hawaii and US Territories as well as P.O. Boxes and APO/FPO/DPO addresses. Final shipping costs are available at checkout.
How to Replace Hood Lift Support 1992-96 Toyota Camry
Created on:
Tools used
12mm Wrench
13mm Wrench
1. remove the hood support strut
Use a 12 mm combination wrench to remove the two 12 mm bolts.
Pull the strut out.
2. Install the new hood support strut
Line up the two studs and tighten down the nuts with your wrench.
Repeat on the other side.
Brought to you by 1AAuto.com, your source for quality auto replacement parts and the bets service on the internet. In this video, we're going to show you how to replace the hood struts on this '94 Camry. You know you need new ones when you put the hood up and it doesn't stay up on its own. You got to use a broom or something like that to hold it up. Pretty easy, you need a 12 and 13 millimeter wrench.
If you one these Camry's, you might be familiar with this. I've got the map holding up the hood here because the gas struts that hold the hood have started to wear out so I'm going to show you how to replace those. It's quite easy. The only think you really need is a 12 millimeter combination wrench and there are two bolts, one right there and you want to undo this bolt here that goes into the hood. Okay, I'm going to speed it up here as we're just loosening those bolts. Again, there are 12 millimeter bolts and also make sure that you have something supporting the hood. As you saw on the beginning, I had the broom there to hold the hood up. Here's your old assembly out. Make sure you save this bolt. Okay, here's the new assembly from 1AAuto. See, it's all the same, the same bracket and everything. It comes with a stud this thing clips on to. Let's install the stud. It makes a little difference to use the 13 millimeter nut rather than the 12. Okay, I'm just going to speed up tightening up that bolt. You want to tighten it up nice and firm, not extremely tight. Now, using our existing bolt from the car, we have a locating tab right here built into the fender. Again, we'll speed up tightening up, tightening up, putting it up and tightening up the bolt. Again, nice and firm, not extremely tight. Now, you see it lift up your hood. Pop that in.
It's all set. Now you can see my hood. One side replaced. You can see the hood is standing up a lot better. Once we replace the other side, then we'll be all set. We hope this helps you out. Brought to you by www.1AAuto.com, your source for quality auto replacement parts and the bets service on the internet. Please feel free to call us toll-free, 888-844-3393. We're the company that serves you on the internet and in person.
GSA47379
In Stock
Product Reviews
Loading reviews
There are no reviews for this item.
Customer Q&A
No questions have been asked about this item.
Customer service
877-844-3393
Monday - Friday 8:00am - 9:30pm ET Saturday - Sunday 8:00am - 4:30pm ET
Enter Vehicle Year Make Model
Specify your vehicle's year, make and model to guarantee fit.
Year
Make
Model
Options
Drivetrain
This part doesn’t fit a . Select from parts that fit.