Hey friends. It's Len here at 1A Auto. Today we're going to be working on our 1996 Dodge Ram 1500 Laramie and I'm going to be replacing the mirrors. It's going to be fairly easy. I can do it. You can do it too. As always, if you need any parts, you can always check us out at 1AAuto.com. Thanks.
All right, so now it's time for out with the old, in with the new. Okay, so we're just going to test our mirror just to make sure we have power going to it. That way there we know that it has power. When we install the new mirror and it doesn't work, we know it had power originally, maybe we didn't plug it in. Who knows what the issue may be, but hopefully it's going to work.
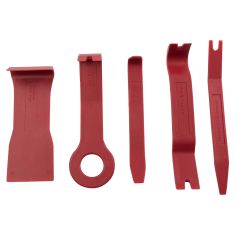
We've got a couple of Phillips head screws, one here and one here. We'll take those out. We've got our two screws. They're both the same. This right here can move around now. That's nice. All right, we've got another screw up here. Get that out of there. It looks the same as the other two. Now this door panel, we're just going to feel around, make sure that there's no more screws. Sometimes you'll feel a couple coming along the bottom there. This does not feel like it has any, so we're doing all right. We have a couple plastic trim tools. The reason why we're using plastic is because we're going to be going up against the paint and if you're worried about your paint, then of course you don't want to scratch it up with metal. Just come right in here like this. Just going to go right along. Just going to try to lift it up. Cool. All right.
Lift this up, as you go, you're going to just kind of jam it towards the forward position or I guess towards the front of the vehicle. There we are, and that's just because on the backside of this you've got all these little clips and they go inside these hooky dos. These things, I don't know why Dodge did it, but they've got some so you need to slide straight up and down. You got some that you need to slide forward and back. Whatever, I'm sure they have their reasons.
Okay, so we're just going to take this, we're going to continue sliding it forward so we can get our handle out through the hole here. Just like that. Carefully bring it down. You've got some wiring on here. We've got our window switches and our door lock and everything right along here. And of course you've got this up here for the mirror control. All right, so if you're worried about putting too much pressure on anything you can disconnect whatever you want to. I'll disconnect this one just because it does have a little bit of pressure on it right there. Okay, that's disconnected. We'll come right down here. This is where the mirror's going to be bolted in and this is the wiring for it. Got a little green connector right along the side. There's a little pull tab. I'm just going to pull on that. Pull on this one and slide that right up. We'll check our connectors, make sure there's no funny colors on either of those. This one doesn't really matter because we're going to be replacing it with the mirror.
Now that we have all this out, just come right in here. This right here is just an insulator and right back here is our three mounting nuts. The studs are going to be attached to the mirror assembly itself, so I'm going to hold my mirror at its base right next to the door and I'm going to use a 10 millimeter right there. You can take out two of these without having to hold it yet. Hold the base, grab our mirror, give it a little wiggle. It's been in there for quite awhile so it's happy there. We're going to have to pull the wiring through the door here. It's just a little rubber gasket. Let's see if I can push it through. Gentle amount of force will get it through. And there my friends is our original mirror.
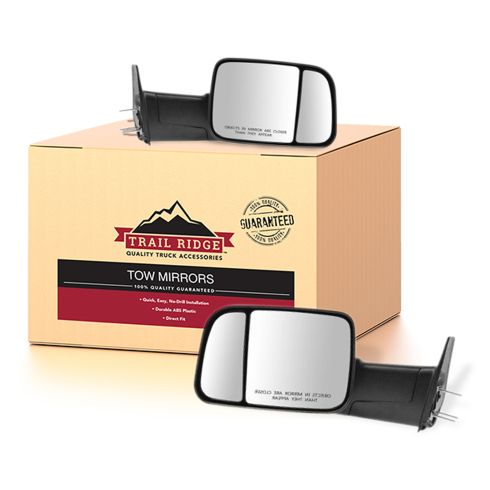
Here we are friends, a quick product comparison for you. Over here we have our original mirror off of our 1996 Dodge Ram 1500 Laramie. You can tell, it's in fairly good condition, but you know what? This person might like to do a little bit of towing. They might like to do a little bit of plowing. Maybe they just generally want to see more of what's going on around them. 1A Auto was generous enough to supply us with these mirrors right here to show you how to install. These mirrors extend out much further than the originals. They've got this right here, which kind of gives you an extra field of view. It just really kind of shows you, I don't want to say 360 degrees because obviously it's not, but it's not just a straight on view of whatever you're looking at.
This one you can see straight back and you can also see a little bit further out. Really sweet. The original one had an electrical connector so you can turn it up down, left, right, whatever you want to do. You do you Booboo. Guess what? Booyah, looking good. It's got the same mounting area right here. You got your three studs. Three studs. Even comes with brand new nuts, which is always nice. This mirror literally has everything that you need to be able to complete your service. As always, if you need this or any other product, you can always check us out 1AAuto.com. Thanks.
One thing you may notice on the tow mirrors is the studs to mount it to the door are much longer. That's okay. Don't go getting scared, go try to tell somebody that you got the wrong thing. When you opened up your package, you may have noticed that it came with this extra bracket here. It's really not an extra bracket. What it is, is it's going to go right on your door. Let me turn it so it's the right way. Come on Len. There we go. It's going to go right out here like this and then the studs are going to come through the holes, through these holes and they're going to give it added support. If you were to just put these super long mirrors on, on just the outer portion of this door, what's going to happen? There's a lot of weight sitting here pulling on that. Odds are you're going to put a lot of flex on your door panel there. You could potentially rip the nuts right out through the outside of the door.
It came with this. Let's go ahead and give it a try. Take our mirror, try to grasp it fairly firmly here and pull this through just like that. Bring my wiring up there, grab my studs, pull them through. Just like this. We're going to need this to come through. Thank you. I'm just going to try to tug some of this wiring through here, just like that. We've got our plate, the plate's going to go on here. We're going to put the wiring harness right through this first of course, and then we'll be able to bolt this on. We're just going to put the electrical connector right through this rubber right here, or foam. Should go through just like that.
Awesome. Bring this up here. Take this off of here. Grab this, put it so it's going the right way. Pull this through. Now we just need to see the direction that this needs to go, which looks like it's just like this. Cool. Line this up. If you're lucky enough to have a teammate help you or a friend, that'd be great because these mirrors are kind of hard to hold up at the same time as you're trying to do all this. Once you have it on there you're doing all right. There we are. That's sitting in there fairly decently. This just helps keep the noise down. Just going to tighten this up.
Let's take a look at how it looks. If it looks good, we'll continue tightening. Now that we have these nice and tight, we're going to connect this in. You can see that the connector has these two little slots and the connector on the door panel itself has two little prongs. Just line those up. Clicked right in. Nice little tug. Yeah. Get this right here. You got a little ear there and a little ear here. Connect those in. Just like that. Give it a little tug. That feels great. Just going to slide it in right here. Try to at least. Come on Len. Very nice. All right, let's get the door panel on here. Actually, before we get the door panel on, let's give it a try. Ooo, Len likes. Wow man, I can't see. There we go. That's better. Back right up now. Beep beep.
It's going to be time to get the door panel on here. Before we go ahead and do that, we're going to take out all these pushpins. All right, and we're going to put them right into the door panel and then we'll put the door panel in and the pushpins will hold it to the door. To do that, you're going to use something as simple as this. It's a little forky tool. Just like that. Give it a little twist. Whatever you got to do to get these puppies to pull out. Make them nice and long for you. They look like they got like a little ear there and that's where it's going to slide over the door panel. And then these little ears right here are what hold into this hole. We'll take all these out and we can continue. These little tabs, the pushpins, got that area right there that I showed you before. It just slides right in. Bonk. There we are. Do the same for all of them and then we can continue.
Okay friends, let's get this door panel on. I'm going to take the electrical connector or the electrical harness here, try to bring it up and through this. Can be a little tricky sometimes try to get out of the way. Just give it a, there it is. Just have to be a little forceful with it sometimes. That's okay. We've got our electrical connector right here for our mirror switch. We're going to plug that in. You can tell which way it goes because it has this little nub right here and that lines up with the nub in there. Slide it in, give it a tug. Don't pull the whole thing right off the door though. Get that back on there. Cool. All right, let's bring this up. What we're going to pay attention to you now is the door handle. I'm just going to try to pull the door handle through its hole. Slide this over. Awesome.
We've got our lock. Just bring it right through the hole. Awesome. Bring the door panel down, get it so all of our little pushpin slash pitons are going to be lined up with our holes. Once you get a couple of them started in, generally speaking, all the rest will be lined up. The hardest ones for me to see are the top ones, but it is important to get them lined up. Same thing along this side. Just line up as many of them as you can before you start bonking them in. Okay, so now we just got to get along this side and along the bottom. One in the center here that is lined up but not going in. There it is. Ah yeah. Awesome.
Just want to make sure that your door lock can flow up and down easily. If it can't, this could be wedged a little bit. Maybe the bar got bent in some of the process that you were doing. If that's the case, well you're just going to have to pop this back out of the way and see what you can do about bending it because you want this to make sure that it can go up and down. That looks really great. I would say we can continue.
Now we're going to take our long screw and we're going to go right up in here. Try to find the hole real quick and then we'll get out of the way. There it is. We don't need it to be too tight. We don't want to break the plastic or anything. We just need it to pull this right up against. That looks pretty great. We can move along, grab our switch here. It's just going to slide in. Just take a look at it. It goes in the backside first and then the front side. Bonk, bonk. Very nice. We're going to grab our little cup with our two mounting screws. You've got your holes. You can see where it goes right down into the door. Start that one in. Start this one in. I'm just going to bring it all the way down. That's snug. Awesome.
Thanks for watching. Visit 1AAuto.com for quality auto parts shipped to your door. The place for DIY auto repair. And if you enjoyed this video, please click the subscribe button.