Replaces


Frequently bought together
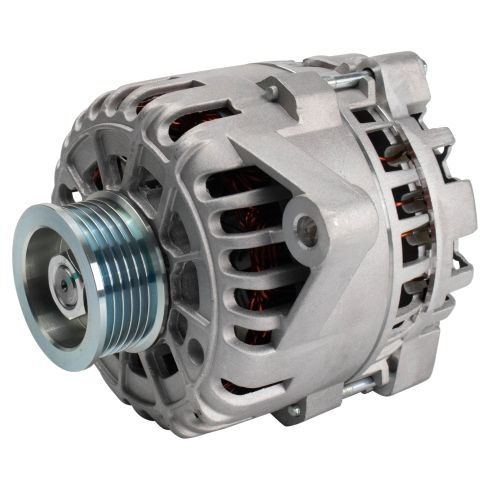
Product Features
Returns: Parts with electrical components cannot be returned once installed.
Attention California Customers:
 WARNING: This product can expose you to chemicals including Lead and Lead Compounds, which are known to the State of California to cause cancer, and birth defects or other reproductive harm. For more information, go to www.P65Warnings.ca.gov.
Lifetime Warranty
This item is backed by our limited lifetime warranty. In the event that this item should fail due to manufacturing defects during intended use, we will replace the part free of charge. This warranty covers the cost of the part only.
Returns: Parts with electrical components cannot be returned once installed.
FREE Shipping is standard on orders shipped to the lower 48 States (Contiguous United States). Standard shipping charges apply to Hawaii and Alaska.
Shipping is not available to a P.O. Box, APO/FPO/DPO addresses, US Territories, or Canada for this item.
Expedited is available on checkout to the United States, excluding Alaska, Hawaii.
Final shipping costs are available at checkout.
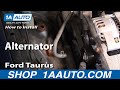
How to Replace Alternator 2000-01 Ford Taurus
Created on: 2010-11-08
Tools used
Brought to you by 1AAuto.com your source for quality replacement parts and the best service on the internet.
Hi, I'm Mike Green. I'm one of the owners of 1 A Auto. I want to help you save time and money repairing and maintain your vehicle. I'm going to use my 20+ years of experience restoring and repairing cars and trucks like this to show you the correct way to install parts from 1AAuto.com. The right parts installed correctly; that's going to save you time and money. Thank you and enjoy the video.
In this video we're going to show you alternator replacement on this 2001 Ford Taurus with a 3.0 liter V6 engine. The tools you'll need are a flat blade screwdriver, a large pair of slip joint pliers, 10 mm, 13 mm and 15 mm sockets with ratchet, a 15 mm wrench with either a larger wrench or a pipe for some leverage and possibly a catch pan. I ran into an issue which you may not have that I had to remove the radiator overflow bottle. That's why you might need the catch pan.
First you're going to want to disconnect your negative battery cable. You might need an 8 millimeter wrench to loosen it up. So right here is your idler pulley and then right down in below is your belt tensioner. What you want to do is take a 15 mm wrench and put it onto that belt tensioner. Then you're going to push it clockwise to loosen the tension on the belt. What I'm doing is I'm using a larger wrench to hook on to that 15 mm wrench to give it some more leverage. Now I'm going to pull that idler pulley over and as I push you might be able to see the tension give on the belt. Then I flip the belt right off of the idler pulley. Now I can pull the belt up and out and the wrenches up and out.
This should be- you should be able to press this and pull it up, but I'm going to use some tools here to help me. I'm going to push on it there with that a little bit. Then I'm going to use the pliers to help me pull it up and off. Then this is a 10 mm nut. We'll speed through taking that little nut off. Now we're going to use a 13 mm socket and ratchet and remove this brace nut. A 15 mm bolt right here. This is where it got a little interesting. I'm not sure if this was a replacement bolt in this car or something. As you can see as I try and pull it out it hits up against my reservoir bottle and I was unable to figure out how to get it out without hitting that reservoir bottle. What I ended doing is taking the bottle out. I'll show you that real quick.
Remove 2 bolts, 10 mm; one that's right here and then one that's right over. As you can probably tell that nut is pretty well rusted on there and the clip is broken. So actually what I ended up doing was using a hammer to punch it through the fender from the other side. If you want to see that you can check out our radiator overflow bottle video we have on dedicated to removing that.
Then you're going to disconnect three hoses; one here, here and one way down in here. The hose disconnect is pretty easy. You want a pair of pliers, put the pliers on, squeeze the clamp and then slide it off. Ok we've unbolted the two bolts and disconnected the upper hoses. A lot of times what will help is a nice big pair of pliers. See as I'm twisting back and forth and pulling back on the bottle the hose is coming off and that will come right out.
Obviously you want a catch pan as you can hear the coolant leaking out.
Here I'm back to our alternator. You can see I've got that 13 mm and then now this is another 13 mm bolt underneath that I'm removing. It comes out pretty easily, actually I was surprised. I believe actually this alternator had been replaced t one time. It looks like it's in pretty good shape. Actually you'll see I just put it back in because there's no really reason to replace it when it is still working just fine. There's the 13 mm bolt out. I'm going to pull you see I stuck the wrench on there. Pull back on that bracket a little bit and then the alternator came up and out. It keeps it out of the way a little bit. Obviously that bolt comes out now without the reservoir in the way.
Then you're going to want to grab something; I grabbed a ratchet handle. Stick it in between, sorry I didn't get a good shot there, stick it in between there and pry the alternator up and out. I'm going to speed up installation since it's pretty much just the reverse. You see I put that lower bolt in first, just kind of get it going. I use the back of a screwdriver to beat on the alternator a little bit. Get it down in place and then I'll use my tools again to get that lined up. Get that 15 mm bolt going then put that 13 mm nut on as well. Now I tighten that 13 mm bolt up, get it nice and tight. You probably want to have about 50 foot pounds. Tighten up that 13 mm nut and then tighten up that 15 mm bolt.
Here obviously I'll plug in the top plug. Actually, I'm sorry, I'm putting on the lead with the 10 mm nut and now I'm going to plug in my top plug. Here I'm going to tighten up that 10 mm nut. It takes a few turns; get it nice as snug without being incredibly tight. Then push that boot on. Make sure that boot covers that nut up because you don't want any metal contacting, it could spark. Now I'm going to use my 15 mm wrench and my 18 mm and then its nice easy to see without that bottle in the way. I pull on that tensioner and then bring my belt up, hook it on to the alternator. Make sure it's on all the way everywhere else and then let the tension off.
If you didn't have to remove your radio bottle then you're pretty much done. If you did you can just follow along as I put the radiator bottle back in. Now I use my big pliers again to grab on to that hose. Push the bottle against it and work the hose on there. Then once I've got it on a little bit I reach down in there with my hand grab hold of it and really push it together. Shake it around and twist it a little bit and then grab the pliers again and get hold of the clamp. Spread the clamp open or whatever squeezes it shut, which gets it open and get the clamp on there. Now I'll hook it into the side into its little clip and get that 10 mm bolt that's inside it started. I'll speed up tightening it up here.
Then once you get that tight then put the little nuts in the top here and I again speed that up, tighten it up and then put on your hoses and you should be all set. Now you can reconnect your battery and get back on the road.
We hope this helps you out; brought to you by www.1AAuto.com your source for quality replacement parts and the best service on the internet. Please call us toll free at 888-844-3393. We're the company that serves you on the internet and in person.