Brought to you by 1AAuto.com, your source for quality replacement parts and the best service on the Internet.
Hi, I'm Don from 1A Auto. I hope this how-to video helps you out, and next time you need parts for your vehicle, think of 1AAuto.com. Thanks.
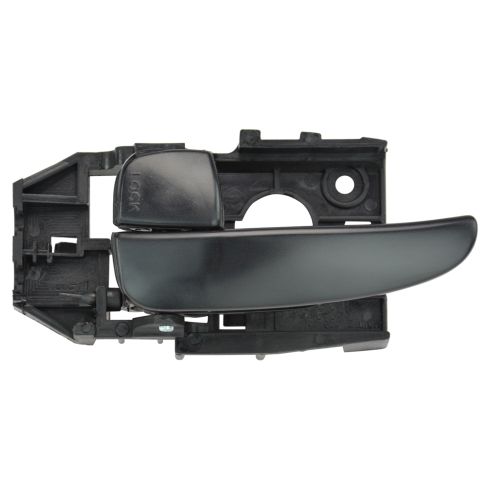
In this video, we're going to show you how to replace the driver's front door handle on this 2005 Hyundai Elantra. It is a pretty easy process. The only tools you'll need are a small flat blade screwdriver, and a Phillips screwdriver. We do the driver's side door. The passenger side front door is the same process.
I'm going to use a piece of cloth to protect the paint while I pry the corner piece off here. I'm going to take off the two trim covers here, the center pieces, and use a tiny flat screwdriver, or you can use a little pick. Just pry into the side and pull it out. Do the same for the bottom. There's two trim covers underneath the door handle. Use your flat blade screwdriver to pry up the seam and gently pull it out. There are two screws behind there. I've got the screw covers off, exposing all nine of the screws: two on the back of the door, two on the very bottom of the door, two on the side, one in your handle assembly, and two below your grab handle. We'll just speed things up here. A Phillips screwdriver is all you need for all nine of those screws. After you take the screw out that's behind the door handle, you do have to pull the little bezel out. I'm going to give a little tug to the handle, get my fingers behind the panel, and just pry apart. There's a clip down here, and I'm going to do the same over here where the clip just came out. I'm going to lift the panel up off of the door. There are three harnesses. Two go to the window switch pack, and another goes down to a door light at the bottom. You'll find a tab right here. Press it in. It'll click right out. Undo another tab here, and the last tab here.
There's one Phillips head screw to remove. There are two clips: one for the lock and one for the door handle, blue and pink. You've got to use a flat blade screwdriver, a small one, and just pry on the clip itself, move it out a space, same at the bottom. The top cable will push up the bottom, and the bottom cable will come up through the top. Then we can take our screwdriver and pry out the cable from the housing, pull it aside, and our handle assembly is going to slide forward and come out.
Reinstalling the door handle, I'm going to line up the four tabs on the back with the four rectangles on the door, and slide the assembly back into place. Then I'm going to put our screw back in at this point to hold the assembly in place. Sliding the lock cable in and securing its tab, put the cable back into the housing. Do the same for the bottom, sliding it in, bring the clip back over, snapping the clip, snapping the cable back in.
I'm reconnecting the three harnesses that go to the switch panel and the light. Putting the door panel back on, I'm going to go up above, push down so it sits on top of the door frame, and then give it a little tap to the lower clips, and start back with my Phillips screws. We'll fast forward again here as we put back the nine screws. Just remember, the only thing is, with the screw that goes behind the door handle where you open the door, put the bezel in first, and then put the attachment screw in. Once you have all the screws in, just remember to put the small trim pieces back in that cover the screws.
We hope this video helps you out. Brought to you by www.1AAuto.com, your source for quality replacement parts and the best service on the Internet. Please feel free to call us toll-free, 888-844-3393. We're the company that's here for you on the Internet and in person.