Brought to you by 1AAuto.com- Your source for quality replacement parts and the best service on the Internet.
Hi, I'm Mike Green, I'm one of the owners of 1AAuto. I want to help you save time and money repairing and maintaining your vehicle. I'm going to use my 20-plus years experience restoring and repairing cars and trucks like this to show you the correct way to install parts from 1AAuto.com. The right parts installed correctly, that's going to save you time and money. Thank you and enjoy the video.
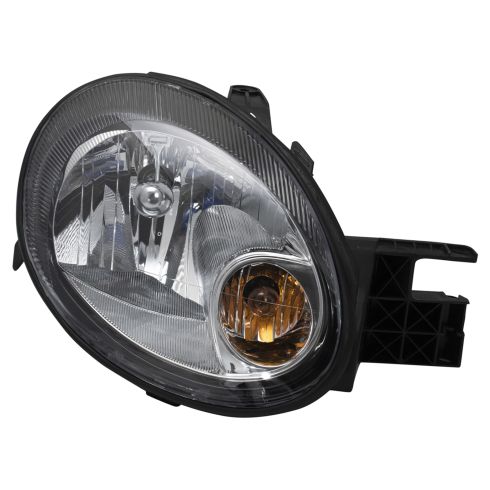
In this video, we'll be replacing the headlight on this 2003 Dodge Neon, same as any 2000-2005 Dodge or Plymouth Neon. The tools you'll need are a small flat blade screwdriver and an 8mm socket or wrench. Maybe you're replacing your headlight bulb, we do cover that. Maybe your headlight was damaged, so you're replacing assembly. Maybe you want to make your car look better. If you look, you can see on the left side what a new headlight compared to an old one looks like. Just by replacing your headlight assembly, you can actually take off years and miles from your vehicle.
First you'll need to remove the five 8mm bolts, right here above the headlight, and then you want to do these three that are on top of your grill. This lets your grill flex a little bit, makes it easier, and makes it quicker. It just adds a little more flexibility. You're going to need your screwdriver and 8mm wrench. The little plug here, you want to get underneath it, this connects the grill to the front fascia. Pry up, pull up the center, and then you pull out the plug itself. Now what you do is you actually push the headlight underneath. Then pull in this way, so that's out. You can unplug the headlight.
If you're looking just to unplug... if you're looking to replace the headlight bulbs, on the passenger side, you can do the headlight bulb without taking the light out. Driver's side, you've got the air box in your way, so you really can't do it. Then the parking light here, signal, twist, it pulls out. I've got my new light. I'm going to re-install the parking light. Try to get it lined up right. Plug in my headlight.
Then again, I'm going to pull out and stick the front corner down in behind the fascia here. Make sure this bracket over here is up on top, and then stick this down in behind the fascia and then push it down and in. Then push the fascia in, try and pull this gasket out if you want the gasket out on top of your fascia.
Then re-install your three small bolts here and you can see down in the little hole that they have to go down into. Re-install this bolt and what I do is just press down on and twist and I'll actually take my air ratchet. You press down on them and twist and you just get them started. Then take my air ratchet. I always just make sure everything is tight with the hand tool, not with the power tool, just so I can make sure I know how tight they are. I replace this plug and put the locking tab back on. I am just going to want to take this gasket and feel it out all the way around to make it even. That's how you want it to sit.
Brought to you by www.1AAuto.com- your source for quality replacement parts and the best service on the Internet. Feel free to call us toll-free, 888-844-3393, the company that's here for you on the Internet and in person. Thank you.