Replaces


Frequently bought together
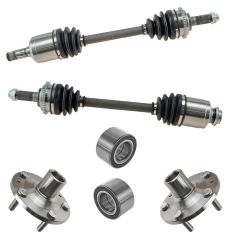
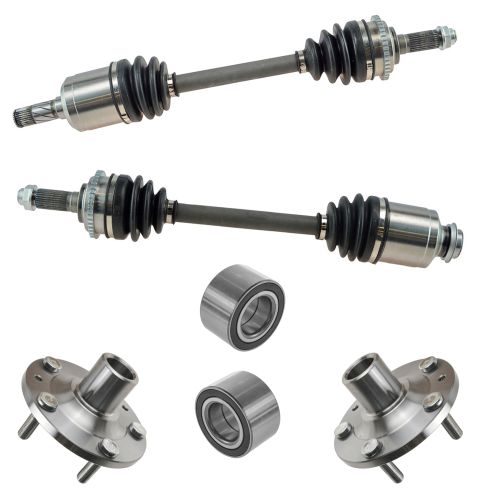
Part Details
About TRQ:
TRQ is a trusted brand dedicated to making every repair a success story by combining premium parts with easy installation. Each TRQ part is engineered by a team of automotive experts to meet or exceed OEM standards, delivering enhanced performance and maximum longevity. With rigorous in-house testing, the brand ensures superior fit and function across every product line. TRQ also provides customers with best-in-class, step-by-step installation videos—so you can complete repairs with confidence, whether you're a first-time DIYer or an industry professional.
Product Features
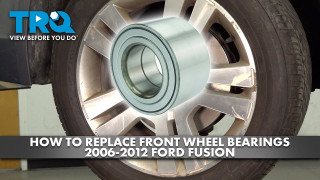
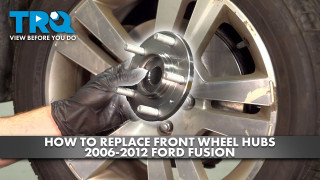
TRQ drivetrain kits are manufactured using premium raw materials to restore original performance. Each TRQ drivetrain component is designed to be a direct, maintenance-free replacement to the stock unit. To extend the service life of your drivetrain, TRQ recommends replacing wheel hubs, bearings, and constant velocity (CV) drive axles at the same time to ensure even wear of components and improved ride comfort. All products are fit and road-tested in our Massachusetts R&D facility to ensure we deliver on our promise of Trusted Reliable Quality.
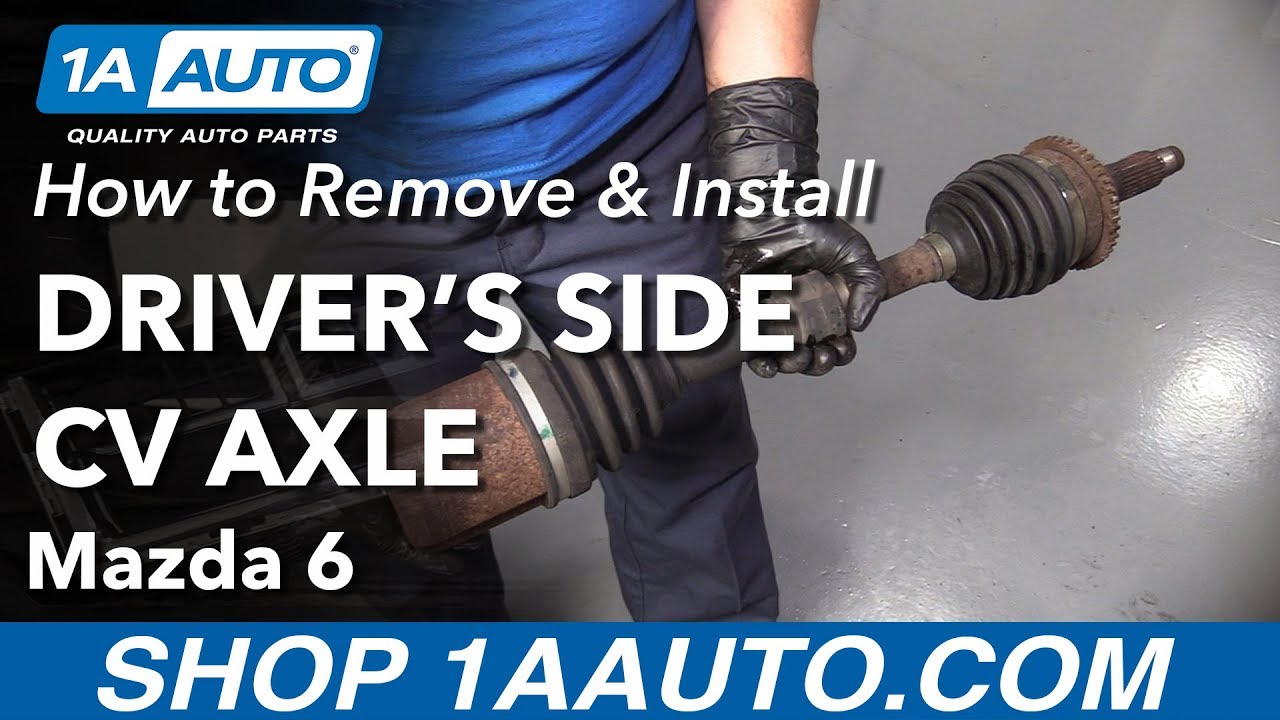
CV axles are designed to transmit the power from your vehicle's drivetrain to the wheels while being able to flex and pivot to the demands of the steering and suspension systems. If your vehicle is making clicking noises at lower speeds or when making turns, it may be time to replace your CV axles with our 100% brand new assemblies.
Our steering and suspension components are pre-greased and sealed for long life and do not require the extra maintenance typically required by greaseable versions.
Attention California Customers:
 WARNING: This product can expose you to chemicals including Lead and Lead Compounds, which are known to the State of California to cause cancer, and birth defects or other reproductive harm. For more information, go to www.P65Warnings.ca.gov.
Lifetime Warranty
This item is backed by our limited lifetime warranty. In the event that this item should fail due to manufacturing defects during intended use, we will replace the part free of charge. This warranty covers the cost of the part only.
FREE Shipping is standard on orders shipped to the lower 48 States (Contiguous United States). Standard shipping charges apply to Hawaii and Alaska.
Shipping is not available to a P.O. Box, APO/FPO/DPO addresses, US Territories, or Canada for this item.
Expedited is available on checkout to the United States, excluding Alaska, Hawaii.
Final shipping costs are available at checkout.
Created on:
Tools used
Hi, I'm Mike from 1A Auto. We've been selling auto parts for over 30 years.
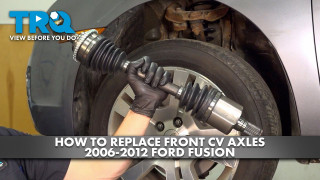
Hi folks Sue from 1A Auto here. Today we're going to be putting in the driver side CV shaft axle on our '07 Mazda 6 sedan.
Just take all five lug nuts off. Send them aside some place safe. Once I took the tire off, I brought it back down because I have to break free the axle nut. I put a nice long pry bar in here, and it's going to put the pressure on the ground as I try to reverse this axle nut off. Now this is a 32 millimeter socket for this axle nut. It is torqued to 202 foot-pounds. So you're going to need a nice long ratchet or breaker bar. There we go. Once you get the nut off, it's safe now to remove the breaker bar, I mean the pry bar, and now we can raise it up and start removing the axle.
I'm going to remove the cotter pin from the tie rod end, and then remove the nut on the tie rod end. You cannot reuse the cotter pin. So if it breaks, that's cool because you're going to replace it with a new one. Sometimes these rust inside, and the only way to get them out is to drill them out. Let's not wish that today. Although, I'll be fine. As you can see, these just broke off. So I'm going to try to pull them one at a time out. There we go. I'm going to spray some rust penetrant oil on here and then I'm going to take the nut off.
Now with the penetrant spray on there, soaking in there, I'm going to put my 17 millimeter socket on the tie rod end nut and break it free. Okay, I'm going to turn this out just to get a little bit more throw. Turn the sting to the right. See how close we can ... There we go, coming to the end of it. That is warm. Now with the nut off of the outer tie rod end, I'm going to hit the knuckle on these points right here mostly to vibrate the tie rod end shaft loose from the knuckle. There you have it, popped right down.
Next I'm going to be removing the upper control on that. It's a 17 millimeter socket. Okay, just give it a good tug. Now we're free to set that. We're going to hit the upper knuckle into the upper ball joint. We're in the same spot. They have those nice marks. Something you don't want to do. There we go. All right. So now with that, dislodge, you can see how the knuckle rolls forward here, and I can see that I have some strain here on my front flex hose, not much on this cable, but because I want the max out of this knuckle to come forward so I can get this CV shaft out, I'm going to undo this one mounting bolt. That's a 12 millimeter socket. I might have to undo the ABS here also. I'll see.
I think I'm going to undo the ABS just because in this case it's always safe to be ... It's better to be safe than sorry. I don't want to put any pressure or strain on the ABS cable, nor do I want to do it to the front flex hose. That's why I'm dismounting this. It's not like we're opening up the hose, so there's no air going to get into the system because we don't have to dismount the caliper to get this axle out.
Yeah, now I've got more throw to it without any pressure. So I'm going to dismount the ABS sensor mounter bracket right here and that is a 10 millimeter socket. Now I can really get a good view. The axle shaft is coming out right through the hub here. I want to see if I have any movement in it. I'm going to grab a hammer. Let's see if I can tap it through. There we go. I'm going to go from the backside here, pull it all the way out. Now we have full access view of it.
I think the next step I'm going to do is I'm going to undo the wishbone into the lower control arm. That is a 50 millimeter socket on this long bolt. I'm going to pull the bolt out so that the wishbone is free from the lower control on ball joint, so I can move the shaft out through the bottom. Then I'm going to disconnect it from the transmission.
So 15 millimeter socket on this wishbone lower part of the strut, break that free. The nice design about this is it has a self-locking nut on the other side. It's got a middle tab that's welded into it. So you never need to use a wrench. That's what the nut looks like, welded with a tab on it so when it comes around, bottoms out whether you're tightening or loosening. Now I'm going to pull the bolt out. There we go. I can see the whole knuckle comes right down, drops down. I'm going to have clearance right here to pull the shaft out once I break it free from the transmission.
Now I'm going to take a pry bar and I'm going to wedge it between the inner part of the CV shaft and the transmission seal right in here. You'll see the tip of my pry bar. They do have some tools for these that will work. Sometimes it doesn't, does it? But you're just going to give it a good tweak. There you go, pulled it right out. I already have a catch pan down below. Even if you're working on your back, and you have jack stands, draining fluid can come out, so you're going to want to catch that and not make a mess. So with it broken from the transmission, I'm clear to pretty much grab this CV shaft and manipulate it out. This is where I'm going to slide it through that wishbone. And here we go.
There's our old driver side CV shaft. We're going to get ready to install the new one. Here we have an axle shaft from 1aauto.com. The new one is on this side, and the old one is right here. If you compare the two, both the same length, come with the same amount of tooth ABS ring that's pressed on, and the new axle from 1A Auto comes with a new lock nut. On the opposite side, that's the inner side. This part goes into the transmission, comes with a new lock clip. It's got the splines for the fluid flow, the bearing seat. If you need this part or any other part for your car, click on to 1aauto.com.
I got to fish the new axle up behind the knuckle. Then I'm going to put the shaft into the wishbone area. Start lining up the new axle inner CV shaft area into the transmission. See that seal? This is where you just give it a good push. I'm going to have to lower it because of ... No, we got it. Yep, it snapped in, locked in. Sometimes because I'm vertically challenged, yes, that means I'm short, I have to bring things down to more of a waist level for strength, but I got that one in. Nice. So now I can manipulate the shaft, axle shaft into the hub bearing. It's lined up really good there. Try to get the wishbone back into place. Now I'm going to lower it so that I can lift my knuckle up. I'm going to put the top control on bolt ball joint in nut in first, so it takes some of the pressure off for me to put the rest of it together.
Now I'm at a level that I can work a little bit easier. I'm going to see the splines, so I got to line the splines up on the CV shaft and push it through the hub. I see there's a lot of rust in the hub as you can see too. I'm going to put a little penetrating spray in there, and hopefully clean some of the rust out. Look at all the rust coming out. You can see it falling right out of there. Okay, now continue to try to line the splines up. There we go.
Now I'm going to put the upper ball joint back into the knuckle, put the nut, start it, hand tight. That way I can really probably get the wishbone both in easier. There we go. As you saw, I lifted that up. I just put it on my arm, give it a lift up, started that. We're going to torque all these bolts and nuts once we get them all together, and now I'm ready to do the same on the wishbone. Put that bolt in. I'm going to put the wishbone bolt right through the control arm again. To do that I'm just going to lift it up a little bit. I'm going to need a little hammer. Okay. There we go. Put it all the way through.
Now I've got my nut with the self locking arm on it so it will spin it around. I'm going to make sure that it locks into place here. 15 millimeter socket. I'm going to just tighten this up while I'm here. This is going to come right around, bottom out on that wishbone, just snug it in because all these have torques to it. I'm going to torque it up in a minute. I'm just going to put the new axle nut on, hand tight. It's a 32 millimeter socket. Just try to bottom that out a little bit.
Now I'm going to move on to my brackets. I'm going to install my front flex hose bracket. Put the bolt in for my ABS sensor. I'm going to tighten those up, 10 millimeter socket for this one, the ABS sensor bracket, and 12 millimeter socket for that one, the front flex hose.
Now I'm going to get a 17 millimeter socket and snug up my upper control arm. I'm just snugging it. Now I'm ready to reinstall my tie rod end. It's a 17 millimeter also. I'm going to have to get a pry bar, pry up on just like that to get the tapered stud off the ball joint to see so that the lock nut will spin the stud ... won't spin the stud in place. See how far I can get. I like to get my nice long pry bar. I'm just going to put some pressure on that. There's one more trick that I've seen and I've done in the past is I've actually just pried, tilted the tire rod end. It's not so much of an effort. Let's see what size I can fit in there. It's probably going to be a 19. Yeah, let's see if that works. This is going to be a stubborn one.
Now that the tie rod end is tightened, I'm going to put my new cotter pin in. Now we're going to get ready to torque up the upper control arm, the upper control arm nut and the wishbone nut bolt. We're going to lower our car. Torque our axle nut. Then put our wheel on. Then we're going to take the draining fluid because we lost just a smidge of draining fluid. So while it's up in the air, I'm actually going to clean that. That way I know that it's all cleaned.
Okay. Let's get the torque wrench in, torque up the wishbone and the upper control arm. Now I'm going to torque the upper control arm ball joint nut to the knuckle. It is 39 foot-pounds, 17 millimeter socket. That's all set. I'm going to move down to the wishbone to the forward control arm bushing bolt, and that is 93 foot-pounds. I have a 15 millimeter socket on the wishbone bolt, and it's 93 foot-pounds I'm going to torque it to.
Now with that all set, we've got the hose connected, we've got the ABS sensor wire connected. I got the tie rod end connected with a new cotter pin, upper ball joint nut wishbone. Now we're going to lower it and torque the axle nut and put the tire on.
Now with my pry bar in place holding it from spinning, I got my 32 millimeter socket and my torque wrench is set up to 202 foot-pounds. I'm going to torque this axle nut. I want to clarify the importance of torquing a front wheel bearing. That's a wheel bearing in there, pressing the bearing that that axle goes through, and that is putting pressure on that bearing. If you use an air gun and you under or over tighten it, you will make the life of that bearing, you'll wear it out faster. Too tight is not good and loose is not good. There is a difference in importance of really torquing the axle nuts on hub bearings.
Now that I have my axle nut torqued down to specs, 202 foot-pounds, I raised it back up and I'm going to hammer over in the lock. It stops it from motion. You never know, but this is what they call a lock it in place. Some use cotter pins. Just really have to make it a divot. Good enough. That will help stop that from moving, not that it should at 202 foot-pounds.
I hand tighten the lug nuts on. We'll lower it and we'll torque this wheel. The torque on this wheel lug nut is 65 to 87 foot-pounds. I'm probably going to go to max because the car is an '07, so that means these wheels have been off quite a bit. So I'm going to go right up to 87, always a star pattern, which I know you know. Come on. The reason for star pattern is to keep the pressure equal on the hub all the way around.
All right, now I'm going to lower it to the ground and torque it to 87 foot-pounds. All right, 87 foot-pounds. I'm going to do it twice in a star pattern just to make sure it's all seated. And there you go.
Thanks for watching. Visit us at 1aauto.com for quality auto parts, fast and free shipping, and the best customer service in the industry.
Tools used
Hi, I'm Mike from 1A Auto. We've been selling auto parts for over 30 years.
Hi, everyone. Sue at 1Aauto.com, and today I'm installing a passenger side CV shaft axle assembly on our 2007 Mazda 6. We ordered this on our 1Aauto.com site. It's a TRQ model design. It comes with a nice brand new locknut, ABS ring. It's the same shaft length as the factory and it has a nice dust shield that goes over the transmission side, covers the rubber seal, keep it from dirt. One of the things I love about this TRQ shafts is I've been testing them every time I get them and they don't fail me at all. I can physically grab and turn this with no binding. I have seen brand new ones come from other brands where I have to put an effort into it and really move them. You don't really want that because it causes a shake going down the road. It will eventually break in, but who wants eventually? So if you want a part like this or any other parts for your car, clink on the link below and head on over to 1Aauto.com.
So we're going to start by removing the wheel. I have it partially on the ground so I can break the lug nut free. It's a 21 millimeter socket. I've got my half inch breaker bar. All right, so now that those are broken free and I can turn it by hand, I'm going to raise my vehicle. I have a two post lift. If you have a floor jack and jack stands, you'd do the same thing.
So now with the car up in the air, we're going to remove the lugnuts and set them aside. Perfect, that's frozen on there. And this happens quite often when you have an aluminum rim with a steel front end. Obviously the steel and the aluminum, they oxidize together. So I'm going to show you how to take this wheel off safely. A lot of people don't think about this. I know I didn't the first couple of times I did it. Take a lug nut and just put it back on by hand. Not all the way, halfway. And now when you take your rubber mallet or your pry bar and you hit it from the other side, it doesn't fly off. I take a rubber mallet and I hit the rubber part of the tire on the backside. That came off nice and easy. Sometimes they don't want to come off that easy and you've just got to keep giving it an effort back and forth. Now we can remove that lugnut and dismount the tire.
So to break the axle nut free, I apply a pry bar in there because I don't have someone to sit on the brake pedal for me. Thirty two millimeter socket, and I'm going to be going counter clockwise. And with this 202 foot pounds, it's really on there. So I'm going to use a breaker bar and an old fence post. So now with that broken free, obviously it goes without saying to be careful. This can slip out. Do it at your own discretion. If you have an air gun, that's the way to go. Now that we have the axle nut out, we can remove the pry bar and raise our vehicle backup.
I'm going to be removing the axle and I'm going to just undo the top control arm nut and the ABS sensor and the flex hose mounting bolt, and that is how I'm going to get my maximum swing of the knuckle and the rotor so that I can get the axle out that way without undoing the two lower ball joints because those are pressed in. This is just a 10 millimeter socket to remove that ABS sensor mounting bracket. And I'm doing this now before I take the upper nut off because I don't want any pressure to swing out on the control on the sorry, on the pressure on the flex hose for the brakes or this wire. The front flex hose mounting bracket bolt is a 12 millimeter socket. Break it free. Get that out of the way. I want to get that clear.
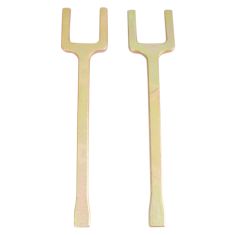
So we're removing the upper ball joint nut, lock nut. It's a 17 millimeter socket or a wrench. Now that I broke it free with the wrench, I'm going to give it a little spray and move over to a socket and ratchet. So now to break the upper ball joint from the knuckle, I'm going to hit it right here where that point is with a hammer. If you have a pickle fork at home, you can try that, but you don't want to tear the boot if you're reusing the ball joint.
So hitting it a couple of times with a hammer, sometimes it will jolt that stud free out of the knuckle. In this case it didn't, so I am going to be using my pickle fork. I'm going to guide it and hope that I don't pinch that boot. I really don't want to tear it. Nice and easy, so we're in good shape. So now with the upper control arm clear and the ball joint out of the knuckle, we have to hit the CV shaft axle center nut or stud. Got to push it through the hub. Now they give you a nice little punch hole here so you can use an air chisel with a punch on it and hit right there. I have presoaked this because it gets stuck in the splines.
If you have a stubborn one, I recommend presoaking it and seeing if you can use a chisel or a punch because you don't want around that axle if you're reusing it. And I'm going to reach my hands in here and pull it out. The reason I disconnected these, as you'll see right now, I can get a good throw. I can turn that all the way without any strain on the flex hose.
So now that I've raised my vehicle, I'm going to take the passenger side CV shaft axle out. There is a extension shaft here that goes into the transfer case of the transmission and it has a carrier bearing on it. Some models, you have to press that off. On this particular model, you don't. The CV shaft actually separates from this long steel or spline. So I'm going to use a hammer. I like to use a hammer that has an actual hammer peak on it, like a, like a blacksmith's peak. That way I can get it at the right angle and hit that. So I'm going to clear and make sure this has got some movement down here so I can pick up the distance and I'm going to hit it out. There we go.
I cannot remove the axle and I've tried. So I wanted to show you at home, you might say, oh look, I can clear this and I was thinking the same thing, but you can't. It's just that little bit that you can't. So with the top of the knuckle disconnected, I'm going to disconnect the caliber, easy access. I've already dismounted my flex hose so there's no strain on that. So with a 17 millimeter socket, I'm going to just undo the caliper bracket bolts. I don't need to undo the sliders because we're just going to lift this whole bracket up. Instead of the side. If you don't have a bungee cord and your piece of rope, even like a metal hook, you're going to want to hang this caliper out of your way.
I'll pry the caliper off the rotor. I like to use a Bungee cord, so I'm going to use the coil spring, and get this up out of the way and move it to the back. Now we can see clearer so you have the clearance. It will not fit through the inner CV joint. Circumference is bigger than the wishbone. So all we have to do now is undo the wishbone and then we can slide the shaft right through between the level control arm. The reason you don't want to undo this lower controller is there are pressed in bushings in the front and in the rear ball joint. Those have to repress back in and out, way too much work for this. So do it the easiest way. Take the wishbone out, bolt out and slide it through.
So now I'm going to dismount this lower strut tower, which is a, they call it a wishbone onto the lower controller. This is a 15 millimeter socket. The nut has a lock clip on it, so it's, you can't put a wrench or anything on that side. Just loosen that nut. I'll show you what I mean about the nut, how it has a lock on it. So that's spot welded. So you can't, holding this means nothing because it stops itself, it hits the metal on the wishbone. At this point there's no threads left, I'm just trying to get it out from the pressure of the wishbone and the control arm. You might when you're at home, if you're doing this on the ground with jack stands, you're going to need the jack to put on this lower control arm when you put it together. You can actually use it right now too to get the pressure off. But I have the luxury of a lift, so I'm just going to let it drop a little. There we go. Now I'm just going to swing the lower part of the strut, the wishbone over to the right. And now I can hopefully guide my CV shaft out. And there we have it.
So this is a TRQ axle from 1Aauto.com. It comes with a new lock nut at the end where it goes to the hub. It's got the ABS ring. It has boot clamps, nice and sealed unmarked. It has a dust cover for the inside. Identical to the factory, the same length. The diameter of the shaft is the same, so if you need this part or any other part for your car, click on the link below come on over to 1Aauto.com.
As I was getting ready to install my new TRQ axle, I noted that there's a double spline here like a keyway. So I checked my factory one. The same keyway is there. So I went to the vehicle and I checked the exterior splines to see if there was a two way keyway and there is not. So that means that this axle's probably multi-fit. So please check your vehicle and if it has that key ay, make sure you line it up so you're not causing any damage or getting frustrated. So this will go on any way because there is no key way I can line those splines up in any way I want.
So now I've got my new axle. I'm going to just guide it up in, and if you can see there's a lock clip that hangs down. It's a spring lock. I like to put the open part of it on the bottom so there's less fighting for me. I'm going to blind that. Excellent. Just give it a good push. See if I can get some of the dirt off. See it will make a smoother transition on. So you just bring it up and bend it so that it lines up with the hub. See the support, it's coming through. You'll feel them line up. It'll come right through. At this point, I'm just going to put the axle nut on by hand. That just assures me it's not going to back out while I, because we're going to now line up the wishbone with the lower ball joint.
Now at home you can, this is where you're going to use a floor jack. If you have a two post lift and you have a stand jack, that's what I'm going to be using. I'm going to keep the wishbone part in my hand and I'm going to spin my bottle jack up, little bit more. Now I've seen it's gone all the way through, I can take this down and get that out of my way.
So on this nut because it's got this safety lock that locks it into place so you can't use it, I'm going to thread it on and I wanted to go this way on this side of the wishbone. I don't want it to go on this side because when we tighten up the bolt, it's going to be turning it that way. So I want it to bottom out on that wishbone right there. I don't want it to be down here in the control arm.
Before I torque this down, I'm going to put the upper control arm ball joint for the knuckle first. I like to get everything lined up before I torque it all down. So I'm going to get my caliper back to the front of this situation over here. I'm just going to slide it right on the rotor. Now I can put a bolt on. Now I know that everything's where it's supposed to be. Make sure that lines up. Make sure my ABS cable's not twine turned around. It's not. So I can now grab my upper control arm and guide the ball joint through.
So now that I have the lock nut snug down to my ball joint in the knuckle, I'm going to torque it to 39 foot pounds. There we go. So 17 millimeter socket or wrench, and I'm going to tighten up my caliper bracket bolts. So the caliper mounting bolt is 79 foot pounds. So I'm going to take my half inch drive torque wrench and my 17 millimeter socket and I'm gonna torque this bolt to the knuckle. There's top one, let's do the bottom one.
So now I'm just going to remount my ABS cable to the frame. That's that little six millimeter bolt with my 10 millimeter socket and I'm going to put the bolt back on for the front flex hose to the strut tower and that is an eight millimeter bolt with a 12 millimeter socket head to it. Just a second, I'm tightening up the flex hose to the strut tower with my 12 millimeter socket. I'm just tightening that. Then I'm going to get my 10 millimeter socket and tighten ABS cable. They just have to be snug.
Now I'm torquing my wishbone lower strut mount to the control arm, 85 foot pounds, 15 millimeter socket. So I hand tightened the nut down as far as I could, and I've got my 32 millimeter socket and I'm going to torque this puppy to 202 foot pounds. There you have it. And this is the way they want you to lock this castle nut is you take a punch or a flat chisel and you pein it over into that groove. Just give it a good hit, one more time.
So now just going to remind my tire. Put it up against the hub. Put my lug nuts on hand tight. I'm just going to hand tighten them with my socket. Then I'm going to lower it down on the ground. Then I'm going to torque these to 83 foot pounds. It's not going to torque my wheels at 83 foot pounds in a star pattern. That just helps make sure that the seat of the rim is seated correctly against the hub. I'll double check it real quick. There you go.
Thanks for watching. Visit us at 1Aauto.com for quality auto parts, fast and free shipping, and the best customer service in the industry.

CSA80109