WARNING: This product can expose you to chemicals including Formaldehyde and Toluene, which are known to the State of California to cause cancer, and birth defects or other reproductive harm. For more information, go to www.P65Warnings.ca.gov.
Lifetime Warranty
This item is backed by our limited lifetime warranty. In the event this item should fail due to manufacturing defects during intended use, we will replace the part free of charge. This warranty covers the cost of the part only.
FREE Shipping is standard on Orders shipped to the lower 48 States (Contiguous United States). Standard shipping charges apply to Hawaii, Alaska and US Territories. Shipping is not available to Canada.
Expedited is available on checkout to the United States, excluding Alaska, Hawaii and US Territories as well as P.O. Boxes and APO/FPO/DPO addresses. Final shipping costs are available at checkout.
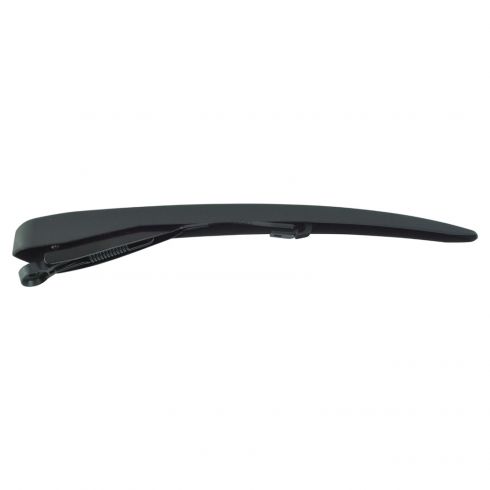
How to Replace Rear Wiper Arm 2010-16 Cadillac SRX
Created on:
Tools used
13mm Socket
Torque Wrench
Painter's Tape
Ratchet
1. Removing the Rear Wiper Arm
Lift the wiper arm cover up and off
Mark the location of the wiper arm with a piece of painter's tape
Remove the 13mm nut from the wiper arm
Lift the wiper arm up and off
2. Installing the Rear Wiper Arm
Press the wiper arm into place
Tighten the 13mm nut to the wiper arm
Torque the nut to 89 inch-pounds
Press on the wiper arm cover
Hi. I'm Mike from 1A Auto. We've been selling auto parts for over 30 years.
What's up, guys? I'm Andy from 1A Auto. In this video, I'm going to be removing and reinstalling a rear wiper arm on this 2013 Cadillac SRX. If you need this part or other parts for your vehicle, click the link in the description and head over to 1aauto.com.
I'm going to take this cover off over the wiper arm. Just on the backside here. It's just clipped in. Slide that over. Slide it up. There's a little clip right there. Just separate this like that.
All right. Before I take this wiper arm off, I'm just going to take a piece of tape and mark the location where the arm is so that when I go to put it back it's in that same location. You could also take a crayon and just wipe right there so you can see that. Now I'm going to take a 13 millimeter socket and ratchet. I'm going to take this nut off. Just hold the arm while you loosen it up. Take that nut off. You can grab the arm and just try to bend it out a little bit. Work it back and forth and it should come right off just like that.
I'm going to take this wiper arm. Install it right there. We're going to line it up with our tape, where we took it off. Take the nut. Spell the nut. Just snug this up. I'm going to use a torque wrench and we're going to torque this to 89 inch-pounds. Then we can take the tape off. Sometimes these clips break right here and down here sometimes these won't stay secure. What happens with these, these are going to go over on this pivot right here to re-secure it. I'm going to just take and line this up over here. Once that's in position, slide it down. Push it down and lock it in place.
Thanks for watching. Visit us at 1aauto.com for quality auto parts, fast and free shipping and the best customer service in the industry.
42874
In Stock
Product Reviews
Loading reviews
There are no reviews for this item.
Customer Q&A
No questions have been asked about this item.
Customer service
877-844-3393
Monday - Friday 8:00am - 9:30pm ET Saturday - Sunday 8:00am - 4:30pm ET
Enter Vehicle Year Make Model
Specify your vehicle's year, make and model to guarantee fit.
Year
Make
Model
Options
Drivetrain
This part doesn’t fit a . Select from parts that fit.