Our steering and suspension components are pre-greased and sealed for long life and do not require the extra maintenance typically required by greaseable versions.
Item Condition:New
Attention California Customers:
WARNING: Cancer and Reproductive Harm - www.P65Warnings.ca.gov.
Lifetime Warranty
This item is backed by our limited lifetime warranty. In the event that this item should fail due to manufacturing defects during intended use, we will replace the part free of charge. This warranty covers the cost of the part only.
FREE Shipping is standard on orders shipped to the lower 48 States (Contiguous United States). Standard shipping charges apply to Hawaii and Alaska.
Shipping is not available to a P.O. Box, APO/FPO/DPO addresses, US Territories, or Canada for this item.
Expedited is available on checkout to the United States, excluding Alaska, Hawaii.
Final shipping costs are available at checkout.
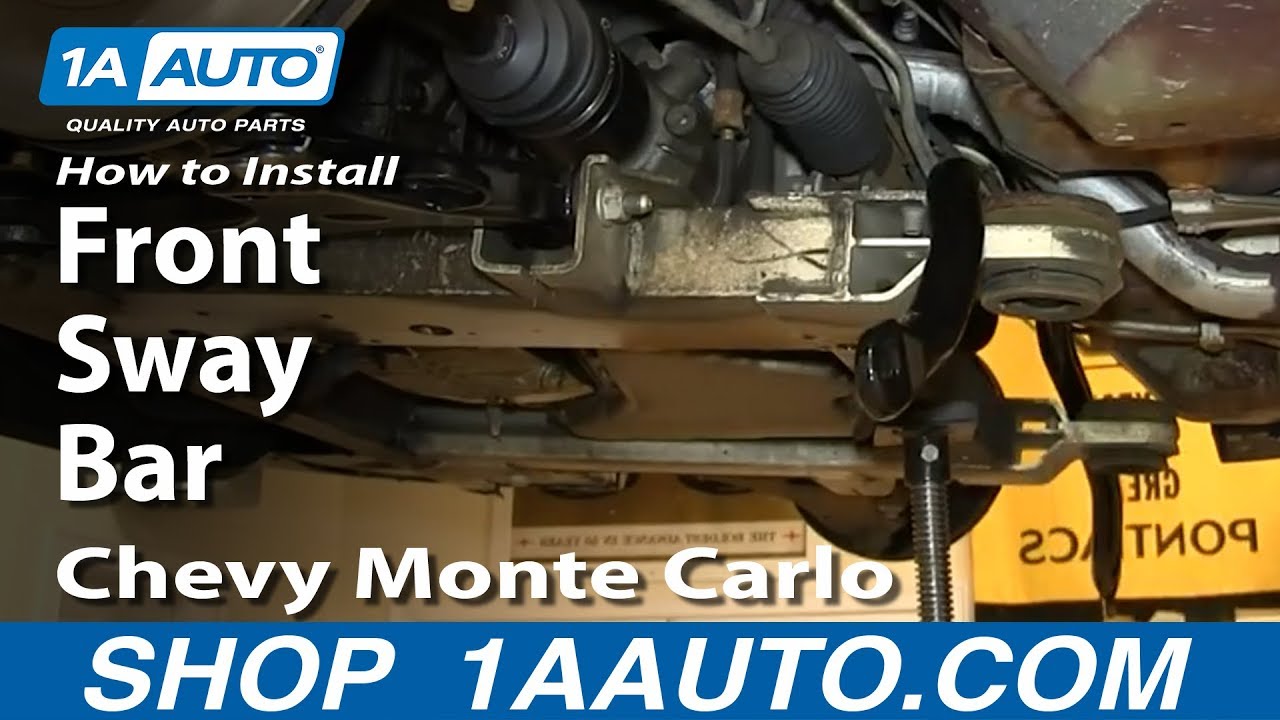
How to Replace Front Sway Bar 2000-07 Chevy Monte Carlo
Created on:
Tools used
14mm Wrench
13mm Socket
15mm Wrench
Hammer
Torque Wrench
14mm Socket
Jack Stands
18mm Socket
19mm Socket
Ratchet
Floor Jack
1. Removing the Wheel
Loosen the lug nut covers with a 19mm socket
Pry off the center cap with a flat blade screwdriver
Loosen the lug nuts with the vehicle on the ground
Raise the vehicle with a floor jack
Secure the vehicle on jack stands
Remove the lug nuts
Pull off the wheel
2. Removing the Sway Bar Link
Spray the top of the stabilizer link with penetrating oil
Place a 14mm wrench to hold the top
Place a 14mm socket on the bottom
Turn the 14mm socket to loosen the sway bar link
Remove the top bushings
Remove the sway bar link
Remove the center bushings
Loosen the 15mm bolts on the sway bar mount
Repeat the process for the other sway bar link
Lift the sway bar up
Remove the 15mm bolts on the sway bar mount
3. Removing the Sway Bar
Place a jack on the cross bar
Remove the two 18mm bolts from the subframe
Slowly lower the jack stand
Hammer off the sway bar mounts
Remove the rubber from the sway bar
Pull the sway bar down and out
4. Installing the New Sway Bar
Insert the new sway bar and angle it forward
Place the bushing into the sway bar link
Place the sway bar onto the sway bar link
Place the nut on top of the bushing by hand
Repeat the process for the other side
Push the mount onto the bar
Push the bracket over the mount
5. Tightening the Sway Bar and Frame
Replace the two 15mm bolts on the sway bar mount
Place a jack on the cross bar
Replace and tighten the two 18mm bolts on the subframe
6. Simulating the Weight
Place jack stands underneath the control arms
Place the weight of the vehicle on the jack stands
Tighten up the sway bar links with a 14mm ratchet
Tighten up each of the 15mm mounts on the sway bar
7. Reattaching the Wheel
Slide the wheel into place
Start the lug nuts by hand
Tighten the lug nuts preliminarily
Lower the vehicle to the ground
Tighten the lug nuts to 100 foot-pounds in a crossing or star pattern
Reattach the center cap
Tighten the lug nut covers with a 19mm socket
Brought to you by 1AAuto.com, your source for quality replacement parts and the best service on the Internet.
Hi, I'm Mike from 1A Auto. I hope this how-to video helps you out, and next time you need parts for your vehicle, think of 1AAuto.com. Thanks.
In this video, we're going to show you how to replace the front sway bar on this 2003 Chevy Monte Carlo. It's the same part and similar process on these Monte Carlos from 2000 to 2007. The items you'll need include a new front sway bar from 1AAuto.com, 13mm, 14mm, 18mm and 19mm sockets, a ratchet, 14mm and 15mm wrenches, a hammer, and jack and jack stands.
Remove the tire by just loosening up these lug nut caps. Now, you can remove your lug nuts. If you don't have air powered tools, you want to loosen these up while the vehicle is on the ground. Then raise the vehicle and remove the nuts the rest of the way. If you do have air-powered tools, you can just remove them right here.
Spray down the top of the link with some penetrating oil and then use a 14mm wrench to hold the top with a 14mm socket and ratchet on the bottom. Ours actually comes apart easily. It's not uncommon. Sometimes the link is totally broken, and you don't even have to do this step. You just pull the remains out. And also, sometimes they're frozen up so bad you have to use a saw or a torch to cut the links out.
Pull the top bushings off and push the sway bar link down and out. Then remove the bushings in the center. Use a 15mm wrench and loosen these two bolts on your sway bar mount. You can see we're using an extra wrench to help break it free. We do the same thing here, but you'll notice this one is a little hard to remove right now. We fix that, and you want to just remove the sway bar link from this side. You can see on this side that our sway bar is actually broken. Now, you want to just lift the sway bar up and now that that's out of the way, you can remove these two 15mm bolts the rest of the way. We'll fast-forward as Mike does that.
Place a jack on this crossbar and then remove these two 18mm bolts. We'll just fast-forward as Mike does that. Now, carefully lower the jack slowly, and then hammer off these mounts. Once you get the metal off, you just pull this rubber part off. Do the same thing on this side. If it still doesn't fit, you can lower it down a bit more and then just pull the bar down.
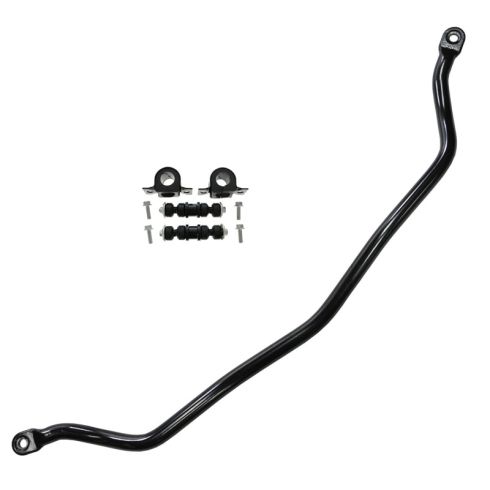
Up top is the old sway bar; below is the new one from 1A Auto. You can see they're identical, and will fit exactly the same. The new one also comes with two new mounts and two new sway bar links.
Feed your new sway bar link up into place. Angle it forward and clip it on to the sway bar over there if you didn't entirely remove it. If you did, you want to just put the sway bar bolt up through. Put the bushings on. Push the sway bar down into place, and then put that top bushing and the nut back on top. You don't need to tighten this; you're just using this to hold it into place.
Have that set up on both sides, and then push the mount on to the bar. Then push the metal bracket down over that. Then replace those two 15mm bolts, and then repeat the process on the other side. Now, raise the jack back up. Once you have it in position, replace those two 18mm bolts and tighten them up.
When you tighten up the sway bar, you want to simulate all the weight being on the suspension. You want to have the sway bar in the riding position. Put jack stands underneath the control arms and carefully put the weight down on the jack stands and then tighten up all the mounts on the sway bar. Then replace your wheel and each of the lug nuts. You want to just tighten them preliminary, lower the vehicle, and tighten them the rest of the way.
We hope this video helps you out. Brought to you by www.1AAuto.com, your source for quality replacement parts and the best service on the Internet. Please feel free to call us toll-free, 888-844-3393. We're the company that's here for you on the Internet and in person.
Product Reviews
Loading reviews
4.97/ 5.035
35 reviews
5 Stars
4 Stars
3 Stars
2 Stars
1 Star
34
1
0
0
0
Eric Stake
September 25, 2010
Nice and solid (2x better than factory!) and it went in well. Big improvement in the car's handling. Great customer service to boot!
2006 Impala Sway bar Kit
Darrell
February 19, 2017
Easy installation nicely made and good quality thanks!
Solid vs. Hollow
John
February 28, 2017
OEM sway bar comes hollow from GM. Rusted through and broke on my 2003 Monte Carlo. No safety issue, just some clunking noises when turning and had to take it easier in general with high-speed turns. 1A Auto's replacement bar is solid, heavy and the fit was excellent. Only thing I didn't like was that it's made in China. Didn't know that until it arrived, but apparently the CEO keeps a close watch on his manufacturing operations over there. Customer service is excellent.
Fits Perfectly
Jacob
March 13, 2017
After my original broke; I bought the bar because of watching the youtube video of 1aauto showing how to install it. This bar is 3x heavier than the original, but that's because it's solid and the original was hollow. Good product, easy install, great customer service.
Love the videos!
Maurice
March 18, 2017
The videos take away all the questions I may have about doing the job myself. Easy ordering and fast delivery. Thank You!
sway bar better than ome
ADAM
March 18, 2017
part great . box arrived no sway bar box bad damaged. call A1 no problem had part next day
Great
Bruce
August 10, 2017
Can't be beat, great price, free shipping, far superior to OEM.Thanks.
Front end part
Scott
October 27, 2017
This was an part I didn't know I needed until I was replacing the rest of the front end. Ordered the part and it came quick and with all I needed.
Good
Heavy Duty Sway Bar
Glen
December 14, 2017
Sway bay is solid and came with all bushings and hardware. It fit like glove!
Great Value
thomas
January 21, 2018
Installation and fit was great. And it appeared to be powder coated.
Fit and works perfectly
A
February 1, 2018
Parts fit perfectly and work great. I will buy from 1A Auto first when I need parts.
Good parts
Lawrence
February 16, 2018
It was easy to install with everything need to do it
Perfect fitting complete sway bar kit.
Allan
March 30, 2018
I have watched many A1 auto videos for installation help and they always say presented with hope you will consider them for parts purchase. Their price was comparable to the local chain store so I ordered the kit. It arrived quickly and with all the pieces we needed for replacement. Highly recommended based on this purchase and their installation knowledge. Will use from now on. :-)
perfect
jim
August 20, 2018
more solid than the original. came with all the parts. fit perfect
Sway bar for 08 Impala
Andrew
September 9, 2018
I was working in the brakes when I saw the end of the sway bar half broken off. I'm YouTube trained, and I was afraid it was something I was going to need a lift for. Nope. Super easy installation. Remove the bolts (I cut the links with a grinder) disconnect one steering control arm and the sway bar comes right out the side. Good purchase.
Great fit. Easy install
Joe-
September 24, 2018
Video was a great help. Sway bar is solid, not hollow like he original. Control arm needs to be tightened up after a few hundred miles, good practice.
great part, great price
B
November 30, 2018
Perfect fit. Appears to be more heavy duty than the original. Best price I could find and received quickly.
Heavy duty
matt
January 10, 2019
Great aftermarket /stock size part for 2007 Grand prix. Had to loosen the two bolts that hold the front to the rest of the car a inch or so but well worth the time and money.
Sway Bar
Allen
March 26, 2019
Direct fit. I will buy more parts from them!!
Very happy with the parts
J
August 13, 2019
I purchased my parts online, received in 2-3 days, everything was in the box, and they were the right parts, bolt on perfect!
Nick's buick
Nicholas
August 23, 2019
I received the sway bar promptly it was perfect better than the factory gm the bushings and sway bar end links were just like the factory gm ones I would I highly recommend this part especially if you want to keep your car like original
rickey
October 2, 2019
Perfect fit
Very pleased
Erin
October 30, 2019
Recieved just what I needed in a timely manner. I would recommend.
perfect fit and packing
jeff
September 11, 2020
My order came faster then I expected. The packing of this item was almost over done. I work for a shipping company and I've seen products like this with pieces missing and poking out of boxes. great packing, above all the sway bar was exact fit with great quality and all fasteners were packaged separate and strongly taped to the sway bar. Thanks
Fits
Jeremy
December 9, 2020
The sway bar matched up to my old one and came with all the needed hardware. 2005 impala
Great product, price, and shipping!
DEREK
January 10, 2021
This was exactly what I needed. Fit perfectly, works great. Found it for a great price including shipping and it showed up in just a few days. Would definitely buy from 1a auto again!
Happy Customer
Tianna
April 15, 2021
I am very satisfied with my purchase!
Solid replacement.
Duane
August 3, 2021
Exact replacement. Solid too.
Better than the original
Scott
October 15, 2021
Fit my car perfectly! Took two of us about an hour to replace the broken one. Did NOT have to lower the sub frame. Draw it out on the passenger side to avoid fuel line on drivers side. Insert from passenger side also. My Monte handles great now!
Awesome
Rickey
May 25, 2022
Awesome
Sway Bar broke, 1Aauto to the rescue!
Schelesia
July 17, 2023
Thank goodness for your fast shipping. Got me back on the road in only a few days!!
Front anti-swaybar
Richard
November 13, 2023
Perfect fit
great part
stephen
March 28, 2024
great part was able to return it as mine was good
Quality in all areas
Keith
August 15, 2024
This product just like all the others I have purchased through 1A over the years was just what I needed. Great quality, great shipping times and great customer service.
Great replacement
Gary
October 25, 2024
Replaces old broken sway bar
Customer Q&A
Do I need to loosen the pinch bolt when replacing the sway bar. 2006 Impala??May 24, 2017
Jeffrey Lockwood J
10
I didn't. I had a 2003 Buick century though. I was going to, but I found I didn't need to. I was working with a lift too, so the job was easier for me.
May 24, 2017
E I
10
Mine was 2004 Venture. Did not have to loosen pinch bolt but did have to unhook passenger tie rod.
May 25, 2017
James T
10
The front sub fram bolts take them out but put a jack under it first and let it down with the jack just around a inch maybe just enough to let you slide it in then jack back up put bolts back in before going on just for safety. Hope this helps.
May 25, 2017
Barry B
I see two sway bars in the picture diagram but description says one quantity, so what is the quantity actually provide when purchased? Cause I need two.May 14, 2019
D O
10
This will come with the sway bars assembled as shown and will include all of the pieces in the photo.
May 14, 2019
Emma F
Is the center link included in this?October 1, 2020
Gabby C
10
There was no shortage of parts that were to be included, so I'm saying yes it was there or go to web page an look up kit number an see what's included. Maybe a phone call or Email you guys that's also worked for me. Peace , out.
October 1, 2020
Douglas J
10
Thank you for your inquiry, Gabby! Yes the entire sway bar in included with this kit.
October 1, 2020
T I
Customer service
877-844-3393
Monday - Friday 8:00am - 9:30pm ET Saturday - Sunday 8:00am - 4:30pm ET
Chevrolet is a registered trademark of General Motors Company. 1A Auto is not affiliated with or sponsored by Chevrolet or General Motors Company.See all trademarks.
Enter Vehicle Year Make Model
Specify your vehicle's year, make and model to guarantee fit.
Year
Make
Model
Options
Drivetrain
This part doesn’t fit a . Select from parts that fit.