WARNING: This product can expose you to chemicals including Lead and Lead Compounds, which are known to the State of California to cause cancer, and birth defects or other reproductive harm. For more information, go to www.P65Warnings.ca.gov.
Lifetime Warranty
This item is backed by our limited lifetime warranty. In the event that this item should fail due to manufacturing defects during intended use, we will replace the part free of charge. This warranty covers the cost of the part only.
Returns: Parts with electrical components cannot be returned once installed.
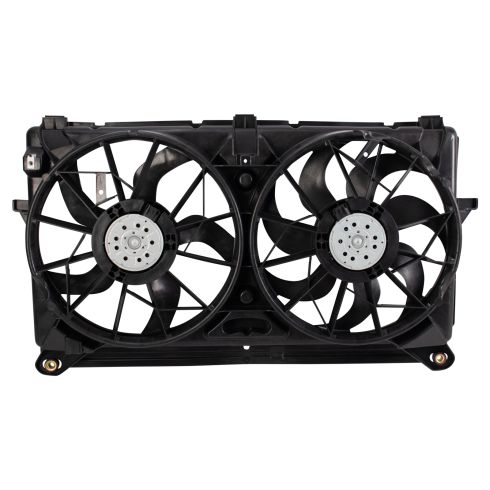
How to Replace Radiator Cooling Fan Assembly 2005-06 Chevy Silverado V6 4-3L
Created on: 2017-10-03
Tools used
13mm Socket
Flat Blade Screwdriver
Ratchet
1. Removing the Radiator Fan Assembly
Disconnect the two electrical connectors from the fans
Unclip the wiring harness from the fan shroud
Remove the two 13mm bolts from the top of the fan shroud
Lift the fan assembly off the clips and out of the engine bay
2. Installing the Radiator Fan Assembly
If reusing the original assembly, make sure the rubber bushings are in place
Line up the fan assembly using the tabs
Slide the fan assembly into place
Insert the two 13mm bolts into the fan shroud
Connect the radiator fan electrical connectors
Clip the wiring harness to the fan shroud
Hi. I'm Mike from 1AAuto. We've been selling auto parts for over 30 years!
Remove the cooling fans. Start by unplugging the two electrical connections at the fans. Push the locks in, work the connector out, and unclip the harness from the bottom of the assembly. Use a small, flat bladed screwdriver. Pry open the lock on it. Just lay that right there.
Use a 13mm socket to remove the two upper retaining bolts. There’s a bolt on each side. You do the same. This hose can just be pushed out of the way.
With the two upper bolts removed, you're going to lift it out and off of the clips, and lift the whole assembly up. Push it around that hose there.
There's the entire fan assembly. Just be sure if you're using the original fan assembly that these rubber mounting bushings have not fallen out. They can easily be popped out when you're removing it. If you need to reinstall them, they just push in the groove. They just sit in there, just like that.
The bottom of this fan assembly has these three rubber grommets. Those are going to go over the pinch weld at the bottom of the radiator support. There's also tabs, one on each side of the radiator shroud. It matches up with a tab down here on each side of the radiator. It's going to slide in in there and hold it. Slide the radiator shroud down into place. We need to move it, get that little ear around the upper radiator hose. I have to pull this one out of the way. Making sure it lands in those ears on the side of the radiator. That seems to be in place.
Put the bolts in. I threaded this down by hand. Now I can tighten it with my socket. It's going to squish a little bit, the rubber part and once I feel it get tight, I'm just going to stop and repeat for the other side. Finally, don't forget to reconnect your electrical connectors or else the fans won't work. Push it in until you hear it click. Put this back in the holder. Push it back together to lock it. The fan shroud is replaced.
Thanks for watching. Visit us at 1AAuto.com for quality auto parts, fast and free shipping, and the best customer service in the industry.
RFA80452
In Stock
Product Reviews
Loading reviews
4.00/ 5.04
4 reviews
5 Stars
4 Stars
3 Stars
2 Stars
1 Star
3
0
0
0
1
Awesome as always!
Lee
May 22, 2023
Worked like a charm and perfect fit!!!
isauro
October 28, 2023
The only last 2 weeks one fan blade broke and damaged my radiator so I have to buy both
Quann
May 4, 2024
Fixed my cooling issue I didn't think it was the fans but it was
Great product! Great price!
Paul
October 19, 2024
Excellent quality of part that was a perfect fit! Easy to install video makes this a no hassle project. Friends came over to hangout and watch football. They asked why I was working on a time-consuming task and I said it was super easy. While they watched the less than 5 mintue video I was already tighten the last bolts. Excellent choice for DIY and wallet! Thank you very much 1A Auto!
Customer Q&A
Customer service
877-844-3393
Monday - Friday 8:00am - 9:30pm ET Saturday - Sunday 8:00am - 4:30pm ET
Chevrolet is a registered trademark of General Motors Company. 1A Auto is not affiliated with or sponsored by Chevrolet or General Motors Company.See all trademarks.
Enter Vehicle Year Make Model
Specify your vehicle's year, make and model to guarantee fit.
Year
Make
Model
Options
Drivetrain
This part doesn’t fit a . Select from parts that fit.