Hi, I’m Mike from 1A Auto. We’ve been selling auto parts for over 30 years!
What's up, guys? I'm Andy from 1A Auto. Today I'm going to be replacing the rear taillights on this 2008 Chevy Silverado. If you need parts for your vehicle, click the link in the description and head over to 1AAuto.com.
We're going to take these two Phillips head screws out. These are aftermarket screws. Whatever screws you have there, you're gonna wanna take those out, just use a Phillips head screwdriver.
Unscrew the top one, and unscrew the bottom one. Just grab the light assembly. You're just going to pull it towards the back of the vehicle. There we go. These are secured back here, these two little pins to go in there. And then we'll replace this harness right here. This harness is actually bad, someone tried to repair it and it's just no good. So we're going to take all these bulbs out.
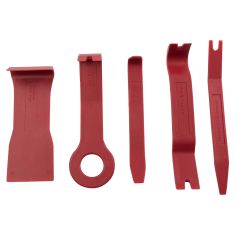
Just untwist this and set the capsule aside. We're gonna take the bulbs out. Set the bulbs aside. Now, from underneath the vehicle, we're just going to grab a trim tool. We're gonna disconnect the harness from this retainer right here. Just slide it out. And, this one right here as well, pop that off. Then there's a connector right here at this junction box. Just push on this little lock tab, slide it out.
A little lock right there. We're going to slide this through, just like that. Let that hang right there, and we'll grab it from the top. Now just grab this harness, we'll just pull it through. Keep in mind what hole you're pulling this out of, because you're going to want to fish the new harnesses through there. Slide it out.
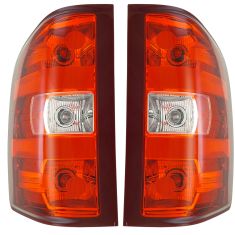
Here's our old tail light assembly. Here's our new taillight assembly from 1AAuto.com. As you can see, the shape is the same and the lenses are the exact same.
Flip it over. The mounting positions are the same. This actually comes with new anchors, so we can take the anchors out of the truck, and these will press right in. Comes with new sockets and taillight bulbs. Those are the same.
We'll look at the connector. Connectors are the same different color, but it's still the same connector. Get yours at 1AAuto.com and you'll be ready to rock and roll.
Before we install the new taillight, I'm just going to use a trim tool. We're going to take these anchors out because the new one comes with them.
You could use a straight blade screwdriver. Anything you can get just to pull them out. And some pliers or something. Just like that. Do the same with this one. We're gonna slide the new harness down that same hole where the old one came out of just like that. You can install these. Get those lined up with the holes, and these anchors up with the holes. We slide them into position. It may take a little bit of effort. This anchor hole is very rusty, so I'm just going to use a file.
Gonna line those up right there, push it in, and they should lock in place just like that. We'll slide this wiring harness back over this bracket back here, and over to this junction box. You're gonna plug this in first, just like that, lock it in place. Get that plugged in, and we can secure the wire with this little push retainer right like that. And we'll do the same over here. This one right there, just like that. Now we're gonna install these Phillips head screws. Get the top one started, and I'll start the bottom one.
Just snug them down, not too tight.
Thanks for watching. Visit us at 1AAuto.com for quality auto parts, fast and free shipping, and the best customer service in the industry.