WARNING: This product can expose you to chemicals including Lead and Lead Compounds, which are known to the State of California to cause cancer, and birth defects or other reproductive harm. For more information, go to www.P65Warnings.ca.gov.
Lifetime Warranty
This item is backed by our limited lifetime warranty. In the event that this item should fail due to manufacturing defects during intended use, we will replace the part free of charge. This warranty covers the cost of the part only.
FREE Shipping is standard on Orders shipped to the lower 48 States (Contiguous United States). Standard shipping charges apply to Hawaii, Alaska and US Territories. Shipping is not available to Canada.
Expedited is available on checkout to the United States, excluding Alaska, Hawaii and US Territories as well as P.O. Boxes and APO/FPO/DPO addresses. Final shipping costs are available at checkout.
Troubleshooting Tips for Your New Window Regulator
How to Replace Window Regulator 1995-2005 Chevy Blazer S10
Created on:
Tools used
No Tools Needed
1. Adjusting the Window Regulator
Lay the old regulator and the new one side by side
Pick the new regulator up by the motor side
Flip the new regulator arms around to match your old regulator
Brought to you by 1AAuto.com, your source for quality replacement parts and the best service on the Internet.
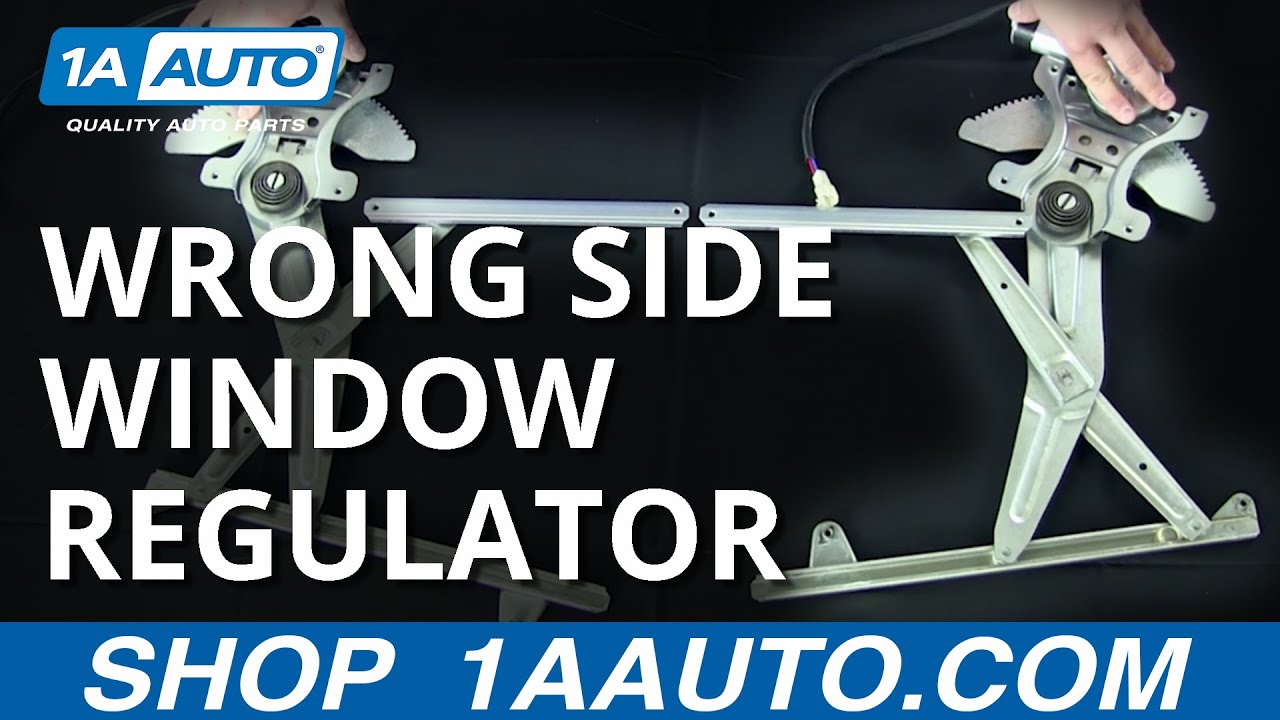
Hey, I'm Brian, I'm here to give you guys a little tutorial on some window regulators. The specific design is the scissor design. We actually get a lot of calls on these products here and the common question is: The part I received seems different than the part in my vehicle.
The scissor design actually has a flip design and we're actually going to show you how to fix this here. The most common thing that you want to do, or the first step you want to do is lay the parts out side by side. Try not to match them up in the car because this can get confusing. Take it out, lay them side by side, and what you actually see here is a same exact part for the same model vehicle in the same door. As the appearance shows here, they seem to be mirrored.
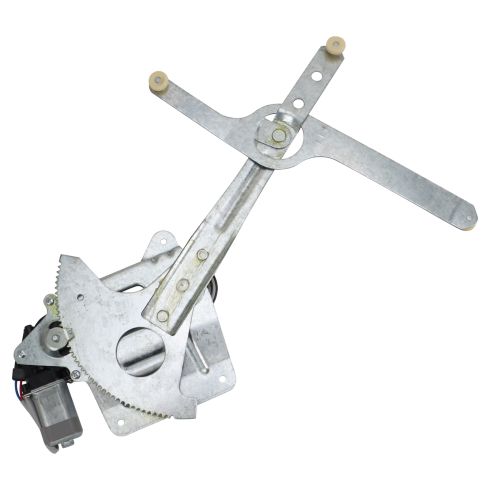
If you look down at the bottom here, we have the power window motor. This is the piece that is actually powered to lift and lower your glass. The next section down here is . you actually have your gear drive. Here's your mounting plates on both. As you can see, it's identical. You have your tension spring here. If you notice on the upper section here, it's kind of reversed. You're going to think normally, I get the wrong side door. You're going to give us a call and you want to express that to one of our customer service reps. I'm going to show you how to fix this.
Basically, pick this up by the base and you want to scissor or flip. This is how you're going to fix the issue. It's going to actually match the component as shown there. You can now see that both of these components here are the same part and you're ready for installation.
You should be good to go. Click on Subscribe or check us out at 1AAuto.com. We'd be more than happy to have you join on board and join the 1AAuto team.
Thanks for tuning in. We hope this video helps you out. Brought to you by www.1AAuto.com, your source for quality replacement parts and the best service on the Internet. Please feel free to call us toll-free, 888-844-3393. We're the company that's here for you on the Internet and in person.
Tools used
Hammer
Flat Blade Screwdriver
Phillips Head Screwdriver
Putty Knife
Window Crank Removal Tool
Center Punch
7mm Socket
Chisel
10mm Socket
Door Panel Removal Tool
Ratchet
1. Remove the door panel
See our other videos for more detailed information
2. Remove the window regulator
Raise and tape up the window.
Disconnect the wiring harness from the power window motor.
Use a hammer and punch to remove the rivets mounting the regulator.
Use a chisel to cheer the head off the rivet.
Remove the window regulator.
3. Install the new window regulator
Put the regulator into place, working the regulator into the window tracks.
Use coarse threaded bolts and nuts to mount the window regulator.
Plug the wiring harness into the window motor.
Lower the window into the window regulator and secure it.
Plug in your switch panel and test the window.
4. Replace the door panel.
Once you are sure everything works correctly, replace the door panel.
Check out our other videos to see more detailed instructions on how to install the door panel.00
Brought to you by 1AAuto.com your source for quality replacement parts and the best service on the internet. Hi I'm Mike Green; I'm one of the owners of 1A Auto. I want to help you save time and money repairing and maintaining your vehicle. I'm going to use my 20 plus years experience restoring and repairing cars and trucks like this to show you the correct way to install parts from 1aauto.com. The right parts installed correctly, that's going to save you time and money. Thank you and enjoy the video.
In this video we're going to replace the front power window regulator on this 2000 Chevy S10; pretty much the same as any '95 to '05. Both the S10 Blazer and the S15 Jimmy and we're going to do the front driver side which is also similar for the front passenger side. Tools you'll need are a flat blade screwdriver; you'll need two of them. A Philips screwdriver, 7 mm socket and driver, a putty knife and a rag, a hammer, a punch, a cold chisel and bolts and nuts with integrated washers to put it back together.
We're going to start by fast forwarding through removing the door panel. It's not that difficult of a job. You remove the switch panel, unhook the switches. I think there are three or four screws that you remove and then pull the door panel away on some pins. If you do want to see this in regular speed just check out our other videos for the door panel removal for the S10 Blazer.
Once your door panel is off then carefully pull back your water shield and once you have that shield pulled back here's your window regulator and it's held on by four rivets actually. We will use a punch to punch out the center and a chisel and then once you have those four rivets off the regulator slides out. Before that you'll want to press on a tab and disconnect your power window motor. What you want to do with these rivets is use a punch first and punch the middle of them out, you can see that's open and now this is called a cold chisel and you just chisel the head of the rivet right off. We'll just speed this up as I'm banging away. Usually, you sheer the head off, this actually just pulls the rivets right out of the door. You can see it's free from the door; you just want to repeat that for the rest of the rivets.
Now my regulators detached from the door and I've got a person helping me and you can see here's a track and there's two arms that go into the track and then if you're to peel here you can see that there's another arm in a track that runs right here. What we have to do is lift the window up and get these two arms out of their tracks by sliding it down and then forward and then this arm comes out afterwards. You want to be very carefully because you can easily get your hands pinched in here that's why I have somebody helping me. I'll have them hold the window at certain times. You can see as I lift up the window I'm going to pull out of my regulator try and show you a good spot. Lift up. Now hold it there, ok now you see me regulator is kind of rotated down and now I pull it out and now you can see here the roller from this arm. Now I just slide this arm right out, bring those together and pull it out. Now what you want to do is probably tape up the window or let it go, just let it slide down. All right like that. Here's the old regulator, the new regulator from 1A Auto you can see everything's all the same. The only slight difference is that the motor has a lead on it but the attaching point is the exact same.
To reinstall what you want to do is you're going to put this one in first into the slides in the front and then you're going to try and work these two into the track at the same time. Lift the window up, make sure you keep your parts out of the way, put this in and then just kind of look up in and you have to do a lot of by feel. I just put that into the track now pretty much get this almost into place and I'm going to have to push it in over. Push the window all the way up and have your person hold it. Now I've got this one here as you can see and I can see that it's in the right spot by looking right through that hole there. Feel and make sure your top one goes into the track in the front. I've got that started, ok and that one is there. Now I've got everything in and now, let go of the window, slowly let your window down and put your regulator and I didn't get the top one it. Slide it back up, got the front in, that one now try letting it down again. Ok and let your window regulator go up into place, keep your hand down. Hold it right there. You want to use a short bolt and a nut with a washer integrated into it. Let it down a little more. Usually easiest to try to all right that's good, a little more ok, that's good; easiest to start these ones down here at the bottom. Go up a little bit, there you go. Now what's a good thing to do is to connect our power here and I'm going to carefully turn on the power. I'm going to hold the regulator. Why I'm doing this is just to get everything out of the way so I can bolt it in. Now put those two bolts in and you can just put the rest of the nuts and bolts in.
As I finish bolting it in here, I'm using bolts in places of rivets obviously because the rivets were sheared off and I'm either using one and a half centimeter M6 10 mm bolts or I'm using quarter inch by one half inch long bolts with 7/16th heads on them. Got everything preliminarily in place. What you want to do is if you stretched out your holes or anything when you were chiseling off the bolts just lift things up into place and tighten them up. We'll hit fast forward as I just reach in and around. Some of the bolts and nuts are a little hard to get to so you want to put a bolt through from the front side and then use a washer and nut or a nut with an integrated washer on the back side. They're at times a little bit difficult especially I have larger hands so trying to get back in there is a little tough so just fast forward through that.
Get them on there. Ok everything is working good. Unplug our switch; put that harness back in there like that. We'll just fast forward putting that water shield back on. Make sure it's on there good. You can use some tape or masking tape or whatever if you need to and then fast forward through putting the door panel back on. Again if you want to see this in regular motion, just check out or other videos for the S10 door panel, remove and replace.
We hope this helps you out, brought to you by www.1AAuto.com your source for quality replacement parts and the best service on the internet. Please feel free to call us toll free 888-844-3393. We're the company that's here for you on the internet and in person.
WRA51148
In Stock
Product Reviews
Loading reviews
4.80/ 5.035
35 reviews
5 Stars
4 Stars
3 Stars
2 Stars
1 Star
29
5
1
0
0
exactly what I was looking for
Richard
February 10, 2017
Excellent merchandise exactly what i was looking for guick and easy installation well as easy as it could if you have no experience doing it id say take it to a professional
Perfect fit.
Michael
July 18, 2017
It was a perfect fit. Worked like it was new, only reason for the four stars is, it did not included any hardware. Also watched the video provided by 1A which was very helpful. Without that video I would have never figured it out.
Does what is suppose to.
Robert
August 10, 2017
Installed it over a year ago. Still working good.
Perfectly Satisfied
S
August 25, 2017
Worked perfectly with my GMC Jimmy. And it was a third of the cost compared to Auto Zone or O'Reilly. The metal was a bit sharp and I cut myself once or twice trying to man-handle the thing in the door, but nothing serious. Overall, I was really REALLY glad to have found this here. And the instructional video on how to put it in/take it out!
Works Great
Mark
September 24, 2017
Ordered this window regulator and watched the installation video. New regulator went in exactly as shown in video and fits great. My son and I worked together on this, and a second pair of hands is a big help in getting the rollers in the tracks. After installation, the window goes up and down just like new. If you need a new regulator, you will not go wrong ordering this part.
Replacing 2002 S10 LH PW regulator and motor
Gary
November 5, 2017
I just installed a new LH PW regulator/motor in my 2002 S10 p/u.
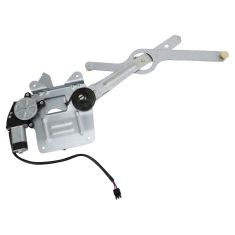
The new regulator is one I bought from 1A auto and it matched the original with the exception of the motor plug. The new unit has a wire pigtail which works fine.
I removed the original rivets with a chisel no problem. The original motor was dead with the window up so I was able to remove it from the door ok. Installing it was tricky since I didn't have anyone to help hold the glass up but I got it in with some fighting.
WIndow works good now. I am pleased with the purchase and video's from 1A auto.
EVERYTHING WORKED GREAT
L
November 7, 2017
THE PRODUCTS WERE EXACTLY AS DESCRIBED AND WORKED EXACTLY AS THEY SHOULD.
I'M TOTALLY SATISFIED WITH THE PURCHASE AND WILL RECOMMEND 1A AUTO TO WHOEVER SHOULD INQUIRE.
FREE FREIGHT WAS REAL COOL TOO.
The old regulator rollers were frozen!
B
December 4, 2017
It was a hard part to remove and I did install it by myself,using a suction cup handle on the window helped still it was difficult..The new unit works great but it would be nice if nuts and bolts were included.
Window Regulator
L
June 24, 2018
Good quality part. Perfect match and easy installation. Took less than a hour to install and worked perfectly.????
Power window motor works well
V
July 24, 2018
Received the unit in 4 days as advised. Easy to install, door cover came off and went back on easily. The rivits did not respond to hammer so I drilled them with metal bit and they were quickly removed that way. You do need to buy the bolts which are not included and specs are in the video. Suggest 1-A auto include them in future. I bought 3/8 diameter bolts which were too big but again drill fixed that easily. Window works perfectly now. I did need an assistant for 15 minutes or so. Good luck.
S-10 Window Regulator
T
August 10, 2018
The part arrived quickly, and looks to be well made. Installation was not difficult, but it took awhile to do. The video you made was a great help.
The window regulator works great.
G
October 1, 2018
part worked great , and installation video was very helpful.
Just what the doc ordered
W
October 15, 2018
Very informational video on how to install. Product works excellent. Tough installation, but that was to be expected for my first time.
A+
Micheal
October 27, 2018
I would recommend 1A auto's service as well as the window regulator that I ordered to anyone needing to replace theirs. the part fit as it should and is working great.
Electric window actuator.
G
February 1, 2019
A little bit of a challenge to install. No fault of the part. Works as good as the original so far. I think it would be best to have another person help. It would have made installation easier. Part works great.
Door rebuild
William
April 6, 2019
Everything works great fixes all that wrong with my front doors 2004 sonoma for this truck parts are getting hard to find
Right fit and went in smooth,after watching the product video
Gary
June 8, 2019
Great 'parts store', always had good luck with 1AAuto products that's why I go back!
Everything works as it shoul
E
August 22, 2019
Window regulator shipped quickly and I have it installed in my 2001 s-10 blazer. Works great. Just want to remind folks to wear gloves when handling the arm as it has sharp edges.
window regulator works perfectly
P
August 22, 2019
Smooth operation...great to have a working window again. Didn't install this myself, as planned, but I appreciate the video giving precise specifications of the nut/bolt sizes to replace the 1/4-inch rivets. Less than a week after receiving the part, my radiator cracked and i let a professional complete both repairs. Good price. I would buy again for passenger side.
S10 BLAZER WINDOW REGULATOR WITH MOTOR
Brek
March 11, 2020
I ordered my window regulator with motor for my S10 BLAZER and it arrived timely. A few days later I was able to find the time to replace the old one with the new one. I used the Video on the 1A Auto website step by step to do it. I have to admit my Blazer is a 1999 and it was a bit tough to get the rivets out but once I got them out the rest of the steps to replace were perfect. I am very pleased so far with my 1A Auto purchase.
Window motor
R
March 25, 2020
The old one was little harder to get out than the video showed, but the new one works great
GMC Jimmy window regulator
Fred
May 8, 2020
Fast delivery, fair priced, easy install and now it works great!
Review
W
November 30, 2020
I got the part and it went in just like you said, it works and looks good. Thanks.
Perfect fit
Ron
February 23, 2021
I highly recommend 1AAUTO. I received the right part and it fit perfectly. The price was right with free shipping. If you should have any kind of problem they have friendly customer support. Some online stores DON'T have customer support and they lost my business. I appreciate the folks at 1AAUTO plus they have very good instructional videos to show how parts are installed. Thanks 1AAUTO
Great part and service. A little harder than the video with one person, but done.
[{"url": "https://wac.edgecastcdn.net/001A39/prod/media/pNISJll75W64CYGsite/c9fc91bdb1baa000d228be243ea184be_1625854245774_0.jpeg", "caption": "Homemade nut with washer attached."}]
Fant
July 9, 2021
My first part came from an Amazon dealer and did not include a motor. This part came with everything but bolts. I made some nuts with washers attached using 1/4" flange nuts, flat washers, and a hot glue gun to attach them together.
The part was identical to the one in the video. It was a little tricky getting the rollers all in the right spots and lined up.
After the install, the part worked great. I can use the drive thru again.
Thanks 1A Auto.
1999 s10 blazer driver door window regulator
Jim
July 18, 2021
I watched your video and with that bit of knowledge and re-enforced courage I ordered the window regulator. I did have to remove a speaker box from the door but the old unit came out petty slick after I got the window in the correct position. Finding the correct bolts was not as easy as it should have been even with great selection at the old hardware store. It would be great if you could include bolts and nuts for the installation. I was able to do it alone and only needed 3 band-aids because of the hidden sharp objects in the door. You could include a few of those too.
Harry
July 26, 2021
Was very easy to install video was really helpful
Joshua
February 8, 2022
The product shipped fast and came in good shape. 1A Autos replacement guide on YouTube was very helpful.
Blazer Window Regulator Replacement
Ronald
July 7, 2022
The part fit and worked OK, but was slightly different than original.
Seems to work fine.
The installation video was very helpful.
Guy
November 29, 2022
Perfect fit exactly what I needed
Works as New
Harry
April 24, 2023
Works perfectly in my 02 S10 Crew Cab. Need a rivet gun or several small nuts bolts and washers if you don't have one. If you know what your doing one person can do it but two work better. There are good videos on UTube. Hardest part for me where the getting the electrical connections off the switch.
EDWARD
May 5, 2023
perfect fit
suitable replacement
noted, smaller motor
Suburban window regulator
Esteban
July 12, 2023
Good product with easy installation
TRQ is good instructor
Lynn
June 25, 2024
Put it in myself. Everything fit as I followed the TRQ instructions. Would recommend an intermediate to advanced do-it-yourselfer.
Works great
Julien
October 9, 2024
Fit exactly as it needed to and works well. It's so nice being able to roll my window down now.
Customer Q&A
Will this fit a 2003 s10 crew cab?May 31, 2017
Michael B
10
Yes, this will fit.
May 31, 2017
Alex P
Will this fit a 1999 Chevy blazer?July 16, 2021
John D
10
Yes, this part is listed to fit your vehicle.
July 16, 2021
Emma F
10
Yes it will - you can do it!
July 18, 2021
Jim B
What size nuts/bolts are needed ?January 26, 2022
Glenn S
10
Actual Measurements are not listed or available. Our parts are exact replacements for your vehicle's OEM parts. As long as your year, make, and model match up with our listing, these parts will directly fit and function like the originals. New hardware is not included with this item. You may be able to reuse your original hardware if it is in good condition.
January 26, 2022
Andra M
10
I believe from the 1A Auto video that I followed, they were 10mm? I just reused the original bolts that were on the door from he original Driver Side Power Window Regulator that quit working. I didn't have to buy new bolts. But I believe they were 10mm. If you pull up the video on the 1A website, the gentleman the MM of the bolts he walks through the repair. I hope this helps.
January 27, 2022
Brek L
Customer service
877-844-3393
Monday - Friday 8:00am - 9:30pm ET Saturday - Sunday 8:00am - 4:30pm ET
Enter Vehicle Year Make Model
Specify your vehicle's year, make and model to guarantee fit.
Year
Make
Model
Options
Drivetrain
This part doesn’t fit a . Select from parts that fit.