Brought to you by 1AAuto.com, your source for quality replacement parts and the best service on the internet.
Hi. I'm Mike Green. I'm one of the owners of 1A Auto. I want to help you save time and money repairing and maintaining your vehicle. I'm going to use my 20 plus years' experience restoring and repairing cars and trucks like these to show you the correct way to install parts from 1AAuto.com. The right parts installed correctly, that's going to save you time and money. Thank you and enjoy the video.
In this video, we're going to show you to replace the blower or the fan motor on this 2004 Dodge Intrepid. Generally, if your fan goes from working to not working, doesn't work on any speeds, then that's usually that your fan motor has gone bad. Tools you'll need are 8mm socket, a pair of pliers or a screw driver, and all you'll need a socket driver, as well as a flexible joint to reach into some of the weird little places for this repair. First, we're going to want to remove ... There's a little pin right here. You could probably use a screw driver to pull the center of the pin down, or maybe a pair of pliers would work as well. See the center of the pin coming down and then when pin pulls out and then this piece of dust frame just pulls right out. You want to disconnect your motor lead first, this part does need first by pressing it enough by pulling down. This is your ball or motor lead right here. There's a tab on the side to pull down.
With your harnesses unhooked, now there are three screws. One there, one, I really don't know if I can get a shot on this. There's one right up in here behind where you pull that clip out. Actually, it's right here. One right there and then one... it's a little more difficult to see. I can get it for you. One right back up in here. I can't really film it for you but you can feel it if you stick your finger up back in there. These two were pretty easy, reach up in their film, get them with a straight driver and an 8mm socket. Same one with this one over here. Straight to that driver socket, get on there. Pull this one out. This one back in here, what you going to want to do is take your carpet and pull it down. It just gives us the ability to have a little better angle with your flex joint. You basically want a driver and a flex joint. Get to feel your way up in here. Get the flex joint on there and then try and keep it straight. Push it into the floor and start turning it. Basically, you can't see much of this but I'm just kind of holding the socket onto the bolt with one hand, turning the driver with the other.
I'm just going to fast forward. This is really the toughest part. Just getting that back bolts is just hard to get to. I'll keep fast forwarding. Hopefully, once you get it loosen up some, you can get your fingers up in there and twist it out. After that, I remove the bolt that's easy to get to in the front. Then you pull this basically down out of the way. Push this grommet through and pull your lead through, pull that out. Now, we can see, there's our fan with three 8mm screws holding it. One back up in there, there and there. We can just get our ratchet on this one. It's probably a tough one. Go back to our flexible joint, works the way out, I guess. Just a regular driver, you'll see as a remove this bolt that the fan is dropping right out. Try to pull the carpet down a little bit again, and down and out.
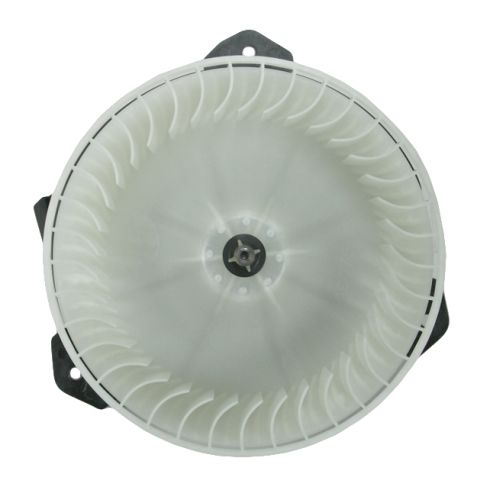
Okay, so here's our new motor from 1A Auto. Original fan. You can see everything's the same. Wire color is different but that doesn't make much difference. What's important is that the connector is the same, which it is. I'll work out the correct way here. Okay, connector is all the same. Okay, our fan cage is all the same, shape of the housing is all the same. For this vehicle, I'm just showing you this video so you know how to do it. The original motor is actually working fine so I am going to reinstall that. I just want to show you that the piece you get from 1aauto is going to be all the same, is going to install the same and work correctly for you. We've got the carpet pulled down. If you want to do this, put the motor up in there. This larger part of the ... This larger part goes towards the front of the car, but all you want to do is put it up in there, with that part kind of facing more towards the outside or the passenger compartment and just get the fan cage. You kind of have to force it a little bit, force it up into the hole. Then, turn it into the correct position here. This will turn it around this way.
Once you have it up in there, then start all three bolts just by hand first and then tighten them up. I'm just going to fast forward through this because there's no need for you to sit down and watch me struggle with that. It's really that bolt that's up near the firewall that's the hardest. Then the other two are quite easy with the straight driver. Put down your cover. Put the lead through. You want to put your lead through and you want to get this grommet pushed in. That's squared away.
Now, you got to kind of pull this down and push back a bit. It's hard to pull down the way its better. You have to pull the front of it down to make sure it goes over the little ... Now, it's pretty crazy. All right. Start this one here. Here again, I'm going to fast forward as I just start all three screws. Then, I struggle for a while with that front one with the flex joint and just pushing hard against the firewall and installation and trying to guide it in there and eventually getting in. Quite honestly, if you get the two that are easy in and tightened up, and you kind of forget about that third, one, I won't tell anybody because that thing is kind of a pain.
Okay, now, you can reconnect the leads. Just in case you're wondering, my hands are not all hyped up on coffee. I just got it going to double speed, just so you don't watch me fumble around with it for too long. Last but not the least, you got to work out the lead and raise it up in place, kind of give it a push. Then, grab your clip, goes through the ductwork first and then put it in place. Get the pin and push the pin in.
We hope this helps you out. Brought to you by www.1AAuto.com, your source for quality replacement parts and the best service on the internet. Please feel free to call us toll-free, 888-844-3393. We're the company that's here for you on the internet and in person.