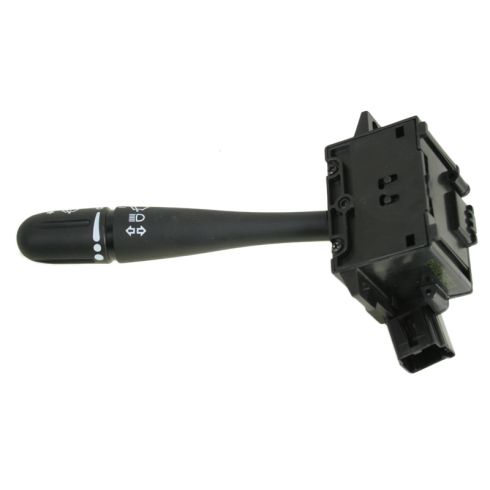
1AZTS00087-Dodge Chrysler Plymouth Combination Switch DIY Solutions BSS00887

Replaces
2004 Dodge Grand Caravan Combination Switch DIY Solutions BSS00887

Frequently bought together
Product Reviews
Loading reviews
4.81/ 5.0
21
21 reviews
turn signal switch
March 2, 2017
awesome, it works great, now when i make a turn it dont show im turning the wrong way
Turn signal & wiper switch
June 22, 2017
What a pleasant surprise something goes as indicated. I have ordered four (4) previous parts so had confidence that it would arrive in a timely manner but I am not a good wrench man, so always have doubts about the installation. Watched the video. The shop estimated at $300.00. Got the part, (about $50.00) & 15mins repair time & everything worked. Happy, Happy Happy
havent got it yet
August 10, 2017
i hanent got it yet dont know what the hold up is get tired of folks pulling out in front of me because i didnt turn it off
As advertised
September 5, 2017
Exact fit and performs perfectly. Highly recommend A1 Auto.
Wow! Great deal
September 12, 2017
I have a 2006 Chrysler van. Wiper switch needed to be replaced. The diy. Video and the part let me install wiper switch from start to finish in 15 minutes. Cool deal
Fit like a glove
October 5, 2017
Very easy to install. Very happy to have auto shut off on my blinker switch.
So far so goo2
October 23, 2017
Seems to be very good turn signals work fine but it hasn't rained yet. So we will see if it works with the wipers on full speed. But yes i would recommend this product thank you
T signal switch
April 21, 2018
Your tutorial made what appeared difficult quite simple. I was leery of attempting it because of the air.bag and not wanting it to deploy. It actually took no more tha 30 minutes to complete. Most difficult part was reinstalling the cover. Getting the screw in the right hole.
Cobination Switch
August 28, 2018
Product arrived quickly and in good condition. We have ordered parts from 1A and haven't had any issues. You alo can't beat their warranty.
Perfect
September 24, 2018
It worked perfect and was easy to install thanks to the videos yall have available. Thanks!
Simplicity Equals Excellence
October 10, 2018
1A auto's website is simple and very effective to find exactly what you need at cooperative prices. Payment was easy. Fast shipping. Item arrived in good order and the quality exceeded my expectations. Using their installation video, it took me twenty minutes to install. This is as good as it gets! Its 1A Auto for me from now on.
2003 turn signal switch
October 22, 2018
Showed up in great condition. Installed just as the video showed. Works great. Wipers, lights and turn signals all worked as expected. A1 is my preferred on line parts authority.
Dodge combination switch
October 5, 2019
Turn signal wouldn't .automatically turn off after a turn. Very easy to install and a perfect fit. Great price too. With my families 4 cars we've saved over $5k. The published videos are GREAT
on how to do things right.
Good product
October 7, 2019
Worked great
A1 Auto Turn Signal Switch.
January 9, 2020
The switch works great. What Im really impressed with is the last item that I ordered which was a taillight lense. Super easy to install and A1 supplies you with a video for installment in case you need it. I used to use Carparts.com, but not anymore. Their customer service is great too.
March 21, 2020
Phenomenal customer service! The part fit perfectly and was easy to install!! I buy all my parts exclusively at 1A Auto!
Good product, easy installation
October 3, 2020
So far the product seems perfect. 5 screws (3 on steering column shroud and 2 for turn signal) and I was back to being a responsible driver with working turn signals.
Fast shipment also.
Good product!
September 3, 2023
Easy install and crips action when in use
Customer service is outstanding
April 22, 2024
Good parts at a good price and very punctual to get orders to my home.
Economical and easy
August 14, 2024
Perfect replacement part
Easy fix
October 25, 2024
Fit perfectly and was easier than I expected to put on.
Customer Q&A
would replacement of this switch fix broken self cancelling for the turn signals?
April 4, 2018
10
Although we cannot guarantee this will fix your issue, this is a common symptom of a failing turn signal lever!
April 4, 2018
T I
Dodge is a registered trademark of FCA US LLC. 1A Auto is not affiliated with or sponsored by Dodge or FCA US LLC.
See all trademarks.


