Brought to you by 1AAuto.com, your source for quality replacement parts and the best service on the Internet.
Hi, I'm Mike from 1A Auto. I hope this how-to video helps you out, and next time you need parts for your vehicle, think of 1AAuto.com. Thanks.
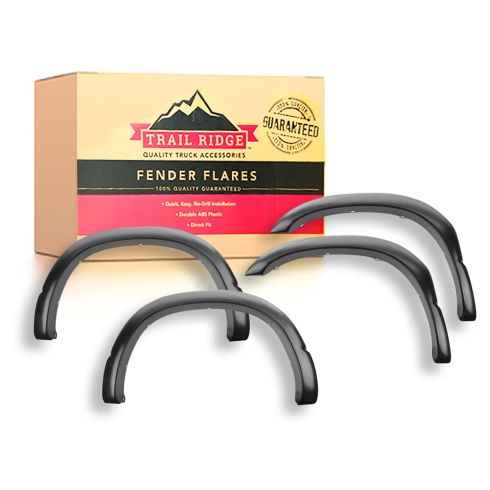
In this video, we're going to show you how to install fender flares on this Dodge Ram. This one is a 2008, and this rugged style fender flare is going to be the same procedure for 2002-08 Dodge Ram 1500s and 2003-09 Dodge Ram 2500s and 3500s.
You need new fender flares from 1AAuto.com, flat blade screwdriver, Phillips screwdriver, utility knife, and depending on the hardware you're using, you might need a socket, but in our case it's an 8mm with a ratchet, and if you have any rust issues, you may need some sand paper and rust preventative paint.
Our truck has some hardware missing, so your truck may have more hardware or hardware of a different style. Regardless, the process of installation will be the same.
There are some Phillips head screws and some 8mm screws at the bottom of the fender inside the wheel well. Before installing your fender flare, you want to take the supplied seal here, and remove the 3M tape from the roll. Remove it little by little. Lay the edge onto your flare flush and walk that seal on there. Just work that right along the flare, remembering to press your adhesive on the outside edge here. When you finish working the seal to the other end of the flare, cut it flat and start the next flare.
Working on the passenger side, we've cut our wheel all the way to the right to make it easier to access these lower bolts inside the wheel well. We'll take our fender flare and just fold it up roughly where it's going to be. Sometimes these badges will interfere, especially with our larger flares, but in this case it clears. We'll get underneath and see where our bolt holes line up with our hardware. We have one at the front, one at the bottom, and one at about the 11 o'clock position. We'll remove that hardware and use it to install our flare. Again, your hardware may be slightly different. The alignment of your flare may be slightly different, but the same basic concept is going to be the same throughout.
Our bottom screw here is a Phillips head. Remove that, and the reason these flares don't use every single bolt hole along the way is so that your inner wheel well doesn't have to be lined up at the same time as the fender, which makes a lot of work and complication in order to remove and reinstall these parts.
Reinstall the bottom screw, in our case it’s a Phillips head. We aren't going to tighten that down all the way, because we want to line up the rest of our hardware and make sure that the flare sits nicely on the fender before we lock anything into place. Move up to the 11 o'clock position, and tighten that up with our 8mm socket. Step back, and make sure that your flare is lined up to your liking. Once you've made sure that your flare is lined up to your liking, step back and double check. Now that it’s where you want it to be, finish tightening down your hardware. Just like that, this flare goes on without any modifications to the truck and looks like it came from the factory.
Our fenders lined up nicely reusing the factory hardware in a few locations, but our kit includes some self-tapping screws and clips, and some plastic retainers. So if your fenders don't line up quite the way you want to, you can use the self-tapping screws or drill holes and use the plastic retainers to secure your fenders a little tighter in a few more places. Our truck, like many trucks of all makes and models, has rust over the rear tires, on the wheel arch, and on the side of the bed. It's very common for these to rust out, and people to buy fender flares to try to cover over them and hide that rust spot. What a lot of people don't do is take the time to remove the scaling and bubbling paint. They’ll coat the rust so the fender flare not only hides it, but keeps it from getting worse. We'll show you how to do that.
Start by taking a fresh, sharp razor blade, and cut around the edges where the bubbling is—just score it. Take a flat blade screwdriver and scrape away all of the bubbled paint up to our score marks. The score mark keeps that chipping controlled so it doesn't break off into our good paint where there's no need to scale it off.
This guy is a little harder to see, but we do have a rust bubble starting right here. Before that gets any worse and expands or goes through, let me score those edges with the razor blade as well. While there was no rust under this bubble, that deformation in the paint would allow water to set in and eventually make our truck look like this, so we'll finish scraping off all our scaling, and then we recommend you sand it and treat it with the rust preventative coating or paint of your choosing.
Line up the body tabs in your flare, and see where everything lines up. In this case, we'll remove our two 8mm screws in the rear, and use the two holes in the front fender for our plastic retainers.
Line up the holes and start reinstalling your hardware. Remember to leave it loose for now so we can line everything up before we lock our flare into place. See here, our body line doesn't really line up well. This is why we leave all of our hardware loose, because simply sliding it up and pushing it in closes that gap. Tighten our hardware.
Go ahead and install your fender flares on the opposite side of the truck in the same way that we showed you on the passenger side. With just a little bit of work to move the fenders around, make sure that you take the time to line them up properly. These fenders look like they were installed from the factory.
Thanks for tuning in. We hope this video helped you out. Next time you need parts for your car, please visit 1AAuto.com. Also check out our other helpful how-to and diagnosis videos.