Brought to you by 1AAuto.com, your source for quality replacement parts and the best service on the Internet.
Hi, I'm Mike from 1A Auto. I hope this how-to video helps you out, and next time you need parts for your vehicle, think of 1AAuto.com. Thanks.
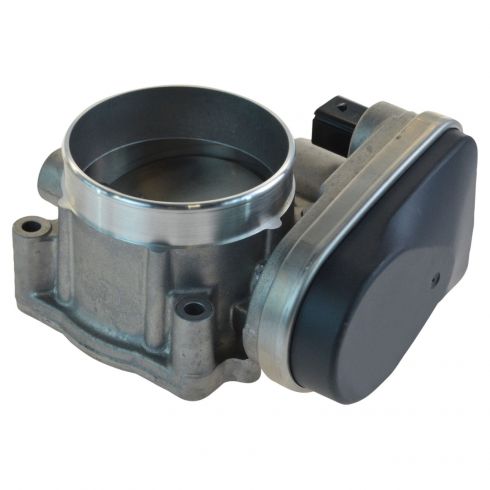
In this video we're going to show you how to replace the throttle body in this Dodge Ram. This one is a 2008 with the 5.7-liter Hemi. The procedure's pretty much the same for a 2005 to 2010 Dodge Ram 1500s with the 5.7-liter engine.
You'll need a new throttle body from 1AAuto.com, a flat blade screwdriver, 8-10mm sockets with a ratchet and extension, an angled pick, a torque wrench, a rag, and some spray cleaner.
Before working on any part of the electrical system you'll want to use a 10mm wrench to remove the negative terminal of your battery and set it off to the side.
Open the air box by releasing the metal clips on the side and the rear. Pop it out of its holders, release this hose from the front and using a flat blade screwdriver, and loosen the clamp on the rear of the inlet pipe. With that loosened up, work the pipe off of the box, and remove this assembly. The bottom half of your air box simply lifts off its retainers and comes right out of the truck.
Remove the two ten millimeter bolts, one behind the alternator and one behind the oil cap, with a ten millimeter socket, ratchet, and extension. Lift up on the air box so you can access the intake air temp sensor at the front.
Push down on the connector, and remove it from the IAT. Remove the air box from the vehicle.
On the top of your throttle body is a connector that runs the stepper motor and opens and closes your throttle body as you hit the gas pedal in the vehicle, as well as a few other sensors. To remove it, we'll pull back on this red safety tab until it clicks. Push down on the connector, and, using a small flat blade screwdriver, carefully work the connector off of its tab. Remove it from the throttle body and set it off to the side.
Using an 8mm socket and an extension, we'll remove the four bolts securing our throttle body to the intake manifold. Hold on to your throttle body while you remove the last bolt. Carefully pull it off of the intake manifold. Using an angled pick hook the tab on the side of the O-ring gasket for the throttle body, lift it out, and carefully remove it.
This style gasket is reusable if in good condition. See, ours has a little bit of dirt and gunk built up on it, so we're going to clean it off and inspect it. If everything looks good, we can throw it right back into our vehicle.
Using some plastic and rubber safe cleaner, it's still something strong enough to cut through grease and dirt. Go ahead and coat that on. Take a thick paper towel or a clean rag and rub all the buildup off the gasket. Try not to pull and stretch it too much, you could deform it or tear it, especially if it's older. You might not get all the buildup off. You really want to get the bulk, and anything that's going to prevent it from sealing. All this staining you see down here is fine as long as it's not raised or jagged. Then we'll want to take a look over for any hairline cracks, tears, dry rotting, causing it to look cracked on the surface, any kind of brittleness on the outside and the inside. Our gasket looks like it's in good shape, so we'll keep that clean and reinstall it in the truck
Here we have our old throttle body that we removed from the truck and our new throttle body from 1AAuto.com. As you can see, they have the bore diameter, same mounting locations, we have the same connector on the side here. This is going to run your stepper motors to actually open and close the throttle body, as well as any throttle position sensors that apply. On the back, you can see we have the same style blade, same machine surface here where it's going to mount to the intake. These alignment holes are the same. You can see we have a nice, fresh throttle body here. This one's been on the truck for a 100-odd thousand miles. It's all full up with gunk. Even if you keep up with cleaning these, they are going to build up some debris, which can cause the vehicle to idle improperly, run a little rough, and have issues with acceleration and throttle response, as well as the stepper motors and sensors in here going bad. Just a few reasons you might want to replace one of these. Be sure that the inside of the intake manifold where the throttle body gasket sits is clear of debris. This tab will sit into the slot at the 9 o'clock position on the manifold, start there.
Firmly press the gasket into place. Install your new throttle body. There are two alignment pins at the 12 and 9 o'clock position like we showed you.
Start your bolts in by hand, get the bolts snug with an 8mm socket and ratchet. We're using a 1/4" drive here for reinstallation because this is going into a plastic manifold with inserts, so if you over tighten these, you can break the manifold. Be very careful just to bring them down until everything is seated flush and then we'll torque it. This step is critical where the new style intake manifolds are plastic. If you over-tighten these bolts, you risk breaking the manifold, which can cause the engine to run improperly, or not at all. You'll want to use a 1/4" torque wrench. Torque these bolts to 50 inch-pounds in a cross pattern, the same you would with lug nuts. Reconnect the electrical connector at the top of the throttle body. Push the red safety tab forward to lock it down.
Reinstall the end of the air box with the silicone gasket over the end of your throttle body. Tighten up the bolt behind the oil fill cap and behind the alternator with the ten millimeter socket and ratchet and an extension. Reconnect the intake air temp sensor. Drop the lower air filter housing back onto its mounting locations. Be sure the air filter is fully seated into the housing. Reinstall the intake tube onto the air box and the PCV breather hose. Lock the lid of the air box back onto its hinge. Close it. Lock it back down. Tighten the intake tube clamp with a flat blade screwdriver.
Thanks for tuning in. We hope this video helped you out. Next time you need parts for your car, please visit 1AAuto.com. Also check out our other helpful how-to and diagnosis videos.