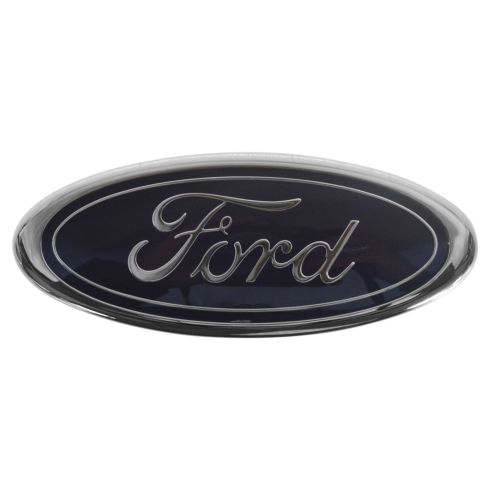
Genuine original equipment part (OEM) that was factory installed on your vehicle by the manufacturer.
Item Condition:New
1 Year Warranty
This item is backed by our 1-year warranty. In the event this item should fail during intended use, we will replace the part free of charge. This warranty covers the cost of the part only.
FREE Shipping is standard on Orders shipped to the lower 48 States (Contiguous United States). Standard shipping charges apply to Hawaii, Alaska and US Territories. Shipping is not available to Canada.
Expedited is available on checkout to the United States, excluding Alaska, Hawaii and US Territories as well as P.O. Boxes and APO/FPO/DPO addresses. Final shipping costs are available at checkout.
How to Replace Grille Nameplate 2001-03 Ford Ranger
How To Replace Grille Emblem 1998 Ford F150
Created on:
Tools used
Socket Extensions
Flat Blade Screwdriver
5.5mm Socket
10mm Socket
Ratchet
1. Removing the Grille
Remove the ten 5.5mm bolts from the plastic cover set
Pull evenly on the tabs below the headlights and around the grille
Compress and remove any remaining retainers stuck in the vehicle
2. Transferring the Badge
Remove the two 10mm nuts on the back of the badge
Transfer the badge to the new grille
Tighten the 10mm nuts to the back of the badge until snug
3. Reinstalling the Grille
Reinstall any remaining retainers to the grille
Press the grille into place
Tighten the ten 5.5mm bolts to the plastic covers
Brought to you by 1AAuto.com, your source for quality replacement parts and the best service on the Internet.
Hi, I'm Mike from 1A Auto. I hope this how-to video helps you out, and next time you need parts for your vehicle, think of 1AAuto.com. Thanks!
In this video, we're going to be working with our 2001 Ford Ranger, we're going to show you how to remove and replace your front forward badge here on the grille.
If you like this video, please click subscribe. We have a ton more information on this truck, as well as many other makes and models. If you need this part for your vehicle, you can follow the link down in the description, over to 1AAuto.com.
Here are the items you'll need for this repair: 5-10mm socket, ratchet, socket extension, and a flat blade screwdriver.
Remove these ten 5 1/2 millimeter bolts from the upper plastic covers. Go ahead and remove these with a socket, ratchet and extension. These parts are actually three separate pieces, so you can remove them as they come off and get them out of your way.
There're tabs located along the bottom and inside edges of the grille. Feel along the bottom for where these tabs are and try to pull evenly on both sides of the tab to try to prevent from breaking them. Using a flat blade screwdriver, push down on the top of any of the metal retainers that stayed inside the vehicle when we removed the grille. This one, you can press them from the top and try to pull out at the same time. These can be a little tricky. Repeat this for any clips that you left inside the vehicle while removing the grille.
Flip your grille over and remove the two 10 millimeter nuts on the back of the badge. Now these are not actually threading, these just have little teeth on them that cut into the plastic to hold on. Once the two nuts are off, you can simply pull the badge out of the front.
Here we have our old badge that we removed from our vehicle and our new part from 1AAuto.com. As you can see, these parts are exactly the same size and shape. We have the same colors, same lettering, and on the back we have the same locating pin and the two studs.
Now you'll notice that the studs here are nice and smooth, while the old ones are kind of chewed up. This is from the design of the nut that retains them. You can see it's got that little twist to it there that actually cuts the threads into that plastic as you install them. Over the years these badges tend to crack or start peeling, so this new part from 1A Auto is a great way to freshen up your truck. It will go in direct fit just like your original equipment and get your truck looking good as new.
There's nothing wrong with our old badge, so we're just going to reinstall it, but this procedure is going to be exactly the same for the new one. Push the badge in, keep a hand on it and flip the grille over. Reinstall your two 10 millimeter nuts. Apply a little bit of pressure. It is only plastic but you do want to make sure it cuts in good, so apply a little bit of pressure and tighten them down with your 10 millimeter socket and ratchet. Once it's snug, you want to stop there. Trying to go any tighter is only going to strip out those threads and make the badge loose. Once you get contact, just a bit snugger than that and you're ready to reinstall your grille.
Reinstall any clips that came off of your grille. This tab is going to face up on all of them. Working on there until it snaps into place. This one here broke on the way off. It's not a big deal, there's enough of them, but it will still go in securely. Line up your clips with the openings along the bottom. Give them a good tap into place. Be sure that you're tapping directly over the clip and not to either side as this can cause the grille to crack and break. Lay our plastic covers on the top back into place and reinstall all of the 5 1/2 millimeter screws with a socket, ratchet and extension. There are 10 in total.
Thanks for tuning in. We hope this video helped you out. Next time you need parts for your car, please visit 1AAuto.com. Also check out our other helpful how-to and diagnosis videos.
Tools used
Flat Blade Screwdriver
Ratchet
11mm Socket
1. Removing the Grille Emblem
Remove the two 11mm nuts from the back of the emblem
Pry the emblem off the grille with a flat blade screwdriver
2. Installing the Emblem
Pull the adhesive backing off the new emblem
Line up the emblem
Press on the emblem
Hi, I'm Mike from 1A Auto. We've been selling auto parts for over 30 years. We're dedicated to delivering quality auto parts, expert customer service, fast and free shipping, all backed by our 100% satisfaction guarantee. Visit us at 1AAuto.com, your trusted source for quality auto parts.
In this video, we're going to be working with our 1998 Ford F150. We're going to show you how to remove and replace your vehicle's front badge or grille emblem. If you like this video, please click subscribe. We have a ton more information on this and many other vehicles, and if you need this part for your truck, you can follow the link down in the description over to 1AAuto.com.Here are the items you'll need for this repair.
Some trucks have little 11mm plastic thread nuts securing the badge to the back of the grille. We pulled ours off and found out we don't have them there, so all we need to do to remove the old badge is take a screwdriver or a trim tool, simply pry up and pop off our old badge.
So we have a nice new badge from 1A Auto. It comes with the adhesive already on the back, so what we're going to do is just line it up with the tabs on our new grille. Press it on there and it'll look just like the original piece.
Thanks for watching. Visit us at 1AAuto.com for quality auto parts, fast and free shipping, and the best customer service in the industry.
F85Z-8213-AA
In Stock
Product Reviews
Loading reviews
5.00/ 5.01
1review
5 Stars
4 Stars
3 Stars
2 Stars
1 Star
1
0
0
0
0
Ford grill badge
G
March 10, 2019
Beautiful badge in perfect condition. Almost inclined to put it on my den wall :)
Customer Q&A
Do the nuts come with the name plate?July 21, 2024
John P
10
New hardware is not included with this item. You may be able to reuse your original hardware if it is in good condition.
July 22, 2024
Meghan R
Customer service
877-844-3393
Monday - Friday 8:00am - 9:30pm ET Saturday - Sunday 8:00am - 4:30pm ET
Ford is a registered trademark of Ford Motor Company. 1A Auto is not affiliated with or sponsored by Ford or Ford Motor Company.See all trademarks.
Enter Vehicle Year Make Model
Specify your vehicle's year, make and model to guarantee fit.
Year
Make
Model
Options
Drivetrain
This part doesn’t fit a . Select from parts that fit.